
Charger V6-3.5L VIN G (2006)
NOTE: LHD model shown in illustrations. RHD model similar.
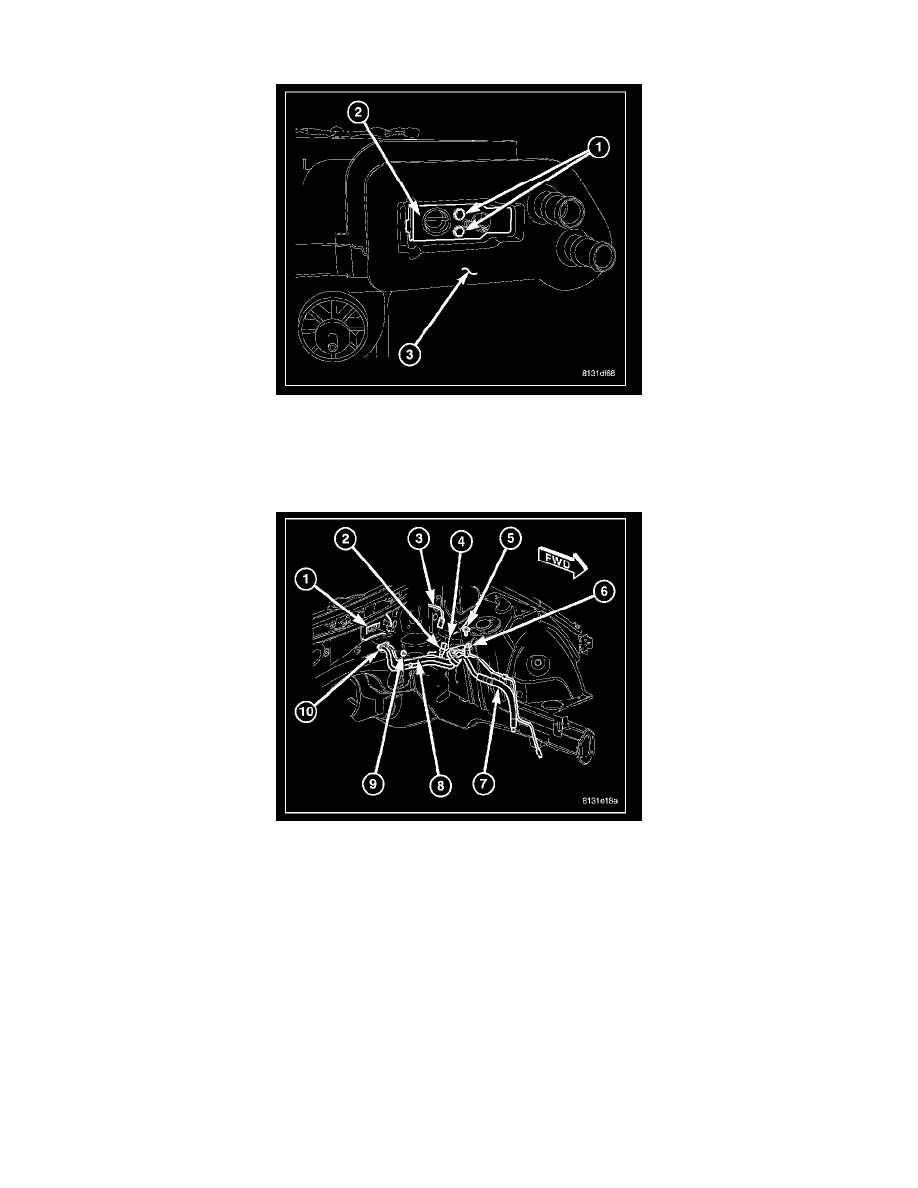
1. Remove the tape or plugs from the evaporator tube fittings and all of the expansion valve ports.
2. Lubricate a new dual plane seal with clean refrigerant oil and install it onto the evaporator tube fittings. Use only the specified seal as it is made of
a special material for the R-134a system. Use only refrigerant oil of the type recommended for the A/C compressor in the vehicle.
3. Install the A/C expansion valve (2) onto the evaporator tube tapping block located within the foam seal (3).
4. Install the two bolts (1) that secure the A/C expansion valve to the evaporator tube tapping block. Tighten the bolts to 11 N.m (97 in. lbs.).
5. Remove the tape or plugs from the suction and liquid line fittings.
6. Lubricate a new dual plane seal with clean refrigerant oil and install it onto the suction and liquid line fittings. Use only the specified seal as it is
made of a special material for the R-134a system. Use only refrigerant oil of the type recommended for the A/C compressor in the vehicle.
7. Connect the A/C suction line (7) and the A/C liquid line (8) to the A/C expansion valve (1).
8. Install the nut (9) that secures the refrigerant line tapping block (10) to the A/C expansion valve. Tighten the nut to 23 N.m (17 ft. lbs.).
9. Install the bolt (5) that secures the refrigerant line mounting bracket (6) to the left front shock tower (4). Tighten the bolt to 11 N.m (100 in. lbs.).
10. Connect the wire harness (3) to the A/C pressure transducer (2).
11. Reconnect the negative battery cable.
12. Evacuate the refrigerant system.
13. Recharge the refrigerant system