
Charger V8-5.7L (2008)
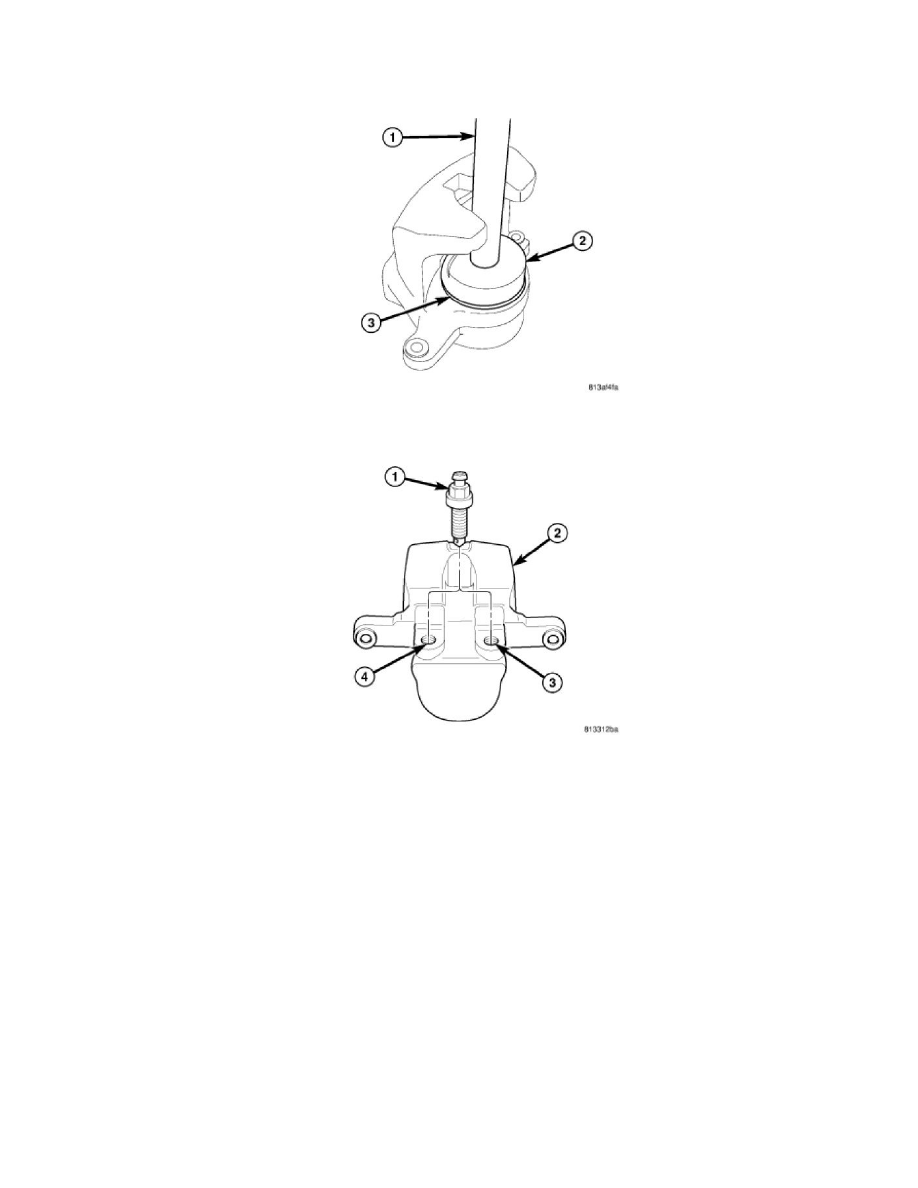
4. Install piston (1) into caliper piston (2) bore, pressing piston down to bottom of bore using hand-pressure. Using a piece of wood or wooden
hammer handle may also suffice as long as piston and boot damage can be avoided. The dust boot will not seat at this time. Refer to following
step.
5. Seat dust boot (3) in caliper counterbore using Installer (2), Special Tool 9315, with Handle (1), Special Tool C-4171. Install dust boot until it
bottoms. Do not over-seat dust boot or damage will occur.
6. Install bleeder screw in correct threaded hole. Caliper housing is not side-specific, so it is important to install bleeder screw in threaded hole that
will be uppermost once caliper is installed on vehicle. Tighten bleeder screw to 15 Nm (125 in. lbs.) torque.
7. Install caliper on vehicle. See: Removal and Replacement/Disc Brake Caliper - Installation
Front Twin Piston Caliper
ASSEMBLY
CAUTION: Dirt, oil, and solvents can damage caliper seals. Ensure assembly area is clean and dry.
NOTE: Always use new, clean Mopar(R) DOT 3 Motor Vehicle Brake Fluid when assembling brake caliper.
NOTE: Never use old or used piston seals or boots for assembly.