
Charger V8-5.7L (2008)
Expansion Valve: Service and Repair
Removal
REMOVAL
WARNING: Refer to the applicable warnings and cautions for this system before performing the following operation See: Service
Precautions/Warning and See: Service Precautions/Caution. Failure to follow the warnings and cautions could result in possible personal
injury or death.
NOTE: LHD model shown in illustrations. RHD model similar.
1. Disconnect and isolate the negative battery cable.
2. Recover the refrigerant from the refrigerant system See: Service and Repair/Refrigerant System Recovery.
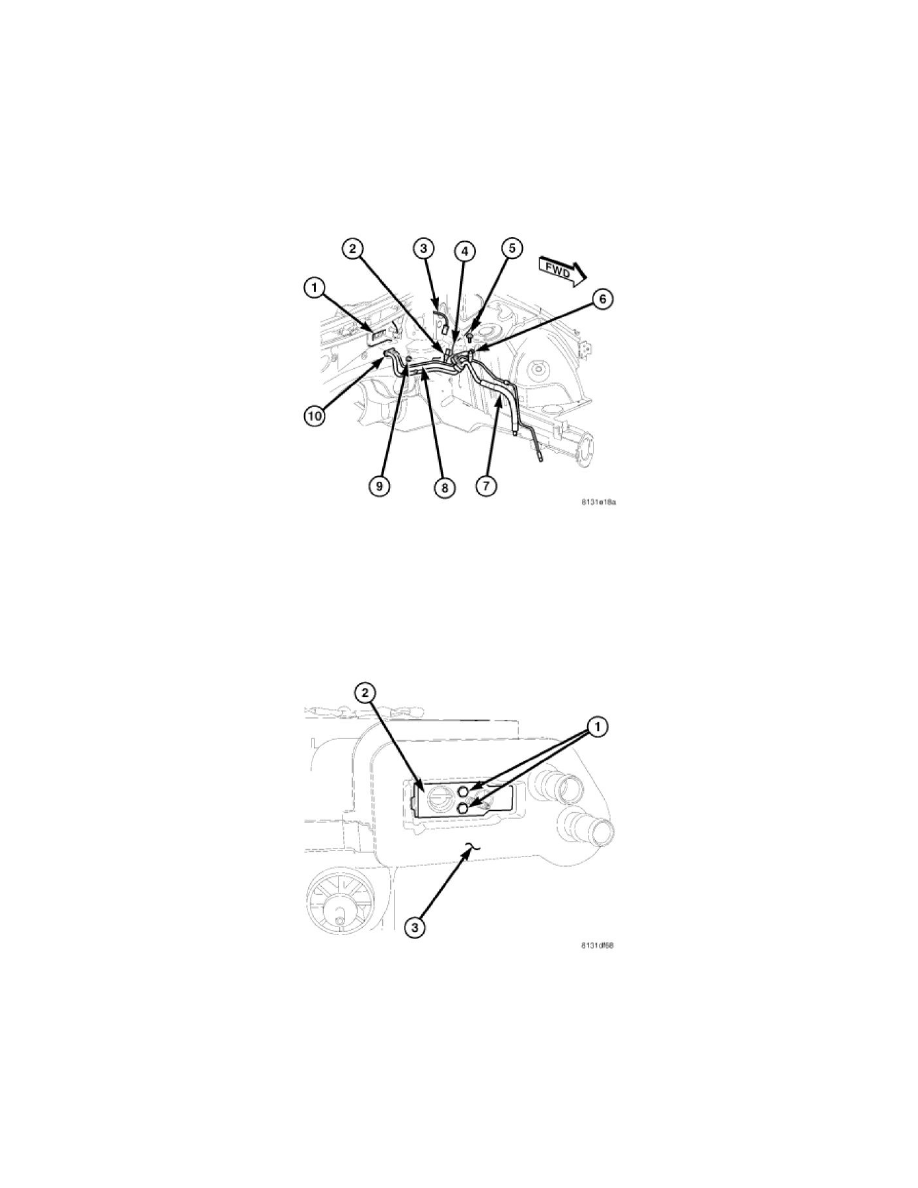
3. Remove the bolt (5) that secures the refrigerant line mounting bracket (6) to the left front shock tower (4).
4. Remove the nut (9) that secures the refrigerant line tapping block (10) to the A/C expansion valve (1).
5. Disconnect the wire harness (3) from the A/C pressure transducer (2) to help allow access to the A/C expansion valve.
6. Disconnect the A/C suction line (7) and the A/C liquid line (8) from the A/C expansion valve and position the refrigerant lines out of the way.
7. Remove the dual plane seal from the suction and liquid line fittings and discard.
8. Install plugs in, or tape over the opened suction and liquid line fittings.
9. Remove the two bolts (1) that secure the A/C expansion valve (2) to the evaporator tube tapping block located within the foam seal (3).
10. Remove the A/C expansion valve from the evaporator tube tapping block and foam seal.
11. Remove the dual plane seal from the evaporator tube fittings and discard.
12. Install plugs in, or tape over the opened evaporator tube fittings and all expansion valve ports.