
Charger V8-5.7L VIN H (2007)
Rear Cross-Member Bushing: Service and Repair
Rear Crossmember Isolator - Installation
Front Mount
INSTALLATION
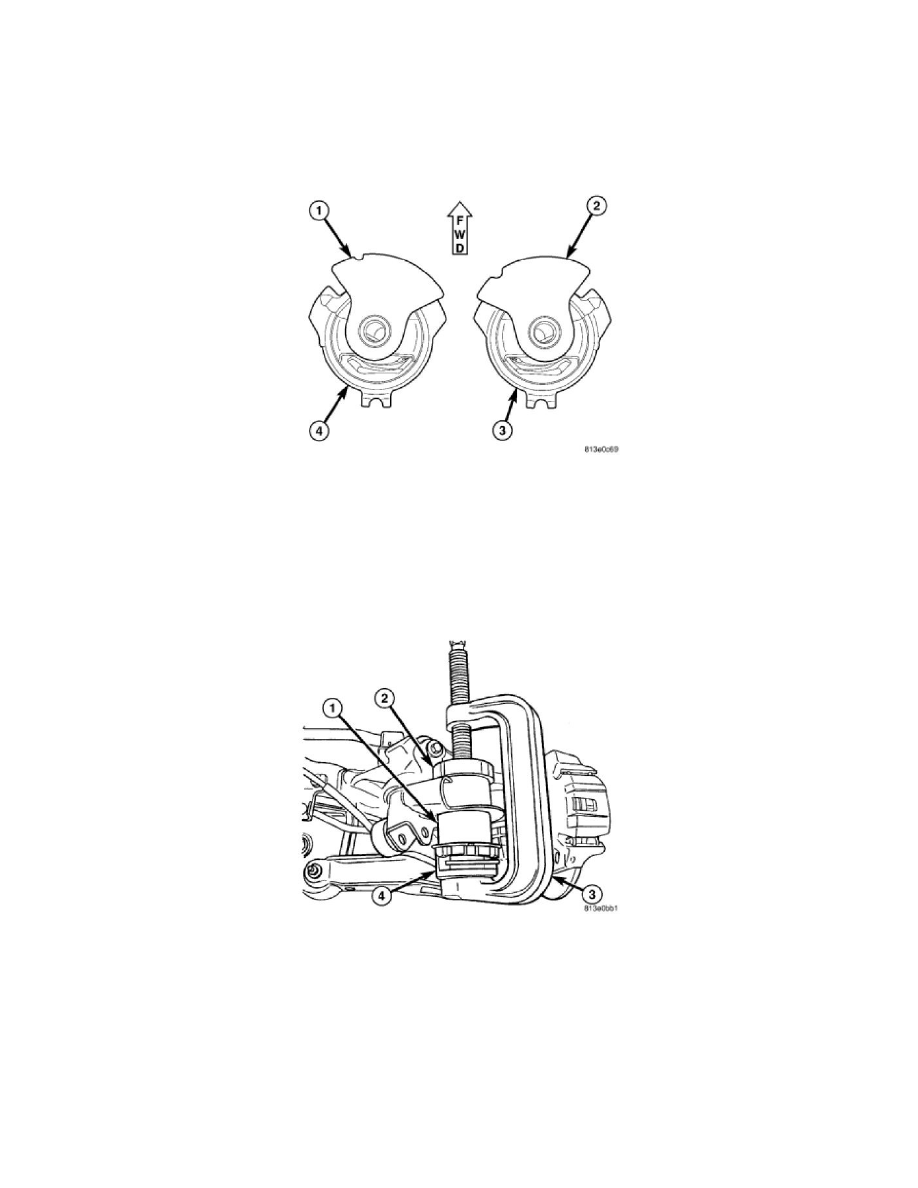
CAUTION: Prior to bushing installation, inspect the bushing to make sure it is the correct side bushing for the job. Left side bushings have the
travel limiter (1) tipped to the right in relationship to the bushing (4) can flange as shown. Right side bushings have the travel limiter (2) tipped
to the left in relationship to the bushing (3) can flange as shown. Once installed, the travel limiters with face slightly outward from
straight-ahead position.
CAUTION: It is very important that bushing be installed in same position as original to maintain vehicle ride quality and bushing longevity.
That is why bushing, once installed, needs to closely match reference marks applied upon removal of original bushing.
1. Position bushing on crossmember bushing bore aligning bushing can flange with reference marks applied during removal.
2. Assemble tools (See following list) over bushing and crossmember as shown.
-
(2) Receiver 9031-6
-
(3) Press C-4212F
-
(4) Installer 9031-7A