Charger V8-5.7L VIN H (2007)

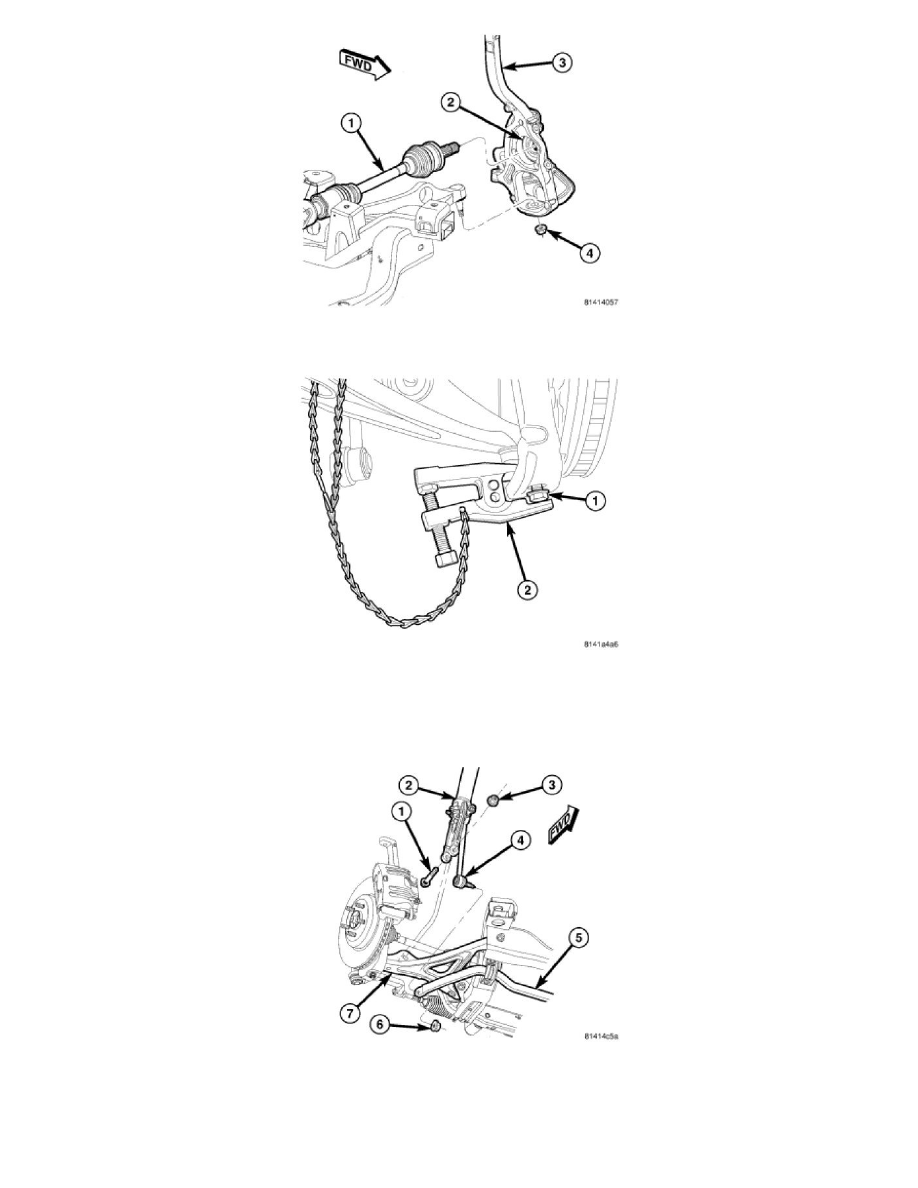
5. Loosen nut (4) attaching lower control arm ball joint stud to knuckle (3). Back nut off until nut is even with end of stud. Keeping nut on at this
location will help keep end of stud from distorting while using Puller in next step.
CAUTION: In following step, use care not to damage ball joint seal boot while sliding Puller, Special Tool 9360, into place past seal boot.
6. Using Puller (2), Special Tool 9360, separate ball joint stud from knuckle.
7. Remove tool.
8. Remove nut (1) from end of ball joint stud.
9. Back off nut (3) from bolt (1) attaching shock clevis bracket (2) to lower control arm (7) until it is flush with end of bolt.
10. Using a brass drift punch, tap the bolt out of the clevis bracket until bolt serrations clear bracket.
11. Remove nut (3) and bolt (1) for clevis bracket and control arm.
