Charger V8-5.7L VIN H (2007)

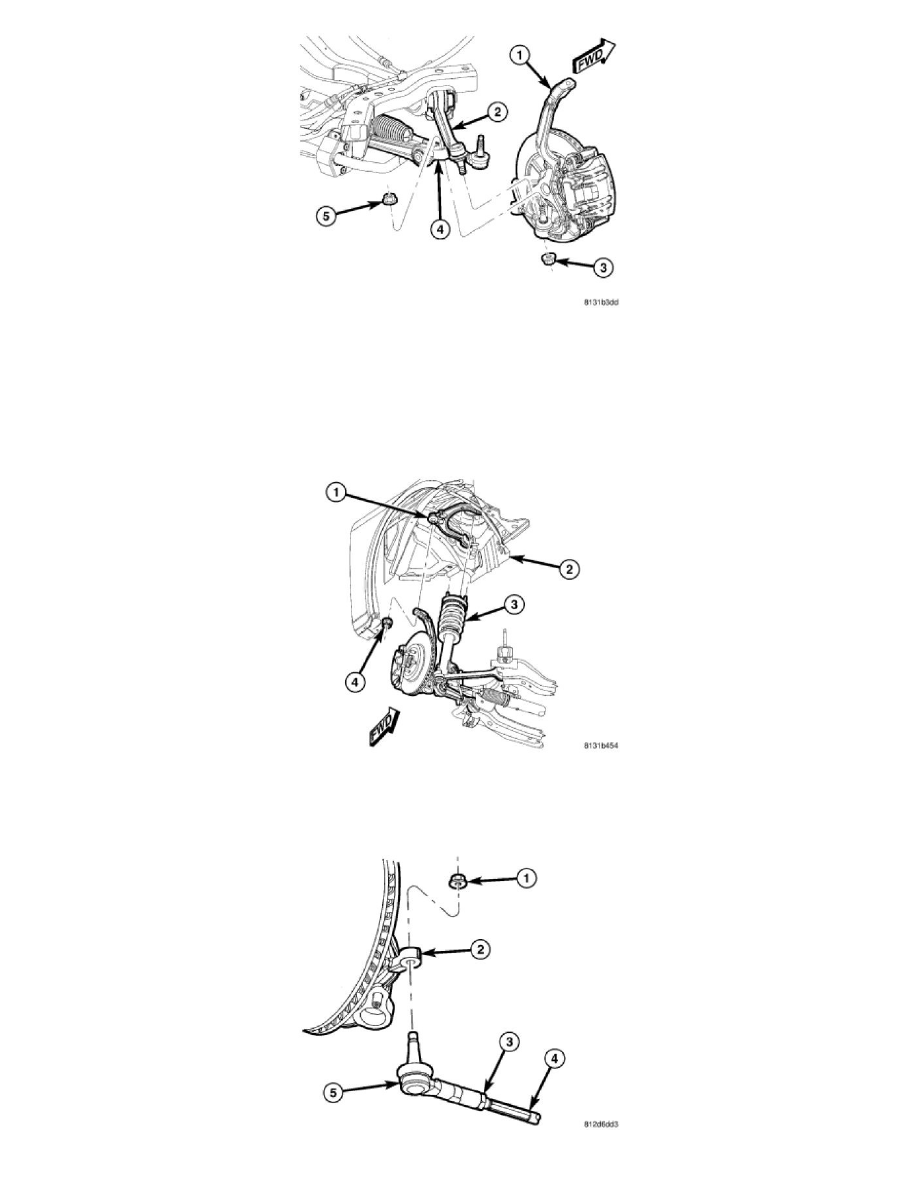
3. Place knuckle (1) over lower ball joint studs on vehicle and loosely install NEW nuts by hand.
CAUTION: It is important to tighten nuts as described in following steps to avoid damaging ball stud joints.
4. Completely install NEW nut (5) on ball joint stud attaching lower control arm (4) to knuckle (1). Tighten nut by holding ball joint stud with a hex
wrench while turning nut with a wrench. Tighten nut using crow foot wrench on torque wrench to 68 Nm + 90° turn (50 ft. lbs. + 90° turn).
5. Completely install NEW nut (3) on ball joint stud attaching tension strut (2) to knuckle (1). Tighten nut by holding ball joint stud with a hex
wrench while turning nut with a wrench. Tighten nut using crow foot wrench on torque wrench to 68 Nm + 90° turn (50 ft. lbs. + 90° turn).
CAUTION: It is important to tighten nut as described in following step to avoid damaging ball stud joint.
6. Place upper ball joint stud (1) through hole in top of knuckle and install nut (4). Tighten nut by holding ball joint stud with a hex wrench while
turning nut with a wrench. Tighten nut using crow foot wrench on torque wrench to 47 Nm + 90° turn (35 ft. lbs. + 90° turn).
