
Charger SRT-8 V8-6.1L VIN W (2006)
10. Lower vehicle.
11. Remove upper radiator hose.
CAUTION: Bolts have a tread locker on them, use hand tools to remove the upper radiator mounting bolts.
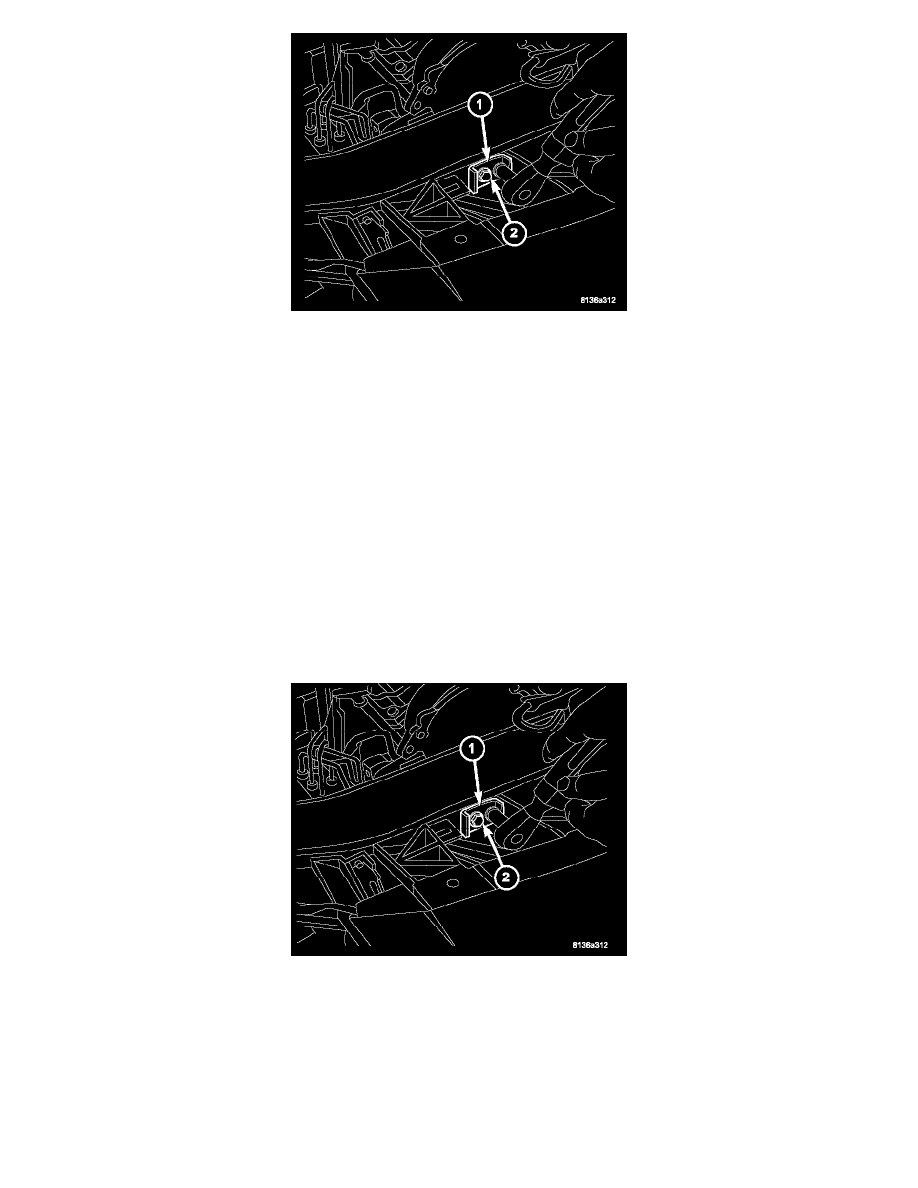
12. Remove upper radiator mounting brackets (1) and bolts (2).
13. Remove upper condenser mounting bolts.
14. Separate condenser assembly from radiator.
15. Tilt radiator toward engine and remove radiator from vehicle.
CLEANING
Clean radiator fins are necessary for good heat transfer. The radiator and air conditioning fins should be cleaned when an accumulation of debris has
occurred. With the engine cold, apply cold water and compressed air to the back (engine side) of the radiator to flush the radiator and/or A/C
condenser of debris.
INSPECTION
Inspect the radiator tanks for cracks, broken or missing fittings also inspect the joint where the tanks seam up to the radiator core for signs of leakage
and/or deteriorating seals. Inspect radiator core for corroded, bent or missing cooling fins. Inspect the core for bent or damaged cooling tubes.
INSTALLATION
1. Position radiator into engine compartment. Seat the radiator assembly lower rubber isolators into the mounting holes in radiator lower support.
2. Install radiator mounting bracket (1) and bolts (2). Tighten to 12 Nm (106 inch lbs.).
3. Position condenser on radiator and install upper mounting bolts. Tighten bolts to 6 Nm (50 inch lbs.).
4. Raise vehicle.