
Charger SRT-8 V8-6.1L VIN W (2006)
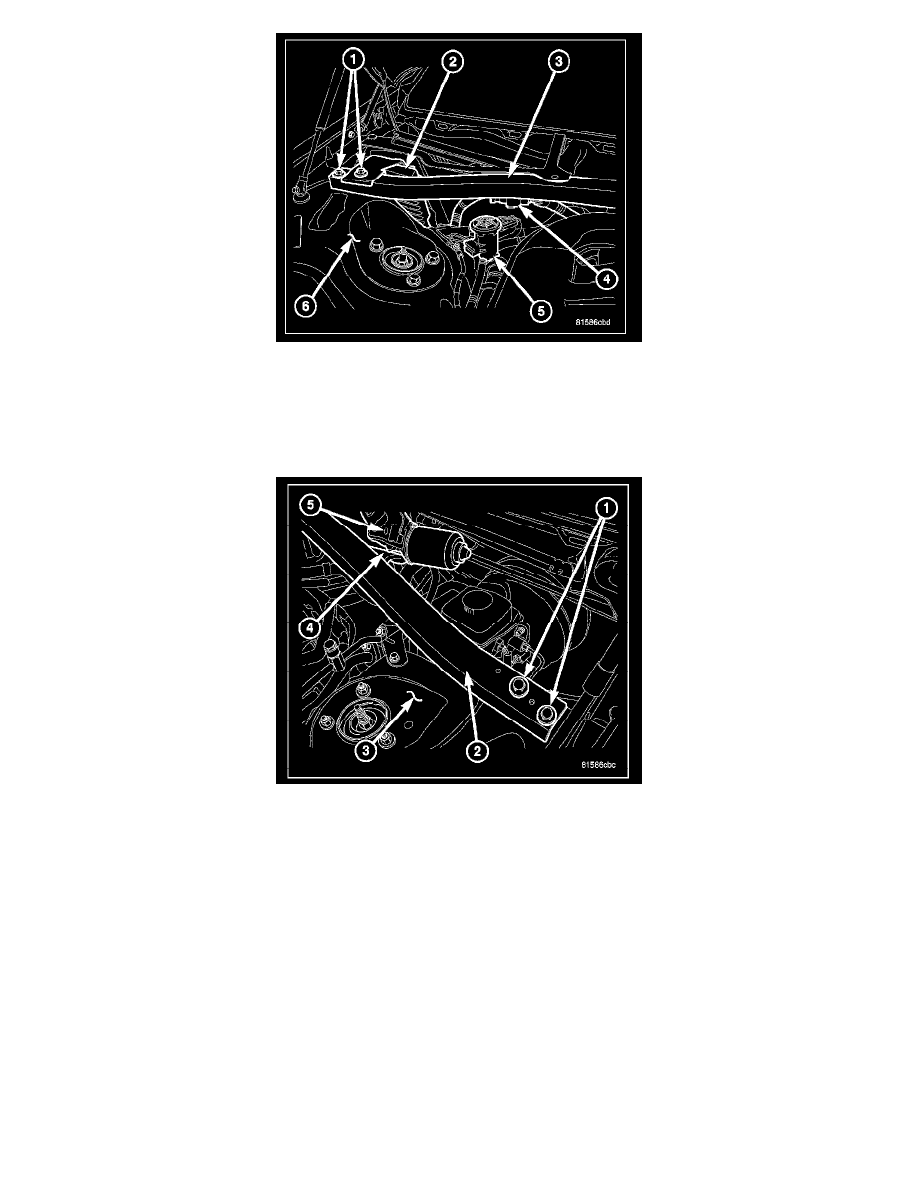
6. Position the powertrain control module (PCM) or the engine control module (ECM) (2) (depending on engine application) into its installed
location.
7. Position the strut support (3) into the engine compartment and loosely install the two bolts (1) that secure the strut support and the ECM/PCM to
the passenger side strut tower (6). Tighten the bolts to 38 N.m (28 ft. lbs.).
8. On LHD models, install the purge solenoid (5) onto its mounting bracket located on the right strut tower.
9. Engage the retainer that secures the wire harness (4) to the bottom of the strut support.
10. Engage the wiper motor (5) to the bracket (4) located on the strut support (2).
11. Position the strut support to the driver side strut tower (6) and loosely install the two bolts (1) that secure the strut support to the strut tower.
12. Tighten all four bolts that secure the strut support to 38 N.m (28 ft. lbs.).
13. Install the cowl top panel onto the dash panel.
14. Reconnect the negative battery cable.
HVAC Housing - Removal and Installation
HOUSING-HVAC ASSEMBLY
NOTE:
-
The HVAC housing must be removed from the vehicle and disassembled for service of the A/C evaporator.
-
LHD model shown in illustrations. RHD model similar.
REMOVAL
WARNING:
-
REFER TO THE APPLICABLE WARNINGS AND CAUTIONS FOR THIS SYSTEM BEFORE PERFORMING THE FOLLOWING
OPERATION. FAILURE TO FOLLOW THE WARNINGS AND CAUTIONS COULD RESULT IN POSSIBLE PERSONAL INJURY
OR DEATH.
-
ON VEHICLES EQUIPPED WITH AIRBAGS, DISABLE THE AIRBAG SYSTEM BEFORE ATTEMPTING ANY STEERING
WHEEL, STEERING COLUMN, OR INSTRUMENT PANEL COMPONENT DIAGNOSIS OR SERVICE. DISCONNECT AND