
Charger SRT-8 V8-6.1L VIN W (2006)
NOTE: To ensure all air is bled from the ICU or junction block in a timely manner, it is recommended to raise the rear of the vehicle
approximately 5 degrees higher than the front or approximately 10-12 inches as measured at the rear bumper (1).
4. Raise and support vehicle placing rear of vehicle approximately 50 higher than the front or if measured at the rear bumper (1), approximately
10-12 inches above level. It will be necessary to add extra support stands under vehicle to support this angle.
NOTE: The following wheel circuit sequence for bleeding the brake hydraulic system should be used to ensure adequate removal of all trapped
air from the brake hydraulic system.
-
Right rear wheel
-
Left rear wheel
-
Right front wheel
-
Left front wheel
REAR BRAKES
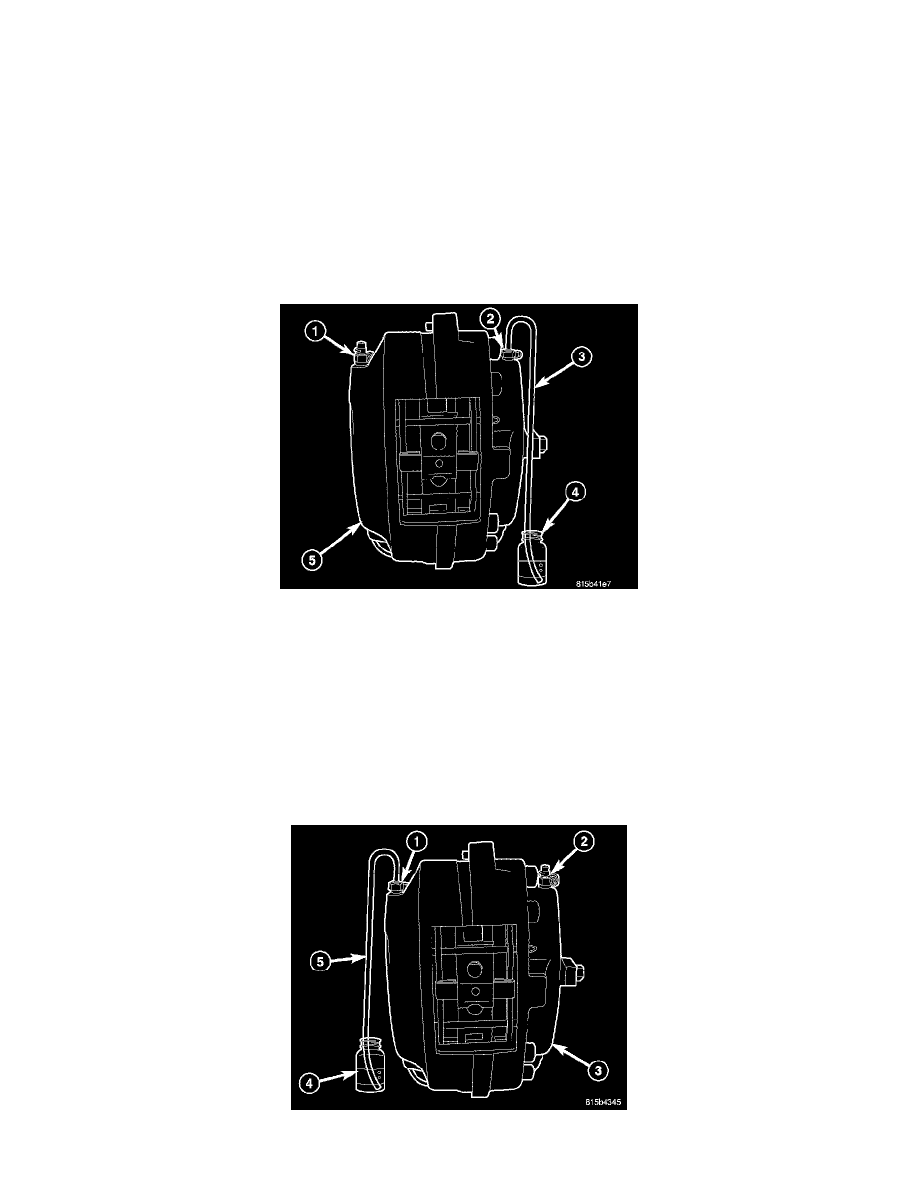
1. If installed, remove rubber dust caps from both bleeder screws on each caliper.
2. Starting at the first wheel circuit that needs to be bled attach a clear hose (3) to the inboard bleeder screw (2) at that wheels brake caliper and feed
the other end of hose into a clear jar (4) containing enough fresh brake fluid to submerge the end of the hose.
CAUTION: Open the bleeder screw at least one full turn when instructed. Some air may be trapped in the brake lines or valves far upstream, as
far as ten feet or more from the bleeder screw. If the bleeder screw is not opened sufficiently, fluid flow is restricted causing a slow, weak fluid
discharge. This will NOT get all the air out. Therefore, it is essential to open the bleeder screw at least one full turn to allow a fast, large volume
discharge of brake fluid.
3. Open inboard bleeder screw (2) at least one full turn or more to obtain an adequate flow of brake fluid.
4. After 4 to 8 ounces of brake fluid has been bled through the brake hydraulic circuit, and an air-free flow (no bubbles) is maintained in the clear
plastic hose (3) and jar (4), close the bleeder screw (2).
5. Remove clear hose and install bleeder screw dust cap.