
Colt FWD L4-1410cc 1.4L SOHC (1983)
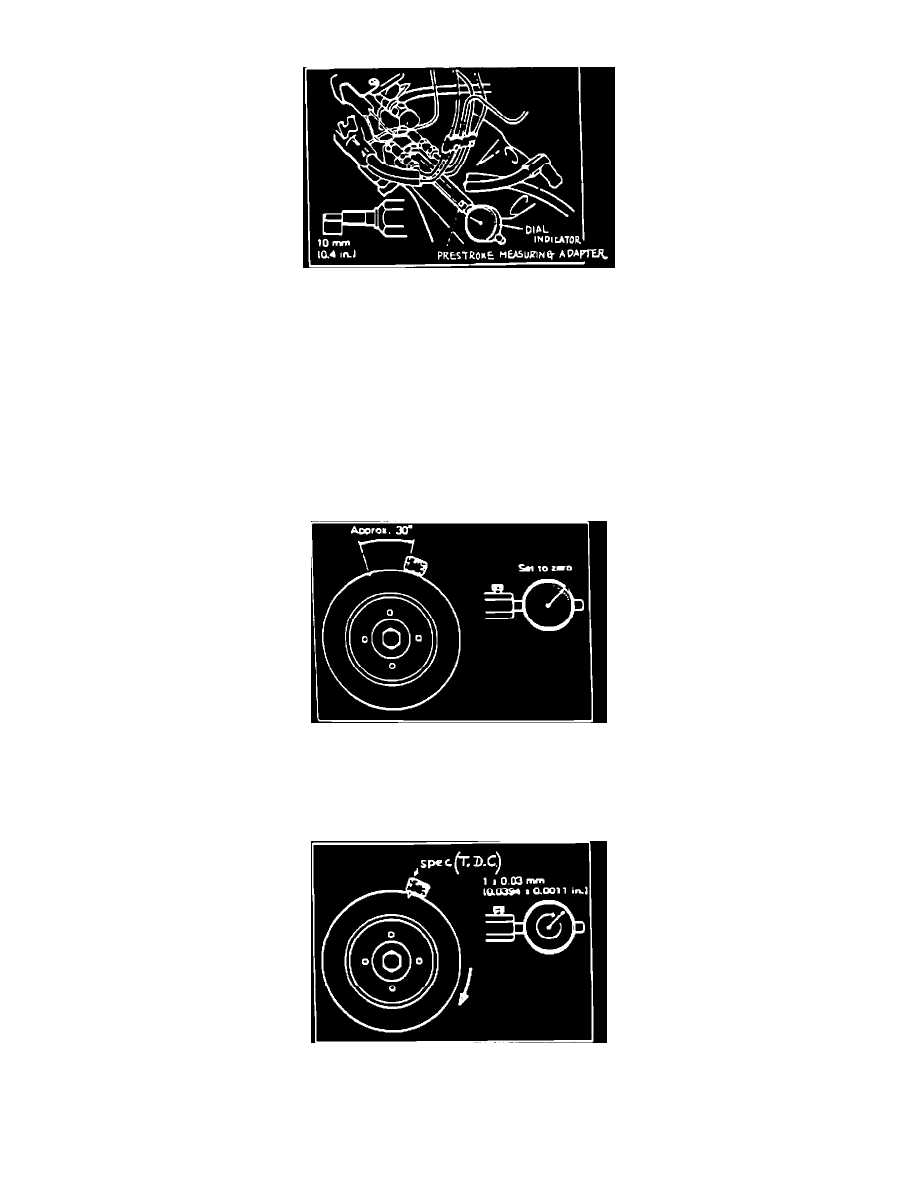
FIGURE 7
FIGURE 8 - ATTACHING PRESTROKE MEASURING ADAPTER
C.
Adjust the injection timing as follows:
1.
Remove the plug from the rear of the injection pump (Figure 7) and attach the prestroke measuring adapter and a dial indicator. Do not
over tighten gauge to adapter as readings will be erratic (Figure 8).
CAUTION:
^
BEFORE INSTALLATION OF ADAPTER, MAKE SURE THAT THE PUSH ROD IS PROTRUDING BY 10 mm (0.4 IN.) -
(FIGURE 8 INSET).
^
PROTRUSION OF PUSH ROD CAN BE ADJUSTED WITH AN INNER NUT.
FIGURE 9 - ZERO SETTING DIAL INDICATOR
2.
Turn the crank pulley to such a position that the notch on the pulley is at approximately 30~ before the top dead center (Figure 9). Then,
set the dial indicator to zero. Slightly turn the crank pulley clockwise and counterclockwise to make sure that the dial indicator does not
deviate from the zero position. If it does, readjust the pulley position so that the notch on the pulley is at 30 before the top dead center.
FIGURE 10 - CHECKING INJECTION STARTING TIMING
3.
Turn the crankshaft in the normal direction (clock-(wise) to bring the notch to specification and check that the dial indicator reads 1 +/-
0.03 mm (0.0394 +/- 0.0011 in.) - (Figure 10).