
Colt Vista 4WD L4-1997cc 2.0L SOHC (1984)
Checking Timing Belt
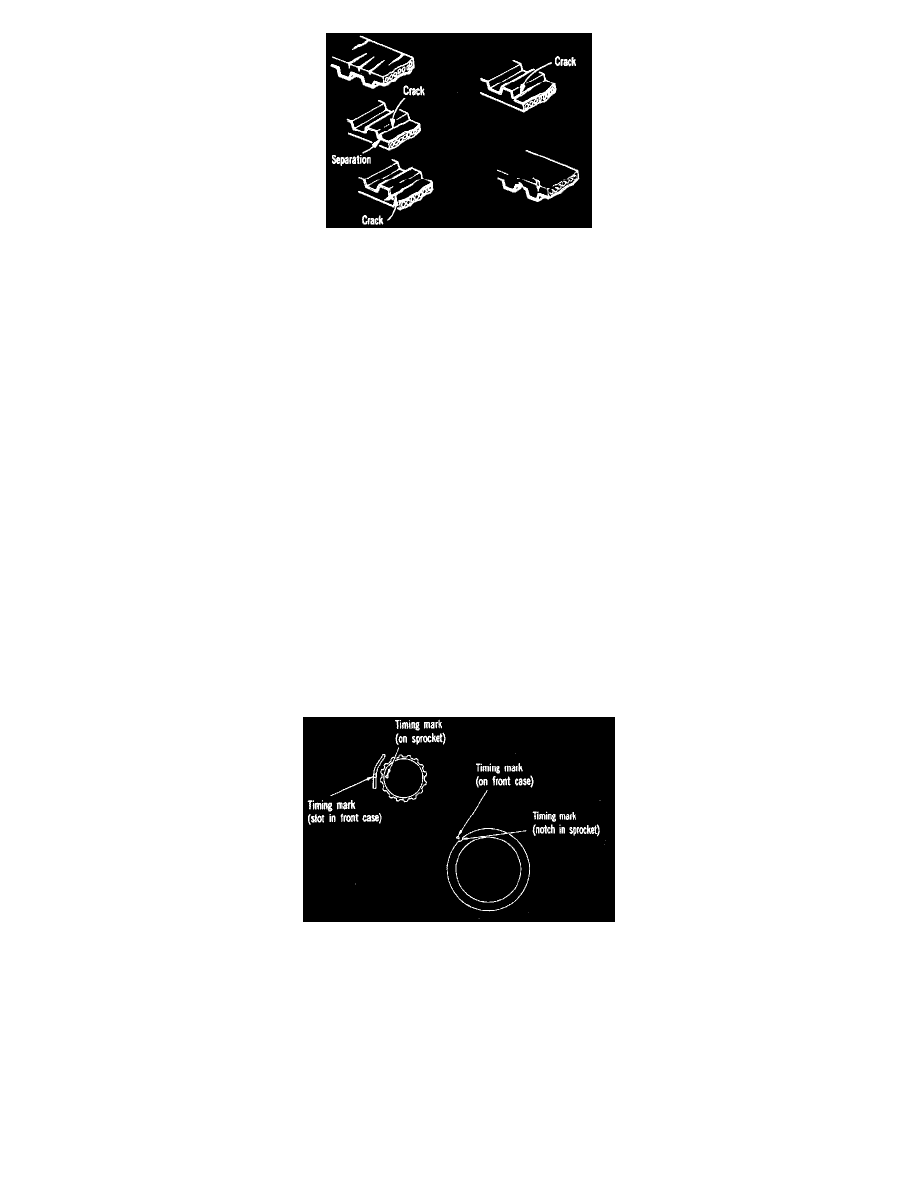
b. Cracked back surface rubber
c. Cracked or exfoliated canvas
d. Cracked tooth bottom
e. Side of belt cracked
f.
Cracked canvas
g. Side of belt badly worn
NOTE: Normal belt should have clear-cut sides as if cut with a sharp knife.
h. Badly worn teeth
Initial stage: Canvas on load side tooth flank worn (fluffy canvas fibers, rubber gone and color changed to white, and unclear canvas texture).
Last stage: Canvas on load side tooth flank worn down and rubber exposed (tooth width reduced).
i.
Missing tooth.
INSTALLATION
1. Install crankshaft sprocket, flange and spacer as shown, while paying attention to their mounting directions.
CAUTION: Pay special attention to direction of flange. If it is installed in wrong direction, a broken belt could result.
2. Temporarily secure tensioner at a position closest to water pump.
3. install end A of spring to predetermined position on tensioner bracket.
4. Install end B of spring to predetermined position on water pump.
5. When spacer is installed to right silent shaft, direct spacer with its chamfered end toward shaft for protection of oil seal.
BELT INSTALLATION PROCEDURE
Aligning Timing Marks
1. Align timing mark on each sprocket with corresponding timing mark on front case.
2. When timing belt "B" is installed, make certain that tension side has no slack.