
Colt Vista 4WD L4-1997cc 2.0L SOHC (1984)
Axle Shaft: Service and Repair
Constant Velocity Type Axle Shaft Assembly
Removal & Installation
COLT VISTA W/TWO WHEEL DRIVE & 1984 COLT
1. Remove hub dust cap and loosen drive axle nut, then raise and support front of vehicle and remove wheel and tire assembly.
2. Remove under cover, then remove strut bar and ball joint from lower control arm. Use care not to damage ball joint dust boot.
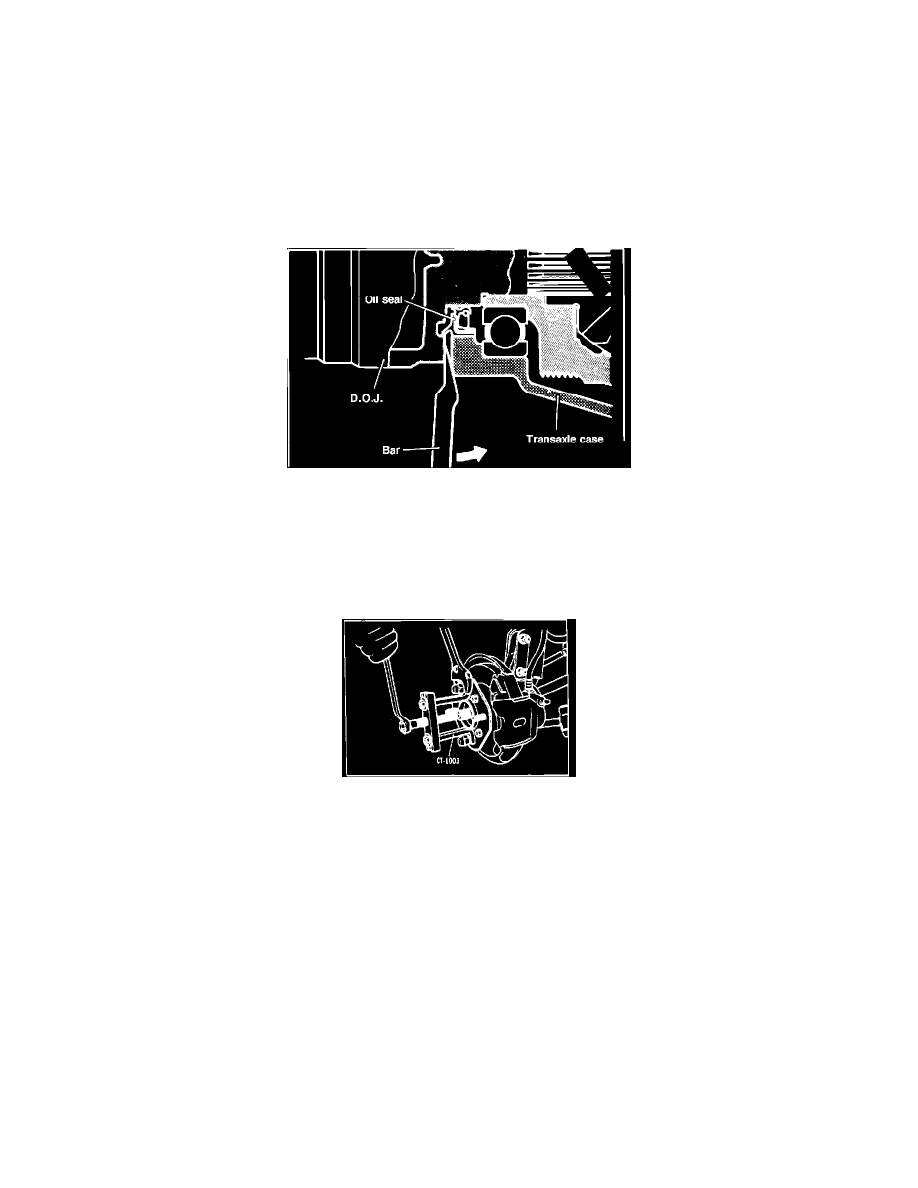
3. Drain transaxle fluid, then on models with turbocharger, disconnect center bearing snap ring.
Fig. 9 Removing front drive axle from transaxle case
4. Insert a suitable pry bar between transaxle case and outer case of double offset joint, then withdraw drive axle. Cover drive axle opening in
transaxle. When removing drive axle, support at tripod or double offset joint and pull shaft straight out to prevent damage to boot or joint. After
disconnecting drive axle from transaxle, support shaft in proper position. Pry bar should not be inserted more than 0.28 inch between
transaxle case and outer case of offset joint, otherwise damage to oil seal may result. The double offset joint retainer ring should be
replaced whenever the drive axle is removed from transaxle case.
Fig. 10 Pressing front drive axle from hub
5. Press drive axle, from hub using tool No. CT-1003, then on models with turbochargers, lightly tap on double offset joint outer race with a suitable
mallet to remove. When pressing drive axle from hub, use care to prevent the spacer from moving out of position.
6. Reverse procedure to install. Position drive axle so that raised inner diameter of washer is facing nut, then install and torque drive axle nut to
145-188 ft. lbs.
COLT VISTA W/FOUR WHEEL DRIVE
The following procedure is only for the left side drive axle. Refer to Colt Vista Less Four Wheel Drive for right side drive axle replacement
procedure.
1. Remove center cap and drive axle nut.
2. Raise and support vehicle, then remove front wheel.
3. Drain transmission fluid.
4. Disconnect lower arm ball joint and knuckle coupling, then remove strut bar and stabilizer bar from lower arm.
5. Remove center bearing snap ring from bearing bracket.
6. Lightly tap double offset joint outer race with a wooden hammer and disconnect drive axle from cardan joint assembly.
7. Disconnect drive axle from bearing bracket.
8. Remove drive axle from hub.
9. Remove bearing bracket attaching bolts, then the bearing bracket.
10. Lightly tap yoke of cardan joint with a wooden hammer and remove it from transaxle assembly.