
Colt Vista AWD L4-1795cc 1.8L SOHC (1993)
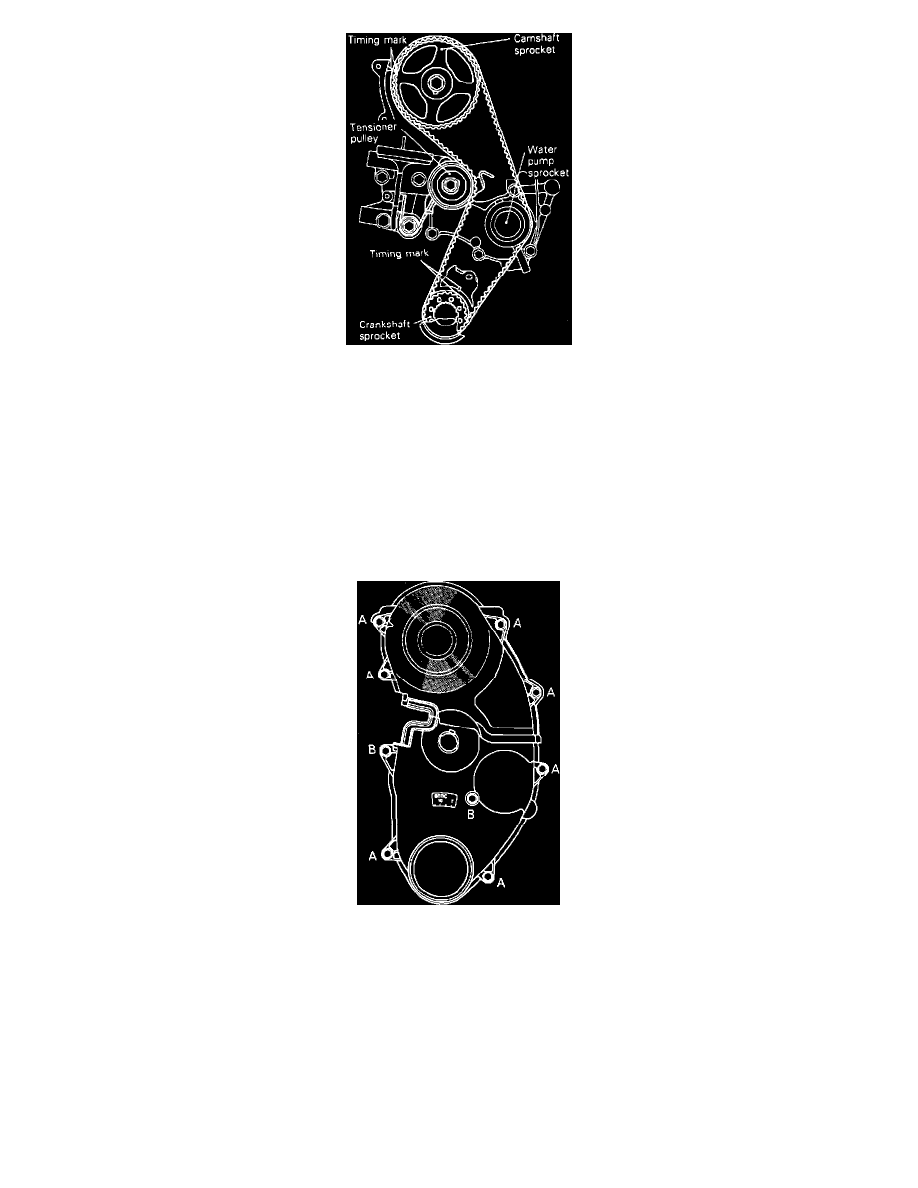
Fig. 18 Aligning timing marks. 1.8L/4-111.9 engine
2.
Align each of the camshaft sprocket and the crankshaft timing marks, Fig. 18.
3.
Without slackening its tension side, install the timing belt at first the crankshaft sprocket, then the water pump sprocket, then the camshaft
sprocket, and lastly the tensioner pulley.
4.
After installing the timing belt, apply force to turn the camshaft sprocket in the reverse direction, then recheck to be sure that the belt is fully
tensioner and that each timing mark is in the proper position.
5.
Set timing belt tension as follows:
a. Loosen the fixing bolt of the tensioner pulley fixed to the engine mount side by 1/4-1/2 turn and use the force of the tensioner spring to apply
tension to the belt.
b. Turn the crankshaft in the proper rotation direction (right turn) for two rotations and recheck to be sure that the timing marks on each sprocket
are aligned.
Fig. 34 Timing belt cover bolt installation. 1.8L/4-111.9 engine
6.
Install timing belt cover bolts in correct location as shown in Fig. 34. Bolts marked A are .72 inch long and bolts marked B are 1.18 inches long.