
Colt Vista AWD L4-1795cc 1.8L SOHC (1993)
Lower Valve Body
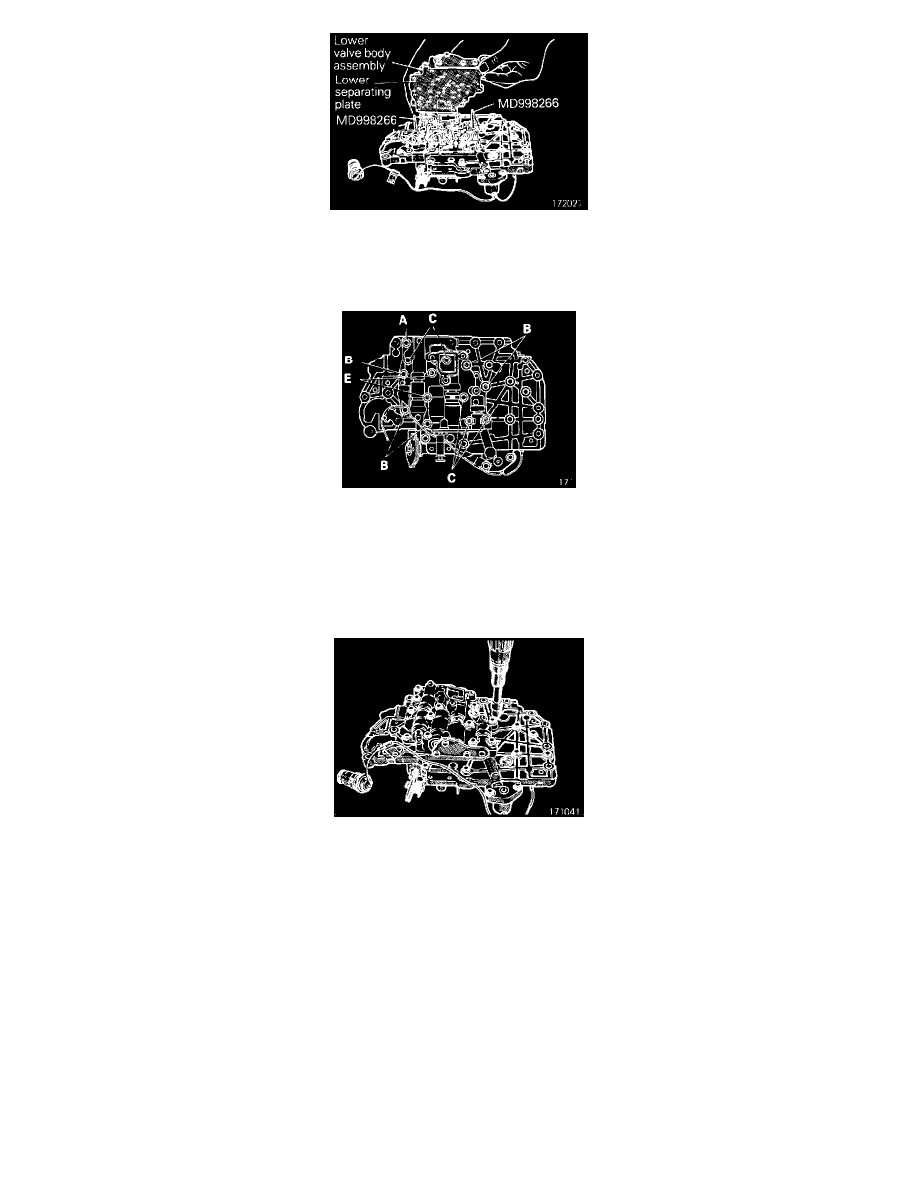
19. Insert two Special Tools, MD998266, into guide pin holes in intermediate plate. Using guide pins as a guide, install lower separating plate and
lower valve body on intermediate plate.
Valve Body
20. Install lower valve body tightening bolts:
A: 19 mm (.748 in.)
B: 34 mm (1.339 in.)
C: 40 mm (1.575 in.)
D: 53 mm (2.087 in.)
21. Tighten all bolts to 10-12 Nm (7.5-8.5 ft.lbs.).
22. Install oil filter and tighten flange bolts to 5-6.5 Nm (4-5 ft.lbs.).
23. Reconnect throttle control cable to throttle cam.
24. Insert the solenoid connector into the case.
25. Install new oil pan gasket and oil pan, then tighten washer-assembled bolts and torque between 10 and 11 Nm (7.5 and 8.5 ft.lbs.).
26. Refill transaxle to proper level with ATF.
4 Speed Automatic Transmission
DISASSEMBLY
1. Drain ATF.
2. Remove oil pan.
3. Remove the oil filter.
4. Remove the oil temperature sensor.
5. Press the tabs of the solenoid valve harness grommet, and then push into the case and remove.
6. Remove valve body assembly. Be careful not to drop the manual valve.