
D50/Ram 50 L4-2555cc 2.6L SOHC (1984)
7.
Remove upper silent shaft sprocket. With the chain still engaged to the lower (2) sprockets, move the upper portion of chain to provide
tool access for the oil pump relief valve plug.
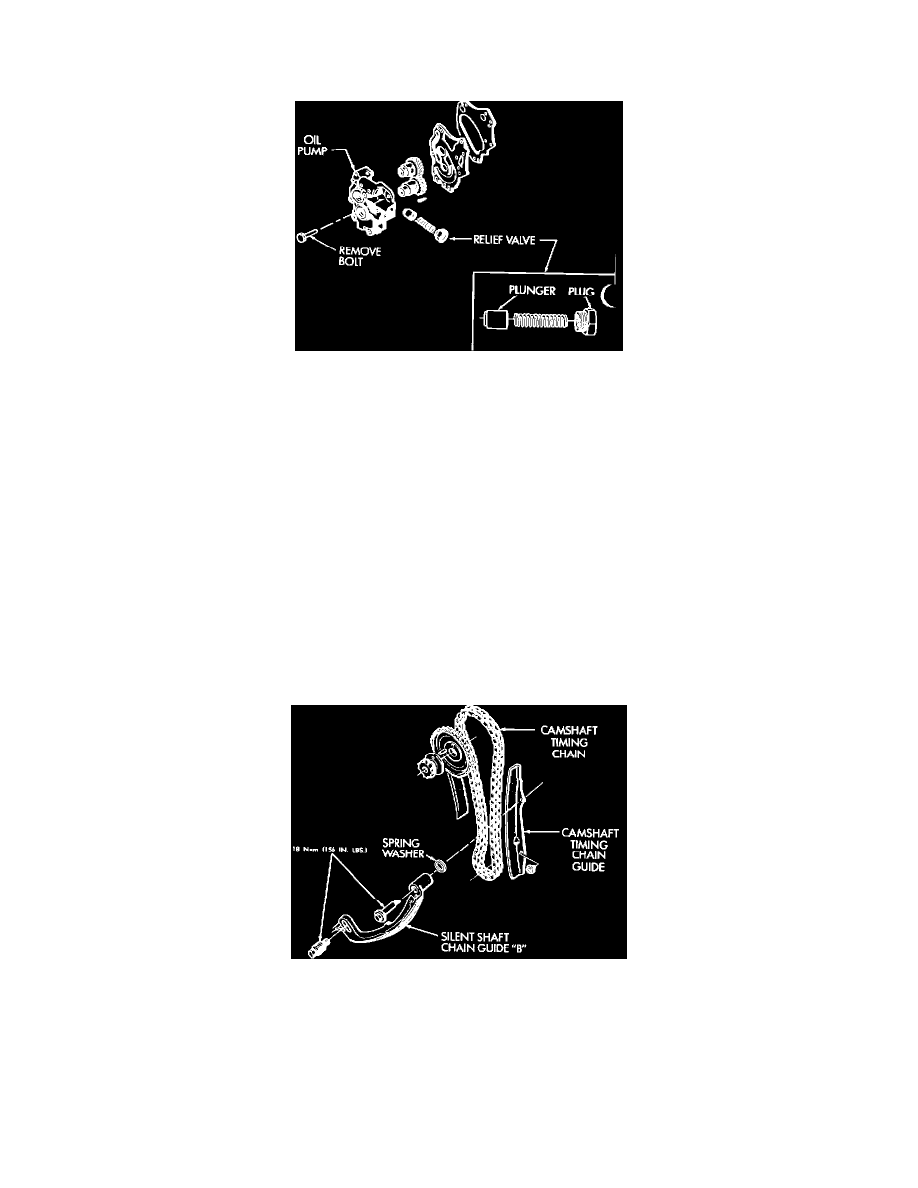
FIGURE 5
8.
Remove oil pump bolt as indicated in Figure 5 for tool access to relief valve.
9.
Remove oil pump relief valve plug, using a 22 mm short socket or wrench. (See Figure 5.) If using a socket, use care to avoid bearing
against or damaging camshaft timing chain tensioner. A 3/8 -drive breaker - bar is recommended for improved access.
10.
Remove relief valve spring. Remove plunger (Figure 5), using a pencil-magnet. Discard plunger.
11.
Install replacement plunger (supplied). Check for smooth movement of plunger for entire length of bore, using the pencilmagnet.
Reinstall original spring and plug. Tighten plug to a torque of 25 foot-pounds.
12.
Clean gasket surfaces for reassembly of chain case cover, oil pan and cylinder head cover.
13.
Reassemble all parts in reverse order to the disassembly procedure. Refer to the Service Manual for torque values.
The following steps are required during reassembly:
^
When reassembling the silent shaft chain, be sure that the timing marks on all
(3)
sprockets and corresponding chain links are aligned.
FIGURE 6
Service Procedure (Continued)
A.
Domestic Vehicles (Continued)
13.
^ When reassembling silent shaft chain guide "B," the supplied spring washer must be installed between the upper attachment of chain
guide "B" and the mating hole on the camshaft timing chain guide. (See Figure 6.)