
D50 4WD L4-156 2556cc 2.6L VIN 7 2-bbl (1982)
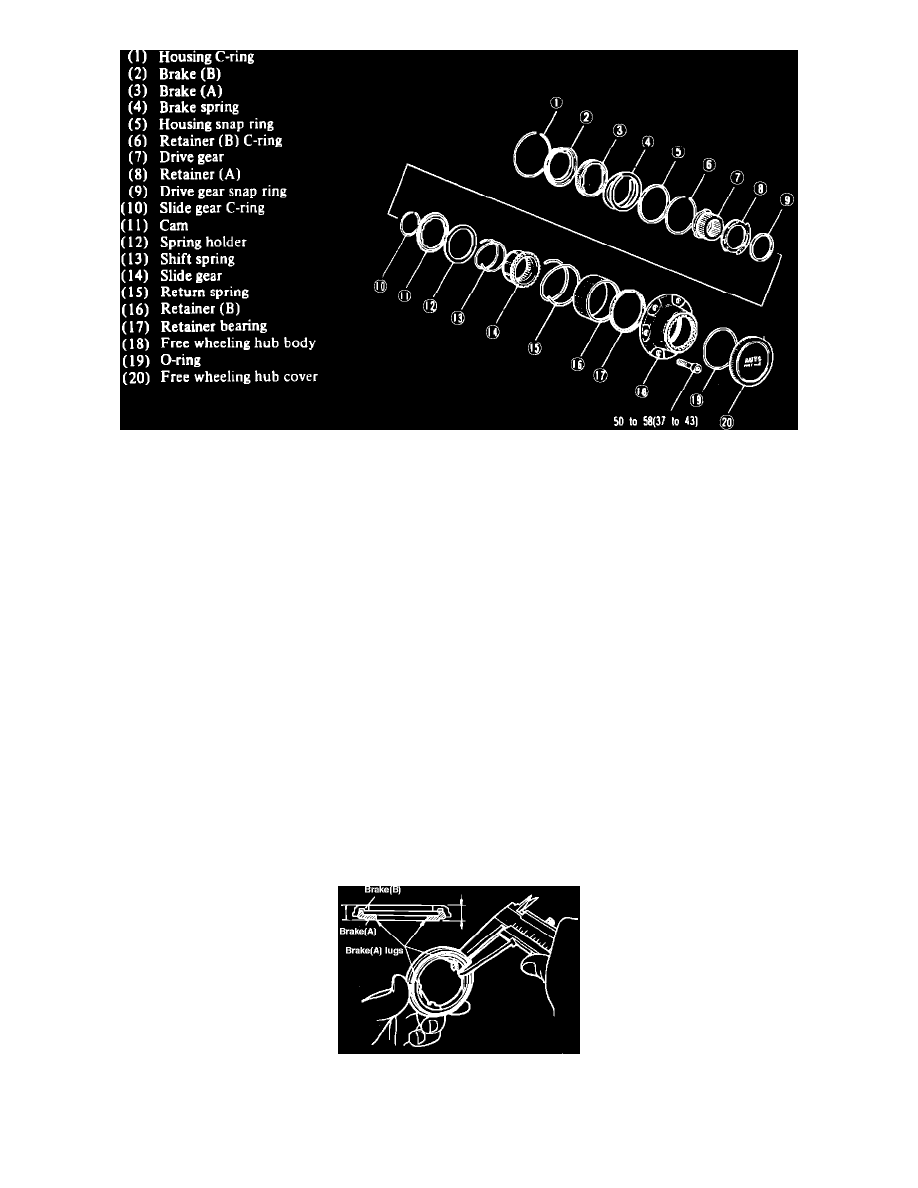
Fig. 9 Automatic (free wheeling) locking hub
AUTOMATIC LOCKING HUB
DISASSEMBLY
1. Press in on brake B, then remove housing C-ring.
2. Remove brake B, brake B and brake spring from housing, then remove housing snap ring.
3. Mount assembly in press, lightly compress drive gear, then remove retainer B C-ring, noting the following:
a. Place protective cloth under cover mating surface.
b. Because return spring is approximately 1.57 inches long, ensure press stroke is more than 1.57 inches.
c. Do not apply more than 441 lbs. pressure to drive gear.
d. After removing C-ring, slowly reduce press force until return spring relaxes completely.
4. Remove retainer B, return spring, slide gear assembly and drive gear assembly from housing.
5. Remove and discard drive gear snap ring.
6. Press in on slide gear cam and remove slide gear C-ring.
INSPECTION
1. Check slide and drive gear splines for damage.
2. Check cam portion of retainer A for wear or damage.
3. Check cam for wear and damage.
4. Check slide gear and housing tooth surfaces for wear and damage.
5. Check retainer B and housing contact surfaces for wear and damage.
6. Check brake wear as follows:
Fig. 12 Measuring brake assembly. Automatic locking hub
a. Assemble brake A and brake B, then measure thickness of assembly at two lugs on brake A.
b. Standard thickness is 0.413 inch and minimum thickness is 0.378 inch.