
D 100 Pickup L6-225 3.7L (1984)
15.
Remove and discard the following parts:
a.
Release fork push rod
b.
Release fork and spring (save the boot for installation)
c.
Clutch pivot shaft assembly and mounting brackets
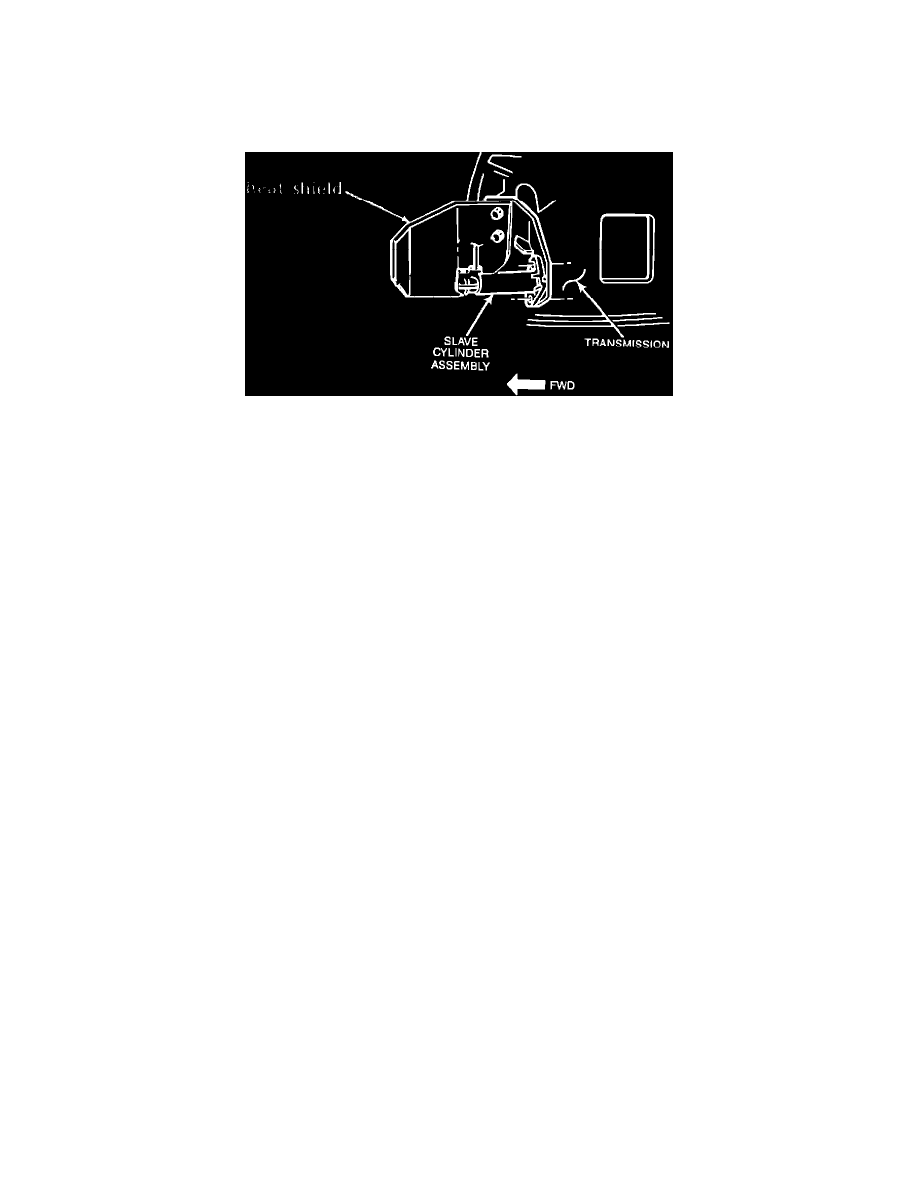
FIGURE 8
16.
A-833 Transmissions
Install the slave cylinder mounting bracket and heat shield supplied with the kit (Figure 8). Tighten fasteners to 50 foot pounds.
A-435 Transmissions
Install the slave cylinder mounting bracket and heat shield with the fasteners ordered separately (PN 00181186 - screws). Torque fasteners to 50 foot
pounds.
17.
Install the supplied release fork.
18.
Install the original release fork boot.
19.
Install the slave cylinder to the mounting bracket. Torque fasteners to 200 inch pounds.
NOTE:
1. RECHECK THE HYDRAULIC TUBE ROUTING. MAKE SURE ADEQUATE CLEARANCE EXISTS BETWEEN THE
HYDRAULIC TUBE AND THE EXHAUST SYSTEM. ASSURE THAT ALL HEAT SHIELDS SUPPLIED ARE
INSTALLED.
2.
DO NOT REMOVE THE WHITE PLASTIC RETAINER FROM THE SLAVE CYLINDER. THE RETAINER WILL
BREAK AWAY WHEN THE CLUTCH PEDAL IS DEPRESSED THE FIRST TIME.
20.
Install the supplied plug in the clutch pedal push rod hole in the bulkhead, as this hole is no longer needed.
21.
Lower the vehicle and connect the battery.
The installation is now complete. No adjustment or bleeding is necessary with this package. Simply depress the clutch pedal to
break away the plastic retainers and check the clutch for proper operation.
POLICY:
Reimbursable within the provisions of the warranty
TIME ALLOWANCE:
Labor Operation No.
06-40-10-95 . . . . . . . . . .
1.3 Hrs.
FAILURE CODE:
2X - Vibration or Chatter