
D 250 Pickup V6-239 3.9L (1989)
Servicing Fuel Injector
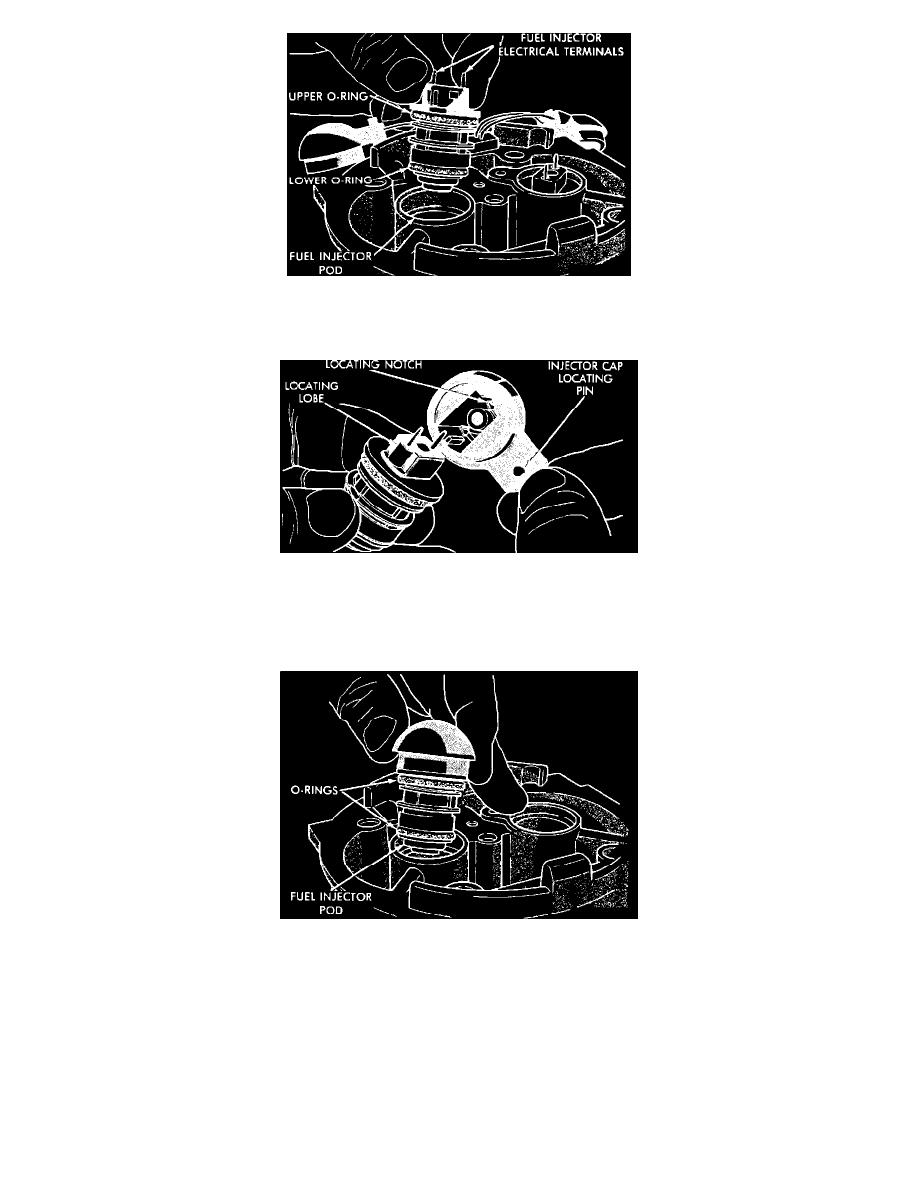
1.
Replace the O-rings on the injector (a new injector will already have the upper O-ring installed).
Fuel Injector And Injector Cap
2.
After applying a light coat of Petroleum Jelly to the injector O-rings, install and align the injector terminal housing in the injector cap.
3.
Press the injector cap onto the top of the injector until the lower surface of the cap is flush with the upper O-ring flange of the injector.
4.
Spray inner surfaces of both injector pods with brake or carburetor parts cleaner to remove any residual gasoline or dirt particles.
Installing Fuel Injector Assembly
5.
Install fuel injector and cap assembly into each injector pod. Align cap locating pin with each locating hole in the throttle body housing. The
passenger side locating pin is 5 mm in diameter and will only fit inside the passenger side hole in the throttle body. The drivers side locating pin is
4 mm in diameter and will only fit inside the drivers side hole in the throttle body.
6.
Press firmly on each injector cap until each cap is flush with the throttle body housing.
7.
Install the injector cap clamp, fastening screw, and loose spacer. Align the injector clamp holes with the injector cap pins. Since injector O-ring
may cause caps to lift up on one side, push down firmly on injector caps with one hand while tightening injector clamp with the other.
8.
Torque injector clamp screw to 4 Nm (35 lb-in)
9.
Reconnect negative battery terminal and test for leaks by pressurizing the fuel system. See: Fuel Pressure/Testing and Inspection
10.
Reinstall the air cleaner assembly.