
Dakota 2WD L4-153 2.5L VIN K FI (1989)
Ignition Lock: Service and Repair
Less Tilt Column
Fig. 2 Ignition Lock Removal. Models W/standard Column
1.
Disconnect battery ground cable.
2.
Remove turn signal switch refer to Vehicle Lighting/Hazard Warning Lamps/Hazard Warning Switch/Service and Repair.
3.
Disconnect horn and ignition key lamp wires, then remove ignition key lamp attaching screw and lamp.
4.
Remove four screws attaching upper bearing housing to lock housing, then remove snap ring from upper end of steering shaft and remove upper
bearing housing.
5.
Remove lock plate spring and lock plate from steering shaft.
6.
Position lock cylinder in Lock position, then remove ignition key.
7.
Remove screw, then lift out buzzer/chime switch.
8.
Remove screws attaching ignition switch.
9.
Remove ignition switch by rotating the switch 90 degrees on the rod and sliding off rod.
10.
Remove dimmer switch.
11.
Remove screws attaching bell crank, then slide bell crank up into the lock housing until it can be disconnected from the ignition switch actuator
rod.
12.
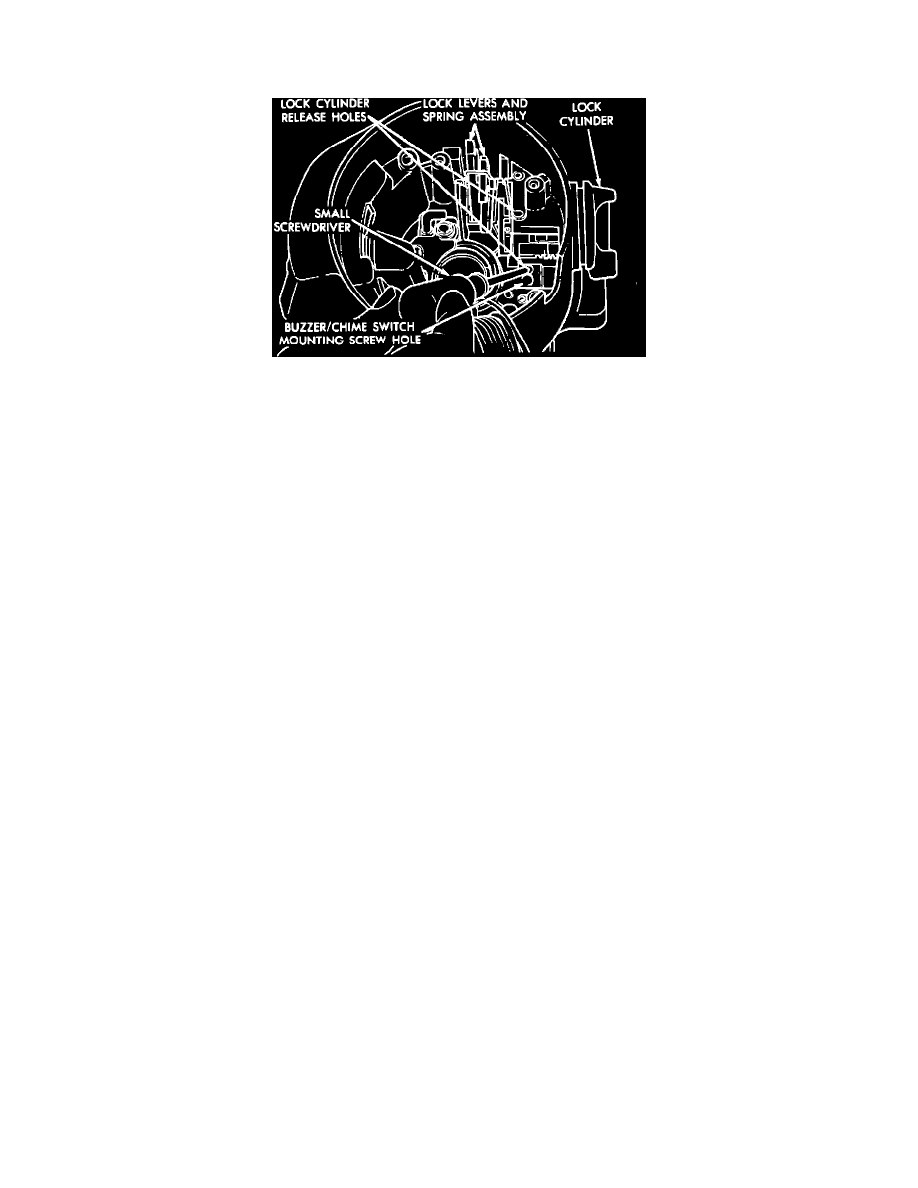
Place lock cylinder into LOCK position, then insert two small screwdrivers into both lock cylinder release holes and push into release spring
loaded lock retainers.
13.
Grasp lock lever and spring assembly and pull straight out of housing.
14.
Remove four lock housing to column jacket attaching screws, then the lock housing plate and housing from jacket.
15.
Turn lock housing 90 degrees to disengage from ignition switch actuator rod, then remove lock housing.
16.
Reverse procedure to install.