
Dakota 2WD V6-239 3.9L (1987)
Brake Master Cylinder: Service and Repair
Master Cylinder Replacement
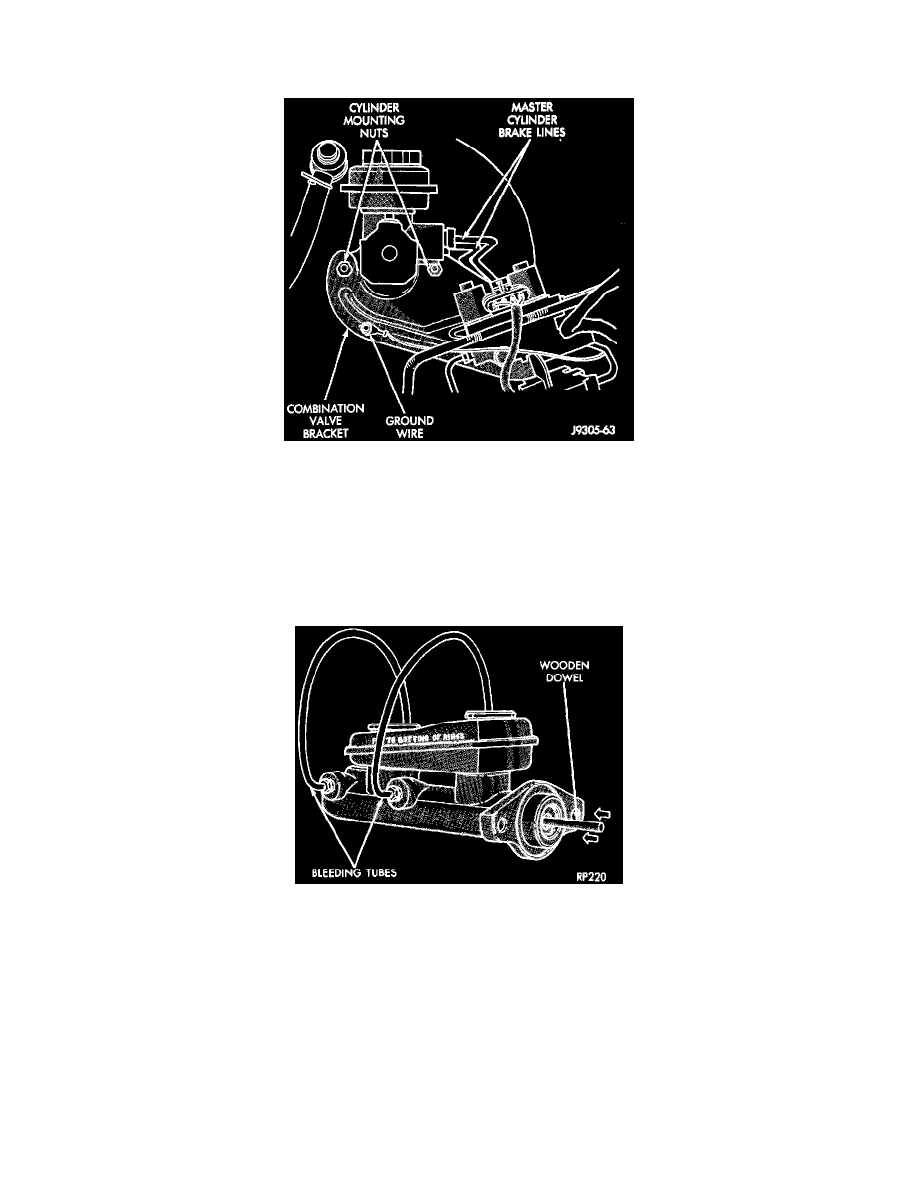
Fig 2 Master Cylinder Mounting
MASTER CYLINDER REMOVAL
1. Disconnect brake lines at master cylinder.
2. Remove ground wire from combination valve bracket.
3. Remove nuts attaching master cylinder to mounting studs on power brake booster.
4. Slide combination valve bracket off cylinder mounting studs. Loosen or disconnect brake lines at rear antilock valve and combination valve if
necessary.
5. Remove master cylinder.
Fig 5 Master Cylinder Bleeding
MASTER CYLINDER BLEEDING
Master cylinder bleeding should be performed on the bench before installation in the vehicle. Required bleeding tools include Bleed Tubes C-4029
and a wooden dowel.
Procedure
1. Remove protective caps from master cylinder outlet ports and mount master cylinder assembly in a vise.
2. Attach bleed tubes to cylinder outlet ports and insert bleed tubes in reservoir fluid compartments.
3. Fill reservoir with fresh Mopar DOT 3 brake fluid.
4. Press cylinder pistons inward with wood dowel. Then release pistons and allow them to return under spring pressure.
5. Continue bleeding operations until air bubbles are no longer visible in fluid.
6. Remove bleed tubes.
7. If cylinder will not be installed right away, install protective caps in cylinder outlet ports. Caps will keep dirt out of cylinder.