
Dakota 2WD V6-3.9L VIN X (1997)
19.
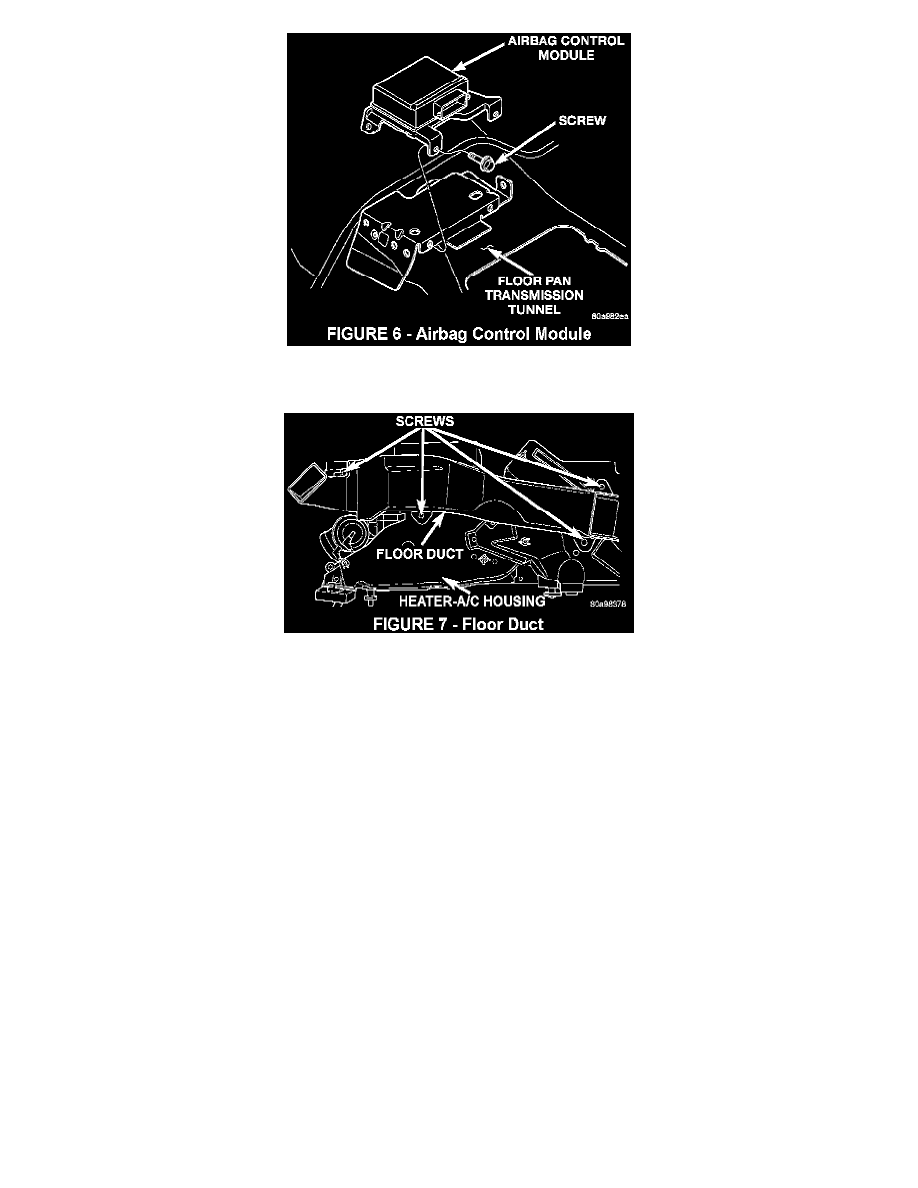
Remove the three screws that secure the ACM mounting bracket to the floor pan transmission tunnel and remove the ACM and its bracket as an
assembly (Figure 6).
20.
Remove the four floor duct screws (Figure 7).
21.
Remove the floor duct by sliding the duct out from the driver's side of the vehicle.
22.
Install the new duct (p/n 04734717AB) onto the heater housing assembly and secure it with the four floor duct screws.
23.
Install the ACM and attach it to the floor pan transmission tunnel with the three mounting screws. Tighten the mounting screws to 11.8 Nm (105
in. lbs.) of torque.
NOTE:
THE ARROW ON THE TOP OF THE ACM MUST BE POINTING FORWARD WHEN INSTALLING THE ACM.
24.
Plug in the wire harness connector to the ACM. Be certain that the connector latches are fully engaged and that the connector locks are pushed in.
25.
Secure the instrument panel wire harness ground eyelet to the left side of the floor pan transmission tunnel.
26.
Attach the center support bracket to the Airbag Control Module (ACM) bracket on the floor pan transmission tunnel. Secure the bracket to the
ACM bracket with three screws (two screws on the left and one screw on the right) and secure the bracket to the lower instrument panel with two
screws (Figure 4). Re-position the carpet.
27.
If the vehicle is so equipped, connect the wire harness to the cigar lighter and the power outlet and clip the ash receiver lamp and hood to the ash
receiver flame shield.
28.
Install the instrument panel lower bezel onto the instrument panel.
29.
Connect the fog lamp switch/connector to the instrument panel bezel.
30.
Attach the instrument cluster bezel to the instrument panel.