
Dakota 2WD V6-3.9L VIN X (1997)
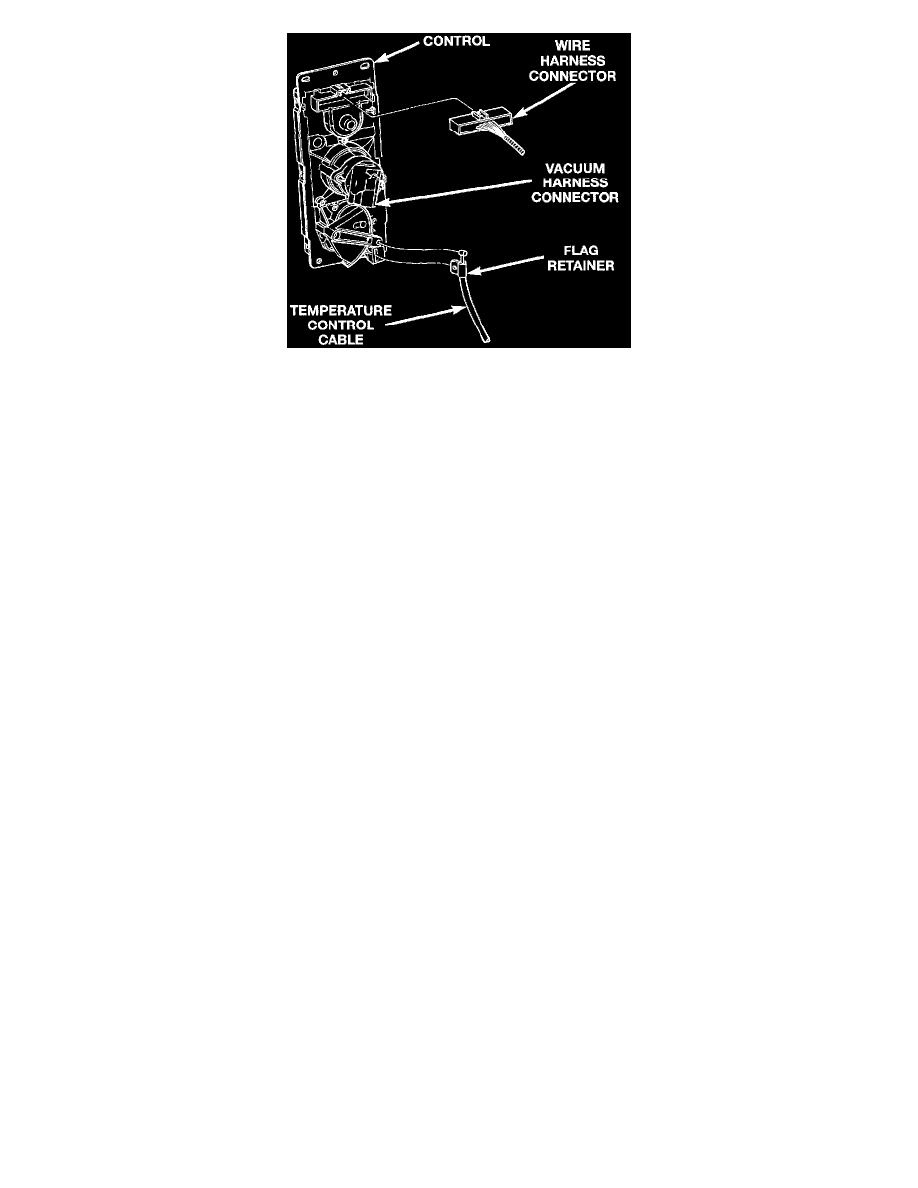
Fig 39 Heater & A/C Control Connectors
9. Unplug the wire harness connector from the back of the heater-A/C control assembly.
10. Disconnect the wire harness retainer from the side of the heater-A/C control assembly
11. Remove the two stamped nuts that secure the vacuum harness connector and unplug the connector from the back of the heater-A/C control.
12. Release the temperature control cable housing retainer flag and disconnect the cable core from the back of the heater-A/C control. Rotating the
heater-A/C control assembly 900 will align the cable core and cable end properly for easy removal.
13. Remove the heater-A/C control from the instrument panel.
INSTALLATION
1. Connect the temperature control cable core and cable housing retainer flag to the back of the heater- A/C control.
2. Plug in the vacuum harness connector and install the two stamped nuts to secure the connector to the back of the heater-A/C control.
3. Plug in the wire harness connector to the back of the heater-A/C control, and reinstall the wire harness retainer to the side of the heater-A/C
control.
4. Install the heater-A/C control to the instrument panel and secure with four screws. Tighten the screws to 2.2 N.m (20 in. lbs.).
5. If the vehicle is so equipped, plug in the fog lamp switch wire harness connector.
6. Install the instrument cluster bezel.
7. Connect the battery negative cable.
8. Adjust the Temperature Control Cable.