
Dakota 2WD V8-4.7L (2008)
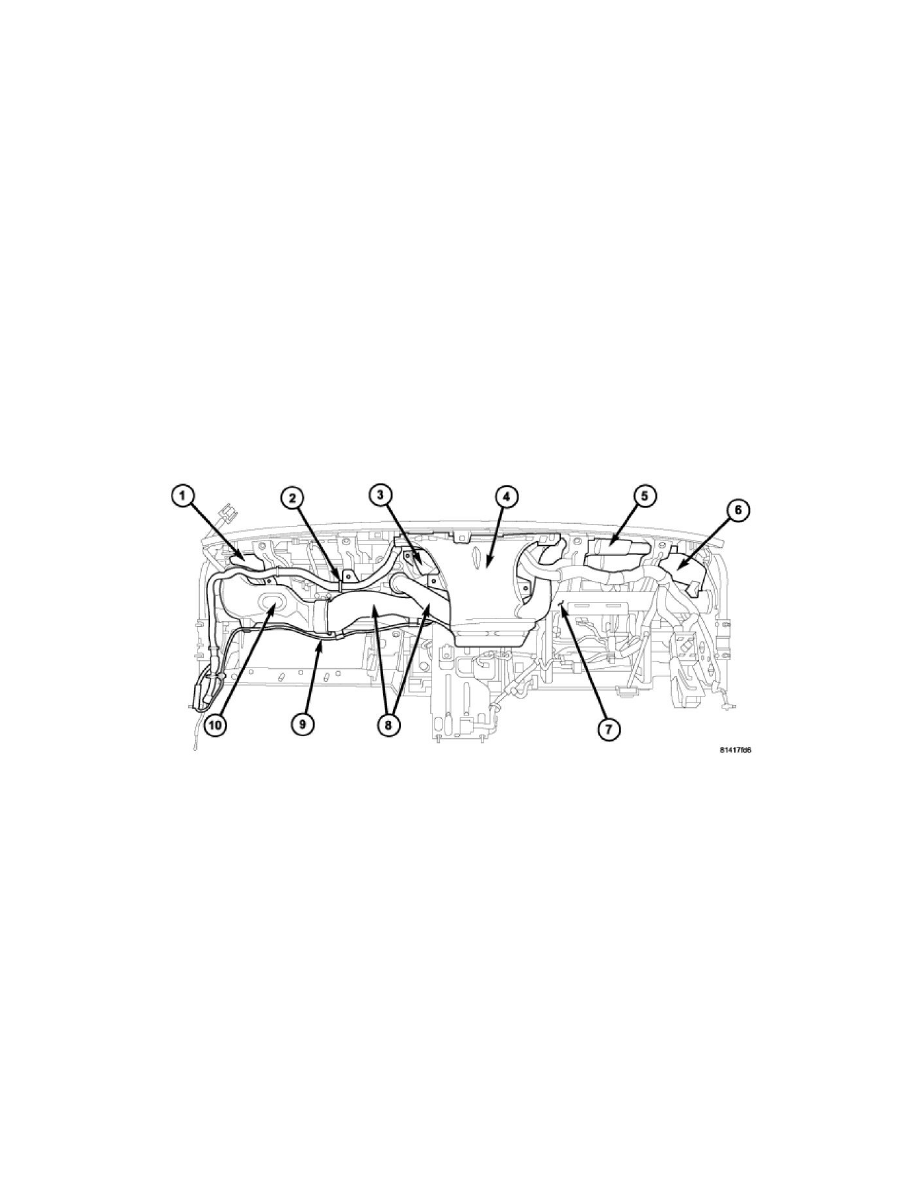
3. Position the center instrument panel duct (3) into the instrument panel.
4. Position the center distribution duct (8) into the instrument panel and connect it to the driver side instrument panel duct (6) and the driver side
demister duct (5).
5. Connect the center distribution duct to the instrument panel duct.
6. Connect the center distribution duct to the passenger side demister duct (1).
7. Position the passenger side instrument panel duct (10) into the instrument panel and connect it to the center distribution duct.
8. Install the screws that secure the ducts to the instrument panel and support. Tighten the screws to 2 Nm (17 in. lbs.).
9. Install the wire harness (2) onto the center distribution duct.
10. Install the radio coaxial cable (9) onto the center distribution duct and the passenger side instrument panel duct.
11. Install the defroster duct (4) See: Defroster Ducts - Installation.
12. Install the instrument cluster See: Instrument Panel, Gauges and Warning Indicators/Instrument Cluster / Carrier/Service and Repair/Removal and
Replacement/Instrument Cluster - Installation.
13. Install the instrument panel See: Body and Frame/Interior Moulding / Trim/Dashboard / Instrument Panel/Service and Repair/Instrument Panel -
Installation.
Instrument Panel Demister Ducts - Removal
REMOVAL
WARNING: On vehicles equipped with airbags, disable the airbag system before attempting any steering wheel, steering column, or instrument
panel component diagnosis or service. Disconnect and isolate the battery negative (ground) cable, then wait two minutes for the airbag system
capacitor to discharge before performing further diagnosis or service. This is the only sure way to disable the airbag system. Failure to take the
proper precautions could result in accidental airbag deployment and possible personal injury or death.
NOTE: Take the proper precautions to protect the front face of the instrument panel from cosmetic damage during this service procedure.
1. Remove the instrument panel and place it on a workbench See: Body and Frame/Interior Moulding / Trim/Dashboard / Instrument Panel/Service
and Repair/Instrument Panel - Removal.
2. Remove the instrument panel ducts See: Instrument Panel Ducts - Removal.
3. Remove the screws that secure the passenger side demister duct (1) and the driver side demister duct (5) to the instrument panel and support
assembly (7).
4. Remove the ducts from the instrument panel and support assembly.
Instrument Panel Demister Ducts - Installation
INSTALLATION