
Dakota 2WD V8-4.7L VIN J (2005)
3.
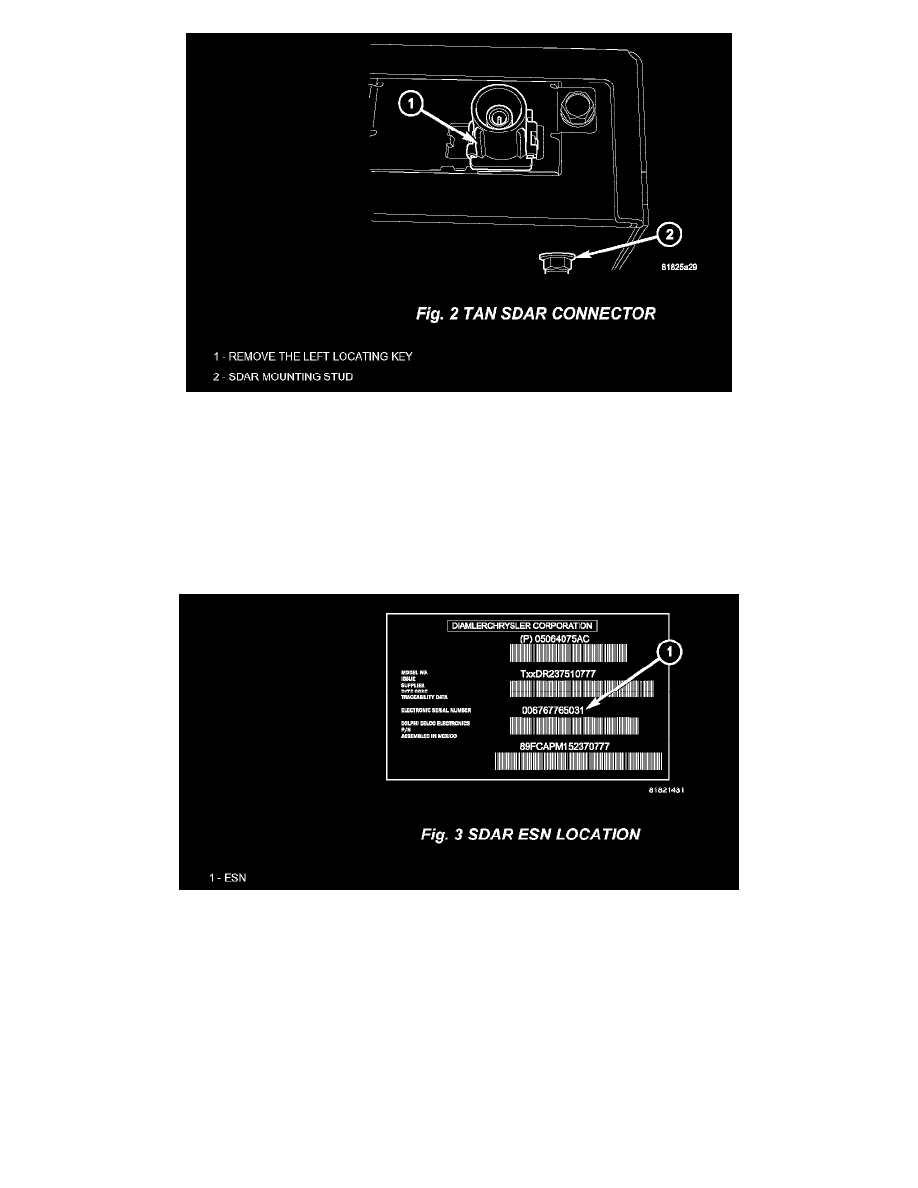
For DR, HB, JR, LX and ND vehicles, remove the left locating key (when viewed with the SDAR mounting studs facing you) on the tan connector
of the SDAR. The key can be shaved off using a utility knife or similar device, (Fig. 2). Continue with step 8.
4.
Slide the red lock on the blue connector housing of the antenna harness to its unlock position.
5.
Use a small screwdriver to pull up on the tab uncovered by the lock.
6.
Slide the housing off the connector terminal.
7.
Replace the removed blue connector housing and red lock with the "tan" colored housing, p/n 05189968AA and white lock p/n 05189969AA.
8.
Record the Electronic Serial Number (ESN) of the removed and replacement SDAR's, (Fig. 3).
9.
Install the appropriate replacement SDAR to the mounting bracket, tighten the fasteners to 5-7 Nm (18-25 in. lbs.).
10.
Tape back the original white connector to the antenna harness to prevent rattling. This white connector will NOT be used with the new SDAR.
11.
Connect the antenna connector to the tan connector on the new SDAR. Insert the 12-way connector to the module.
NOTE:
Be sure to route the SDAR wiring so that is has no bends with a radius of less than 1 in. and is free of contact with the mounting bracket, tape, foam
or convolute may be used to isolate the wiring if necessary.
12.
Install the SDAR/bracket assembly into the vehicle, tighten the fasteners to 5-7 Nm (18-25 in. lbs.).