Dakota 2WD V8-4.7L VIN J (2005)

3. Install right side chain tensioner arm. Apply Mopar(R) Lock N, Seal to Torx(R) bolt, tighten bolt to 17 Nm (150 inch lbs.).
NOTE: The silver bolts retain the guides to the cylinder heads and the black bolts retain the guides to the engine block.
4. Install the left side chain guide. Tighten the bolts to 28 Nm (250 inch lbs.).
CAUTION: Overtightening the tensioner arm Torx(R) bolt can cause severe damage to the cylinder head. Tighten Torx(R) bolt to specified
torque only.
5. Install left side chain tensioner arm. Apply Mopar(R) Lock N, Seal to Torx(R) bolt, tighten bolt to 17 Nm (150 inch lbs.).
6. Install the right side chain guide. Tighten the bolts to 28 Nm (250 inch lbs.).
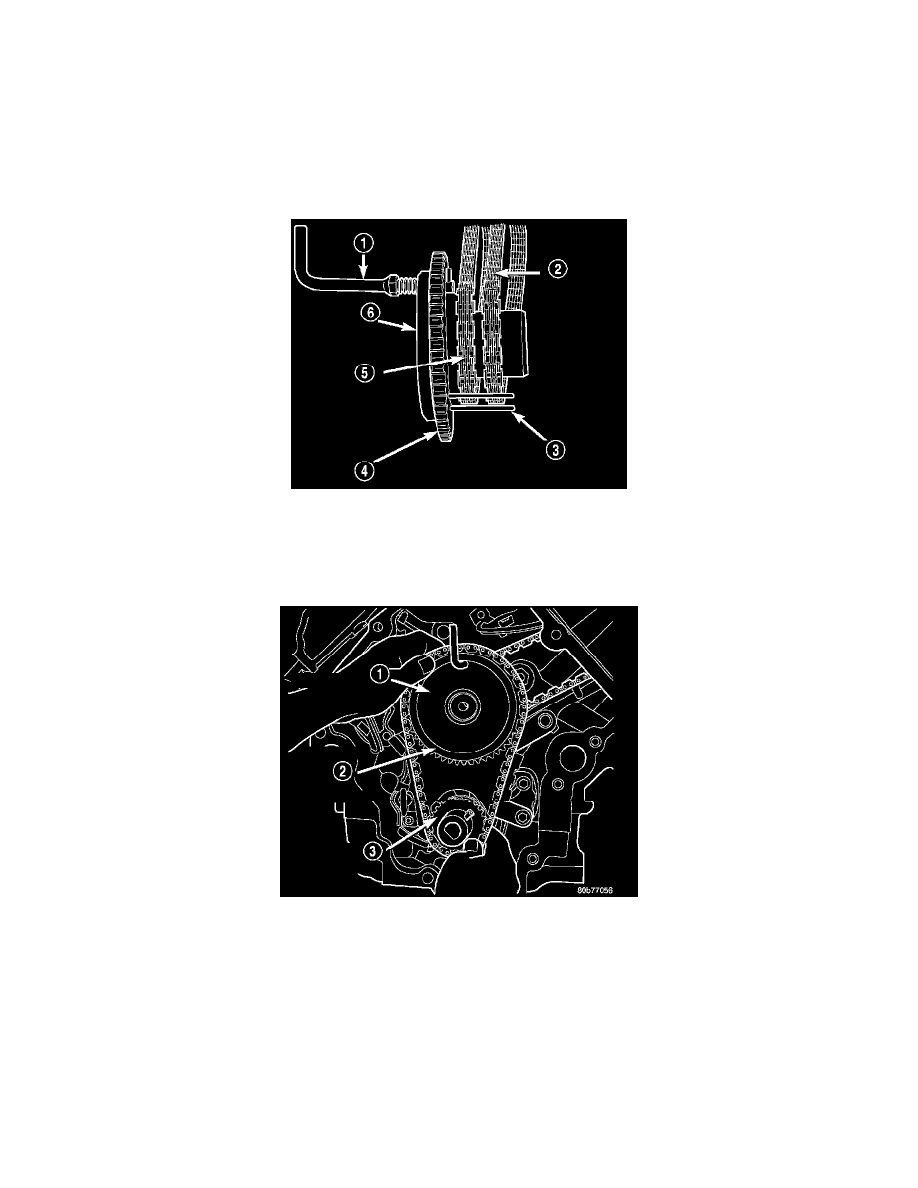
7. Install both secondary chains onto the idler sprocket. Align two plated links on the secondary chains to be visible through the two lower openings
on the idler sprocket (4 o'clock and 8 o'clock). Once the secondary timing chains are installed, position special tool 8515 (6) to hold chains in
place for installation.
8. Align primary chain double plated links with the timing mark at 12 o'clock (1) on the idler sprocket. Align the primary chain single plated link
with the timing mark at 6 o'clock on the crankshaft sprocket (3).
9. Lubricate idler shaft and bushings with clean engine oil.
10. Install all chains, crankshaft sprocket, and idler sprocket as an assembly. After guiding both secondary chains through the block and cylinder head
openings, affix chains with a elastic strap or the equivalent, This will maintain tension on chains to aid in installation.
NOTE: It will be necessary to slightly rotate camshafts for sprocket installation.
11. Align left camshaft sprocket L dot to plated link on chain.
12. Align right camshaft sprocket R dot to plated link on chain.
CAUTION: Remove excess oil from the camshaft sprocket bolt. Failure to do so can result in over-torque of bolt resulting in bolt failure.
13. Remove Special Tool 8515, then attach both sprockets to camshafts. Remove excess oil from bolts, then Install sprocket bolts, but do not tighten at
this time.
14. Verify that all plated links are aligned with the marks on all sprockets and the V6 marks on camshaft sprockets are at the 12 o'clock position.
