
Dakota 2WD V8-4.7L VIN J (2005)
Exhaust Manifold: Service and Repair
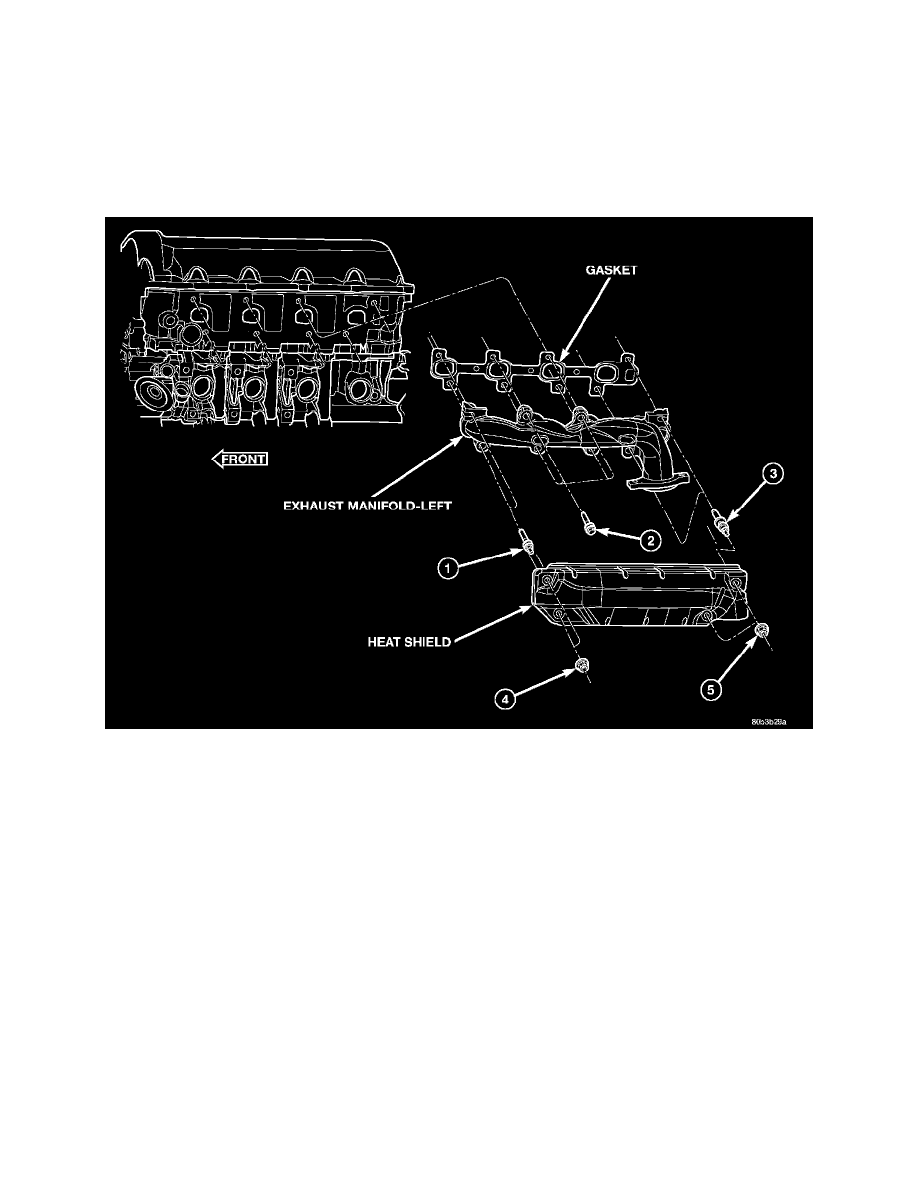
Left Exhaust Manifold
LEFT EXHAUST MANIFOLD
REMOVAL
1. Disconnect negative cable for battery.
2. Hoist vehicle.
3. Disconnect exhaust pipe at manifold.
4. Lower vehicle.
5. Remove the front two exhaust heat shield retaining fasteners. Raise vehicle and remove the fasteners at rear of heat shield.
6. Remove heat shield.
7. Lower vehicle and remove the upper exhaust manifold retaining bolts.
8. Raise vehicle and remove the lower exhaust manifold retaining bolts.
9. Remove exhaust manifold and gasket. Manifold is removed from below the engine compartment.
CLEANING
1. Clean the exhaust manifold using a suitable cleaning solvent, then allow to air dry.
2. Clean all gasket residue from the manifold mating surface.
INSPECTION
1. Inspect the exhaust manifold for cracks in the mating surface and at every mounting bolt hole.
2. Using a straight edge and a feeler gauge, check the mating surface for warp and twist.
3. Inspect the manifold to exhaust pipe mating surface for cracks, gouges, or other damage that would prevent sealing.
INSTALLATION
1. Install exhaust manifold and gasket from below engine compartment.
2. Install lower exhaust manifold fasteners. DO NOT tighten until all fasteners are in place.
3. Lower vehicle and install upper exhaust manifold fasteners. Tighten all manifold bolts starting at center and working outward to 25 Nm (18 ft.
lbs.).
CAUTION: Over tightening heat shield fasteners, may cause shield to distort and/or crack.