
Dakota 2WD V8-5.9L VIN Z LDC (2000)
Drive Belt: Service and Repair
REMOVAL
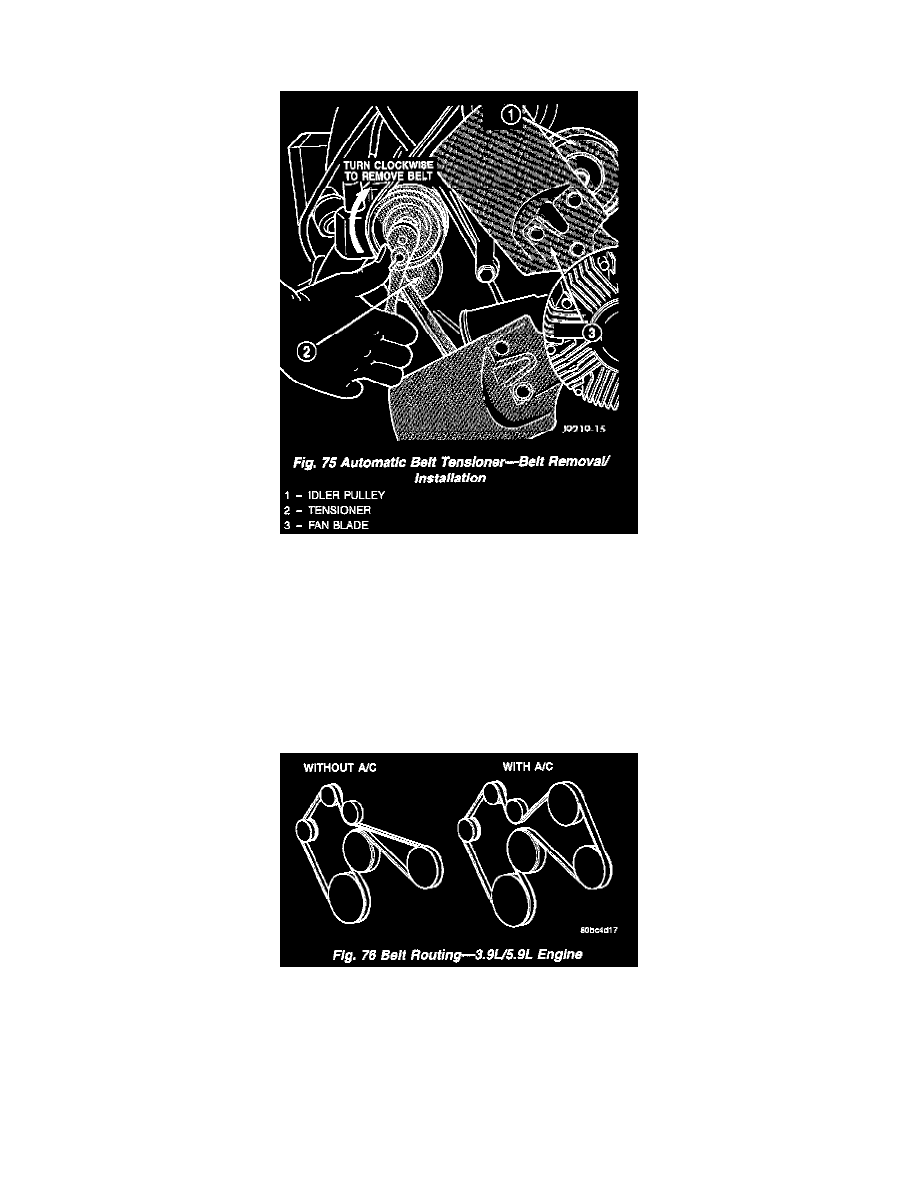
Fig. 75
Drive belts on both 3.9L and 5.9L engines are equipped with a spring loaded automatic belt tensioner (Fig. 75). This belt tensioner will be used on all
belt configurations, such as with or without power steering or air conditioning. For more information, refer to Drive Belt Tensioner, 3.9/5.9L Engines.
1. Attach a socket/wrench to pulley mounting bolt of automatic tensioner.
2. Rotate tensioner assembly clockwise (as viewed from front) until tension has been relieved from belt.
3. Remove belt from idler pulley first.
4. Remove belt from vehicle.
INSTALLATION
Fig. 76
CAUTION: When installing serpentine accessory drive belt, the belt must be routed correctly. If not, engine may overheat due to water pump
rotating in wrong direction. Refer to (Fig. 76) for correct 3.9L/5.9L engine belt routing. The correct belt with correct length must be used.
1. Position drive belt over all pulleys except idler pulley. This pulley is located between generator and A/C compressor.
2. Attach a socket/wrench to pulley mounting bolt of automatic tensioner.
3. Rotate socket/wrench clockwise. Place belt over idler pulley. Let tensioner rotate back into place. Remove wrench. Be sure belt is properly seated
on all pulleys.