
Dakota 4WD V6-3.7L (2008)
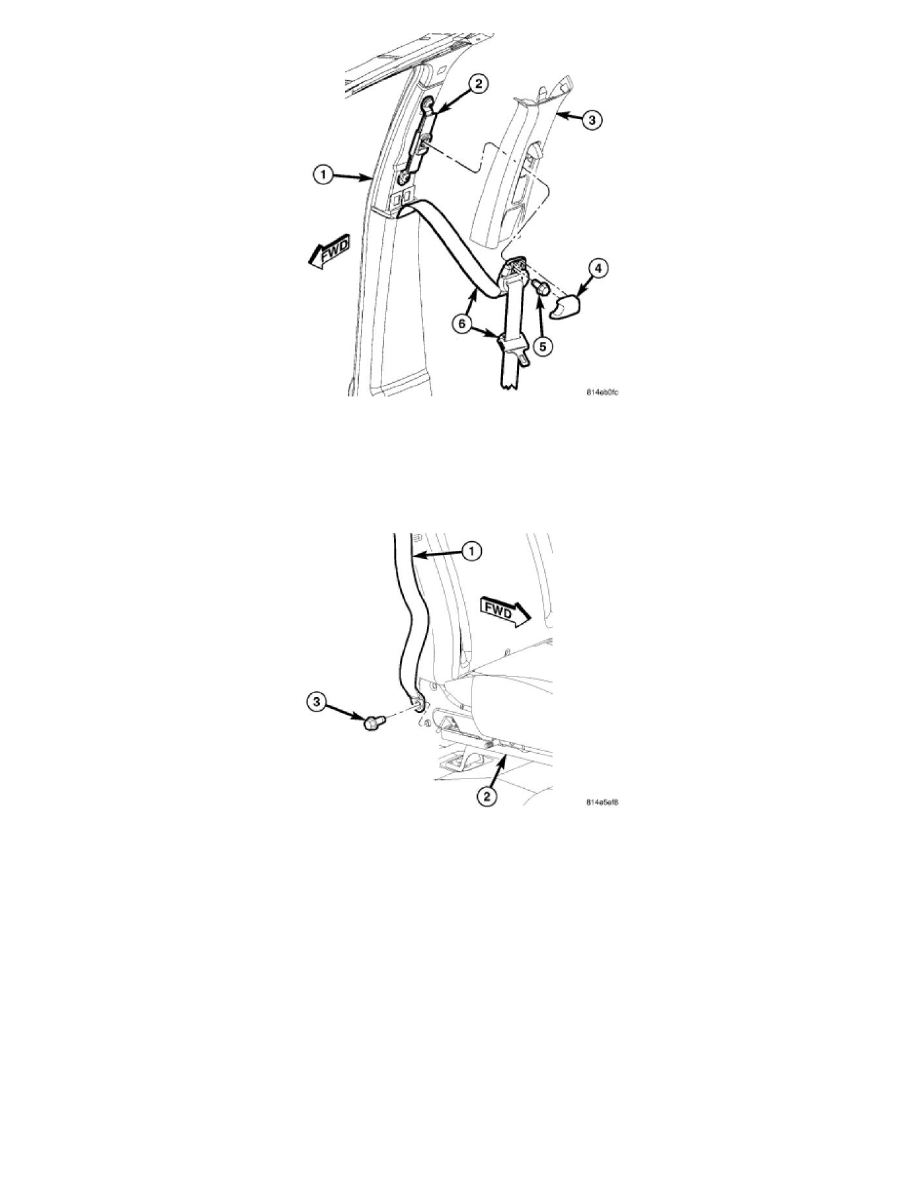
1. Slide the upper retaining tab of the upper B-pillar trim panel (3) into the hole in the B-pillar (1) and engage the retaining tabs that secure the trim
panel to the B-pillar.
2. Position the seat belt (6) turning loop onto the height adjuster (2) on the upper B-pillar.
3. Install the screw (5) that secures the turning loop to the height adjuster. Tighten the screw to 39 Nm (29 ft. lbs.).
4. Engage the upper edge of a trim cover (4) over the top of the turning loop. Then, squeeze the lower end of the trim cover and the turning loop
together firmly and evenly until the engagement tabs of the trim cover snap into the slots of the turning loop.
5. Position the seat belt (1) lower anchor to the mounting hole on the outboard side of the front seat cushion frame (2). Be certain that the seat belt
webbing between the turning loop and the lower anchor is not twisted.
6. Install the screw (3) that secures the lower anchor to the outboard side of the front seat cushion frame. Tighten the screw to 39 Nm (29 ft. lbs.).
Lower
REMOVAL
Club Cab, Without Rear Jumper Seats
1. Adjust the front seat to its most forward position.