
Dakota 4WD V6-3.7L VIN K (2005)
NOTE: On 4WD vehicles, the front axle must be lowered, to provide clearance for oil pan removal. It is not necessary to remove the front axle from
the vehicle, or remove the axle shafts.
7. For 4WD Vehicles Remove the pinion bracket.
8. For 4WD Vehicles Disconnect the front driveshaft at the front axle.
9. For 4WD Vehicles Remove the front axle mounting bolts.
10. For 4WD Vehicles Lower axle using suitable jack enough to provide clearance to remove oil pan.
NOTE: Do not pry on oil pan or oil pan gasket. Gasket is integral to engine windage tray and does not come out with oil pan.
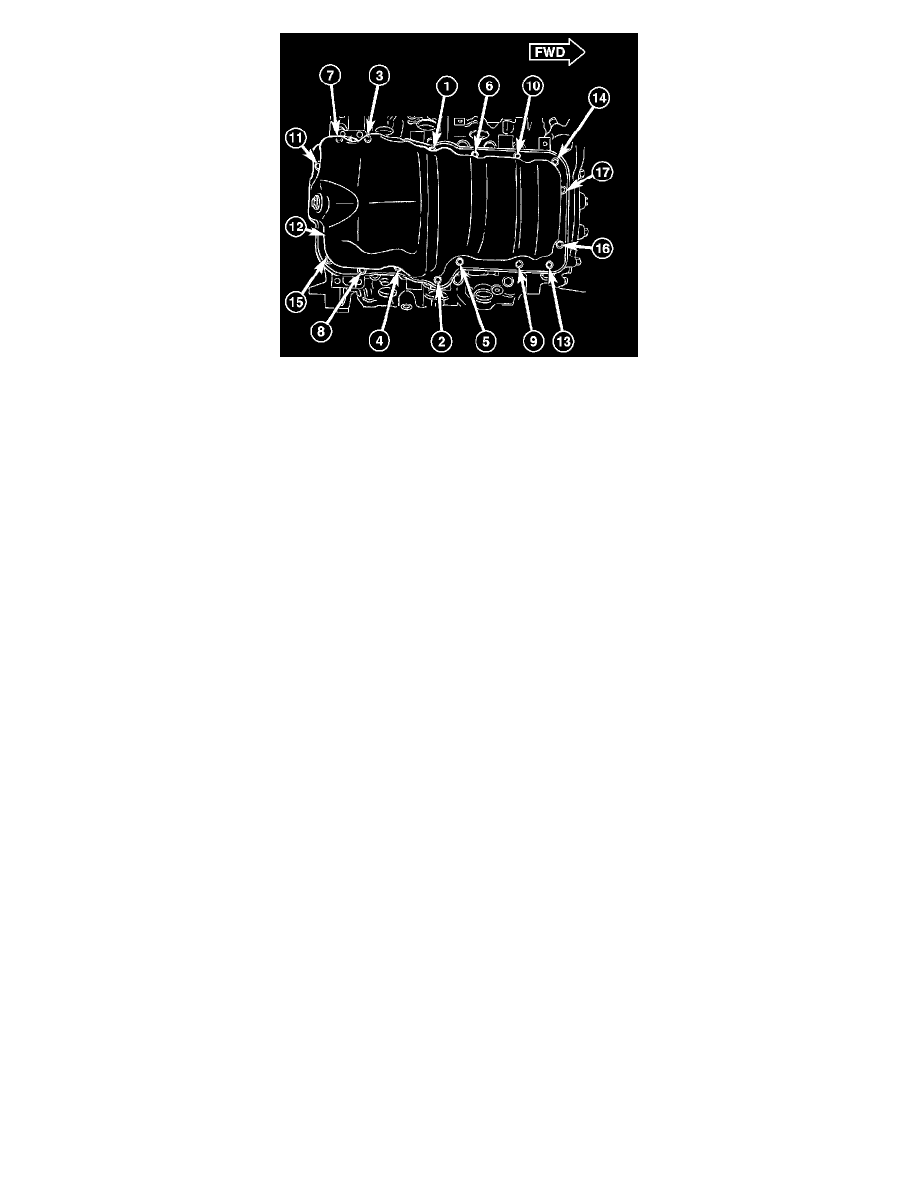
11. Remove the oil pan mounting bolts and oil pan.
12. Unbolt oil pump pickup tube and remove tube.
13. Inspect the integral windage tray and gasket and replace as needed.
CLEANING
1. Clean oil pan in solvent and wipe dry with a clean cloth.
2. Clean the oil pan gasket surface. DO NOT use a grinder wheel or other abrasive tool to clean sealing surface.
3. Clean oil screen and tube thoroughly in clean solvent.
INSPECTION
1. Inspect oil drain plug and plug hole for stripped or damaged threads. Repair as necessary.
2. Inspect the oil pan mounting flange for bends or distortion. Straighten flange, if necessary.
INSTALLATION
1. Clean the oil pan gasket mating surface of the bedplate and oil pan.
2. Position the oil pan gasket and pickup tube with new o-ring. Install the mounting bolt and nuts. Tighten bolt and nuts to 28 Nm (20 ft. lbs.).