
Dakota 4WD V8-4.7L VIN N (2000)
15.
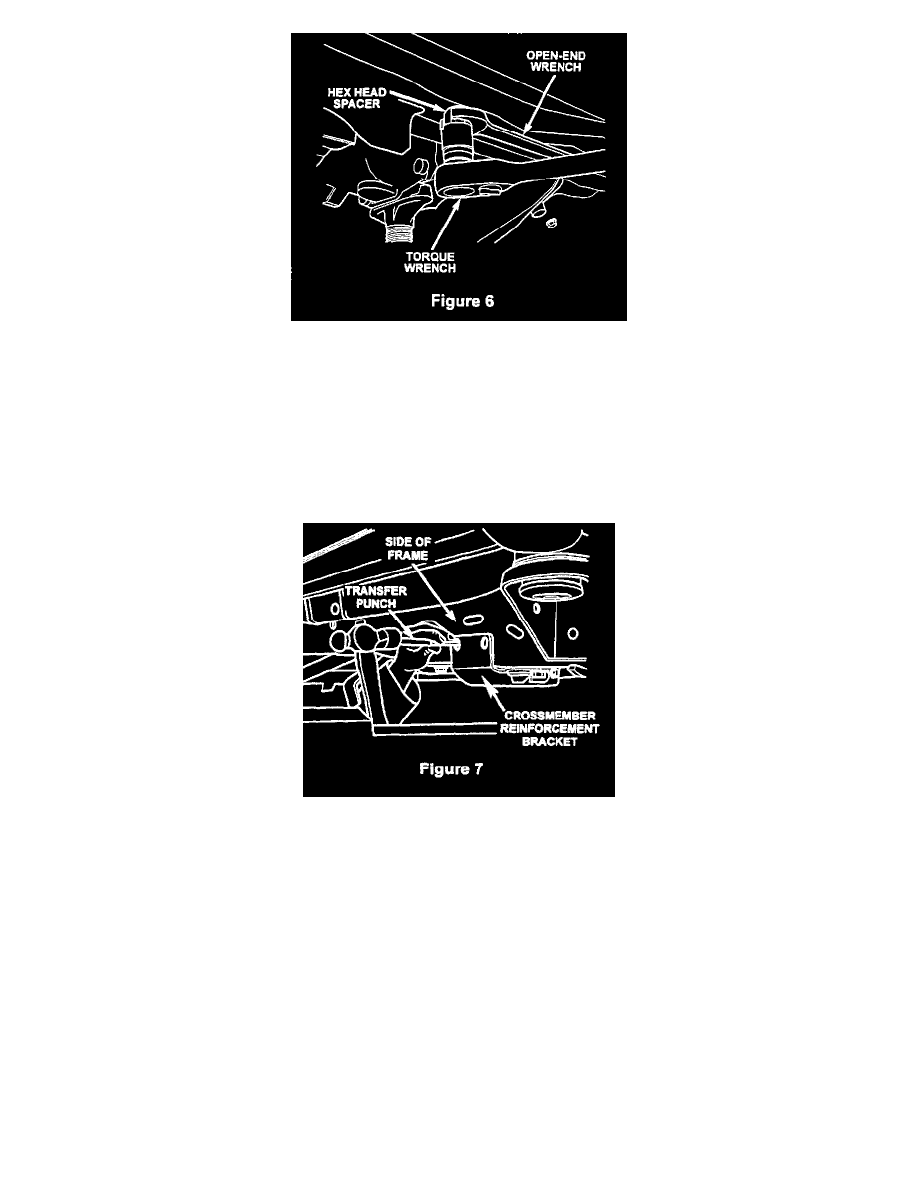
While holding the hex head spacer with an open-end wrench, tighten the M12 bolt with a torque wrench to 45 ft. lbs. (61 N.m) (Figure 6).
16.
Remove the installation tool from the Riv-Nut.
17.
Repeat steps 13 through 16 to install the second Riv-Nut into the other 45/64 inch hole that was drilled into the lower section of the frame.
18.
Temporarily mount the reinforcement bracket onto the frame using the two M1 0 transmission crossmember bolts and two M12 x 45mm bolts. Do
not tighten any bolts until all four bolts are in their proper position.
19.
Tighten the two M12 x 45mm bolts to 15 ft. lbs. (20 N.m).
20.
Using the reinforcement bracket as a template, center punch the side of the frame for two side Riv-Nut locations (Figure 7).
21.
Remove the reinforcement bracket from the frame.
22.
Using the center punch marks as a guide, drill two (2) ¼ inch pilot holes through the side of the frame.
23.
Enlarge the two (2) ¼ inch pilot holes in the side of the frame with the 45/64 inch drill bit supplied.
24.
Clean off any burrs around the two (2)
45/64 inch holes that were drilled in the frame with a flat file and apply a coat of zinc primer (PN 4443636) or equivalent to cover the edges of all drilled
holes.
25.
Screw the installation tool into one of the Riv-Nuts as shown in Figure 5 and apply motor oil to the tool.
26.
Place the Riv-Nut into one of the 45/64 inch holes in the side of the frame.