
Dakota 4WD V8-4.7L VIN N (2000)
Air Door Cable: Service and Repair
WARNING: ON VEHICLES EQUIPPED WITH AIR-BAGS, REFER TO AIRBAGS AND SEAT BELTS/AIRBAGS BEFORE
ATTEMPTING ANY STEERING WHEEL, STEERING COLUMN, OR INSTRUMENT PANEL COMPONENT DIAGNOSIS OF SERVICE.
FAILURE TO TAKE THE PROPER PRECAUTIONS COULD RESULT IN ACCIDENTAL AIR-BAG DEPLOYMENT AND POSSIBLE
PERSONAL INJURY.
REMOVAL
1. Disconnect and isolate the battery negative cable.
2. Roll down the instrument panel assembly, but do not remove it from the vehicle. Refer to Instrument Panel Assembly in the Removal and
Installation of Instrument Panel Systems for the procedures.
3. Disconnect the temperature control cable from the heater-A/C control. See Heater-A/C Control in the Removal and Installation for the procedures.
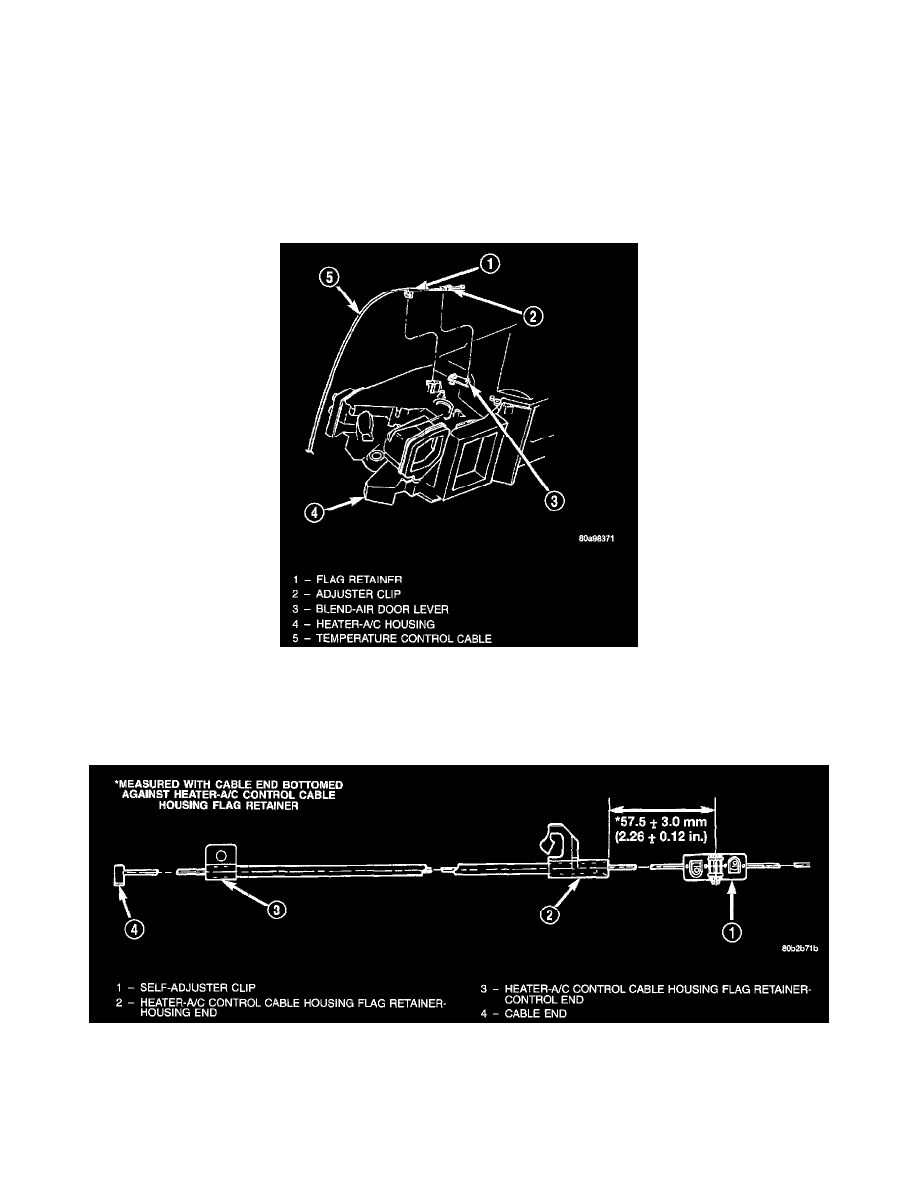
Temperature Control Cable Remove/Install
4. Disconnect the temperature control cable housing flag retainer from the receptacle on the top of the heater-A/C housing.
5. Pull the temperature control cable core self-adjuster clip off of the pin on the end of the blend-air door lever.
6. Remove the temperature control cable from the vehicle.
Temperature Control Cable Self-Adjuster Clip
INSTALLATION
Before installing the temperature control cable, be certain that the self-adjuster clip is properly positioned. This measurement must be made with the
cable end bottomed against the flag retainer on the heater-A/C control end of the cable housing. The measurement is taken from the end of the flag
retainer on the heater-A/C housing end of the cable to the center of the self-adjuster clip. If the self-adjuster clip is not properly positioned, slide the