
Fuel Rail Location for Dakota 4WD V8-47L VIN N (2000)
Remove/Install Injector Connector
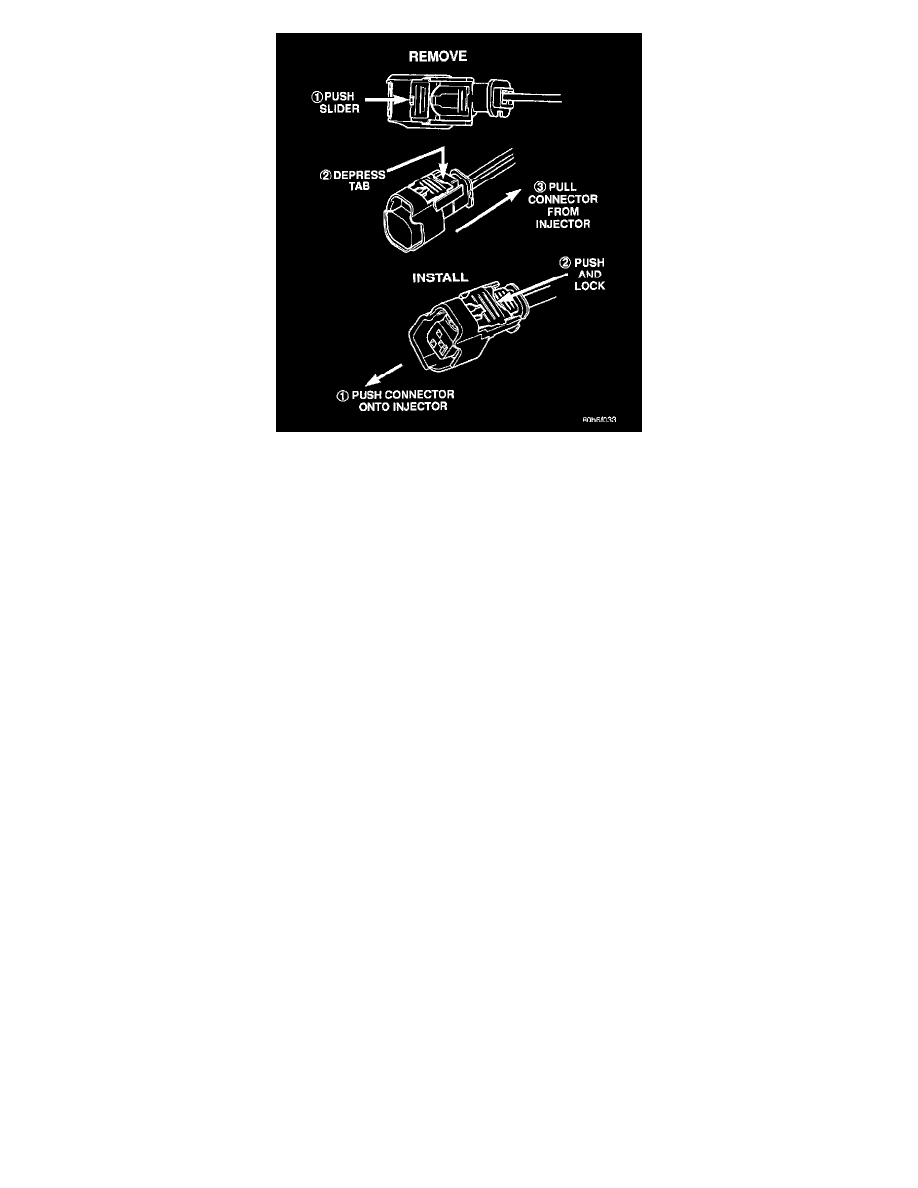
9. Disconnect electrical connectors at all 8 fuel injectors. To remove connector refer to the image. Push red colored slider away from injector (1).
While pushing slider, depress tab (2) and remove connector (3) from injector. The factory fuel injection wiring harness is numerically tagged (INJ
1, INJ 2, etc.) for injector position identification. If harness is not tagged, note wiring location before removal.
10. Disconnect electrical connectors at throttle body.
11. Disconnect electrical connectors at MAP and IAT sensors.
12. Remove first three ignition coils on each bank (cylinders #1, 3, 5, 2, 4 and 6). Refer to Ignition Coil Removal/installation.
13. Remove 4 fuel rail mounting bolts.
14. Gently rock and pull left side of fuel rail until fuel injectors just start to clear machined holes in cylinder head. Gently rock and pull right side of
rail until injectors just start to clear cylinder head holes. Repeat this procedure (left(right) until all injectors have cleared cylinder head holes.
15. Remove fuel rail (with injectors attached) from engine.
16. If fuel injectors are to be removed, refer to Fuel Injector Removal/installation.
INSTALLATION
1. If fuel injectors are to be installed, refer to Fuel Injector Removal/installation.
2. Apply a small amount of engine oil to each fuel injector 0-ring. This will help in fuel rail installation,
3. Position fuel rail/fuel injector assembly to machined injector openings in cylinder head.
4. Guide each injector into cylinder head. Be careful not to tear injector 0-rings.
5. Push right side of fuel rail down until fuel injectors have bottomed on cylinder head shoulder. Push left fuel rail down until injectors have
bottomed on cylinder head shoulder.
6. Install 4 fuel rail mounting bolts and tighten to 27 Nm (20 ft. lbs.).
7. Install ignition coils. Refer to Ignition Coil Removal/installation.
8. Connect electrical connectors to throttle body.
9. Connect electrical connectors to MAP and IAT sensors.
10. Connect electrical connectors at all fuel injectors. To install connector, refer to the image. Push connector onto injector (1) and then push and lock
red colored slider (2). Verify connector is locked to injector by lightly tugging on connector.
11. Connect vacuum lines to throttle body.
12. Connect fuel line latch clip and fuel line to fuel rail. Refer to Quick-Connect Fittings.
13. Connect wiring to rear of generator.
14. Install air box to throttle body.
15. Install air duct to air box.
16. Connect battery cable to battery.
17. Start engine and check for leaks.