
Dakota 4WD V8-4.7L VIN N (2000)
Shifter Transfer Case: Service and Repair
NV242 Transfer Case
REMOVAL
1. Shift transfer case and shifter into the 42WD position.
2. Raise and support vehicle.
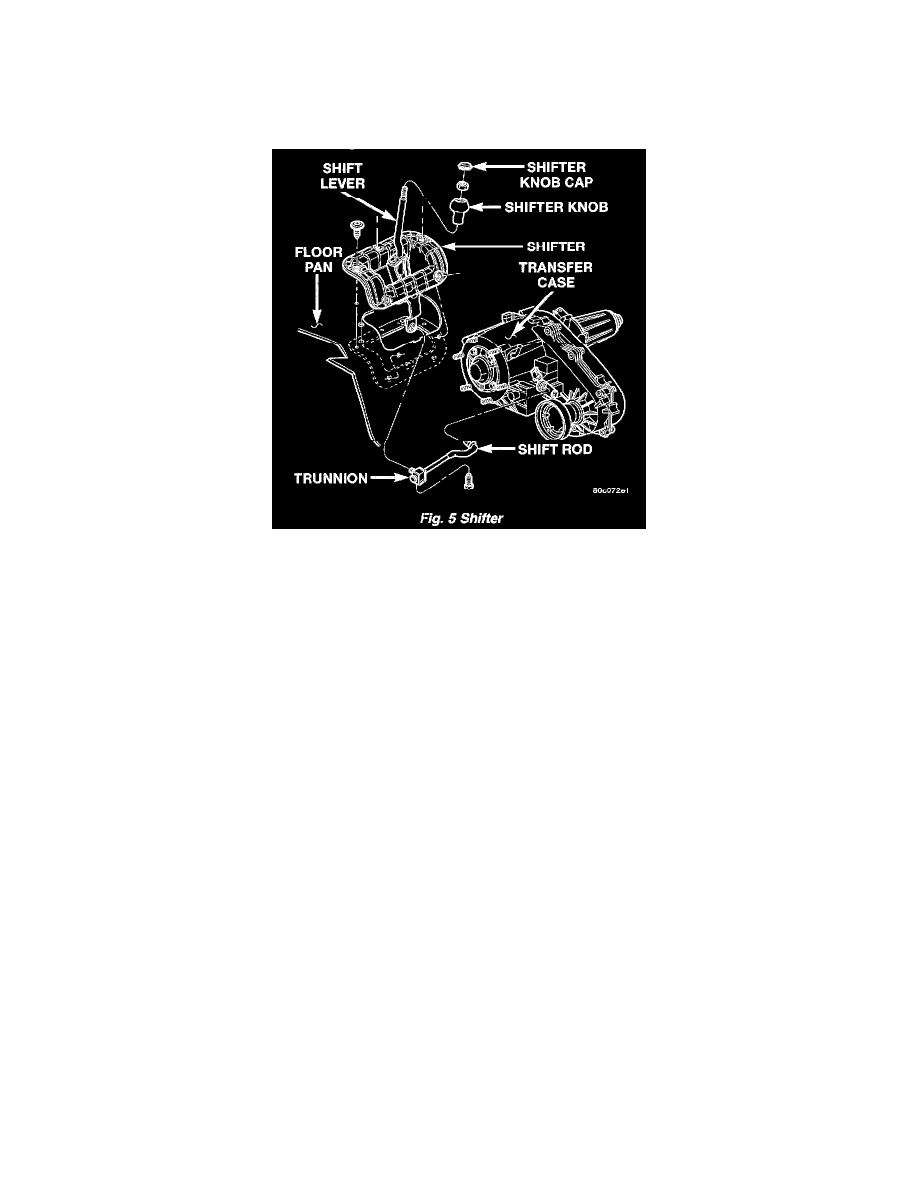
Fig. 5
3. Loosen adjusting trunnion lock bolt and slide shift rod out of trunnion (Fig. 5). If rod lacks enough travel to come out of trunnion, push trunnion
out of the shifter arm.
4. Lower the vehicle.
5. Remove transfer case shifter knob cap.
6. Remove nut holding shifter knob to shift lever.
7. Remove shifter knob.
8. Remove the shifter bezel.
9. Remove the shift lever.
10. Remove bolts holding shifter to vehicle floor pan.
11. Separate shifter from the vehicle.
INSTALLATION
1. If a new shifter is not being installed, secure an appropriately sized pin through the adjustment channel and hole, located in the base of the shifter
body.
2. Position shifter on the vehicle floor pan.
3. Install the bolts to hold the shifter to the floor pan. Tighten the bolts to 12.4 Nm (110 inch lbs.).
4. Install the shift lever to the shifter. Tighten the shift lever bolt to 28.3 Nm (250 inch lbs.).
5. Install the shifter bezel.
6. Install shift knob on shift lever.
7. Install nut to hold shifter knob to shift lever.
8. Install shifter knob cap.
9. Raise the vehicle.
10. Install the shift rod to the trunnion, if necessary.
11. Tighten trunnion lock bolt 10 Nm (90 inch lbs).
12. Remove the locating pin from the adjustment channel and hole in the base of the shifter.
13. Lower vehicle.
14. Verify transfer case operation.