
Dakota 4WD V8-4.7L VIN P Flex Fuel (2007)
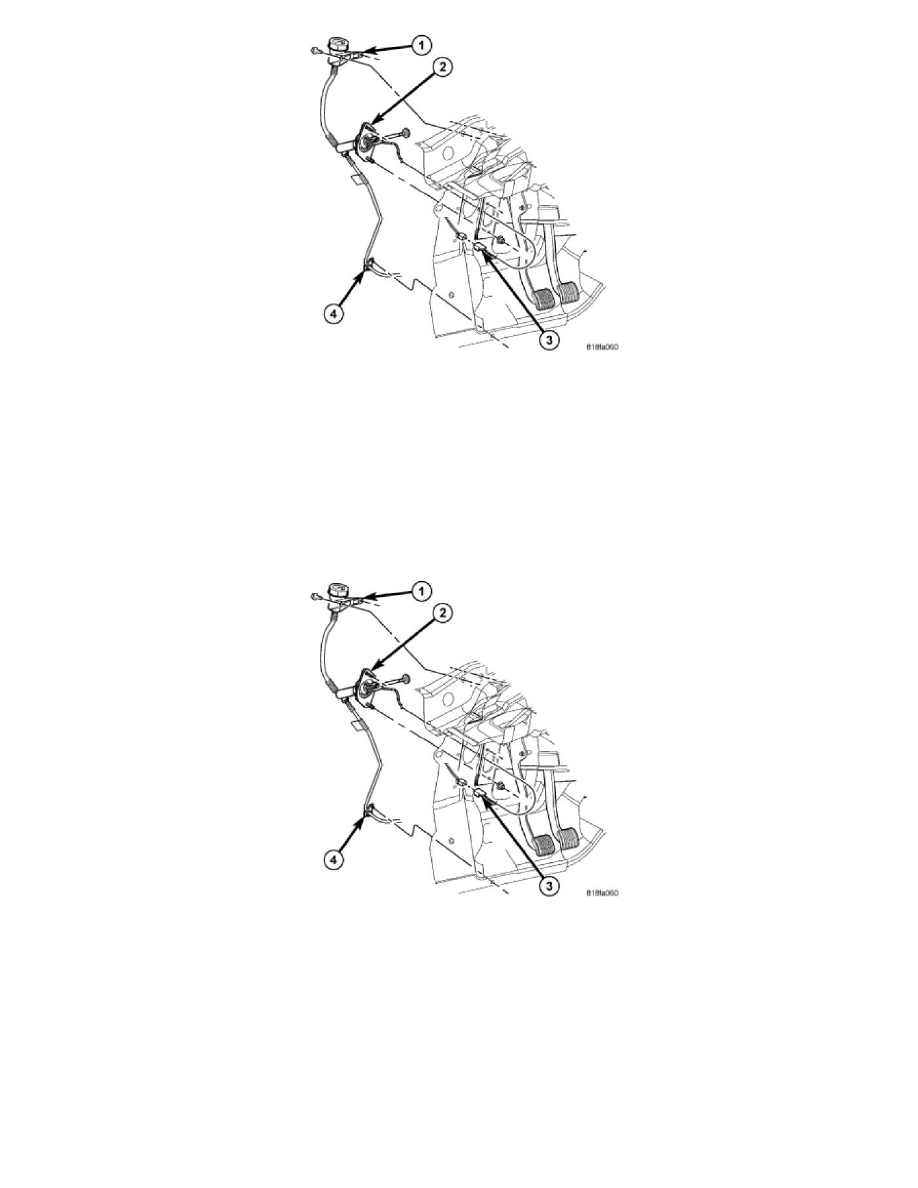
5. Disconnect clutch pedal position switch connector (3) from wiring harness.
6. Remove hydraulic fluid line (4) clip from the lower dash panel flange.
7. Remove clutch cylinder (2) nuts.
8. Ensure clutch reservoir (1) cap is tight.
9. Remove clutch reservoir (1) nuts.
10. Pull clutch reservoir (1) and cylinder (2) from dash panel.
11. Remove hydraulic linkage components from vehicle as an assembly.
Installation
INSTALLATION
NOTE: The hydraulic linkage is serviced as a complete assembly only. The individual components must not be serviced separately.
1. Ensure clutch reservoir (1) cap is tight
2. Install clutch reservoir (1) in dash panel and tighten nuts to 5 Nm (40 in. lbs.).
3. Install clutch cylinder (2) in dash panel and tighten nuts to 54 Nm (40 ft. lbs.).
4. Connect clutch pedal position switch connector (3) to wiring harness.
5. Install hydraulic fluid line (4) clip into the hole in the lower dash panel.