
Dakota 4WD V8-4.7L VIN P Flex Fuel (2007)
Windshield: Service and Repair
Installation
INSTALLATION
WARNING: Allow the urethane at least 24 hours to cure before returning the vehicle to use.
CAUTION: Roll down the left and right front door glass and open the rear glass slider (if available) before installing windshield to avoid
pressurizing the passenger compartment if a door is slammed before urethane is cured. Water leaks can result.
NOTE: The windshield fence should be cleaned of most of its old urethane bonding material. A small amount of old urethane, approximately
1-2 mm in height, should remain on the fence. Do not grind off or completely remove all old urethane from the fence, the paint finish and
bonding strength will be adversely affected. Support spacers located on the cowl at the bottom of the windshield opening should be replaced
with new parts. Replace any missing or damaged spacers around the perimeter of the windshield opening.
Windshield Preparation - Installing A Previously Installed Windshield
1. Before proceeding with the following repair procedure, review all warnings and cautions.
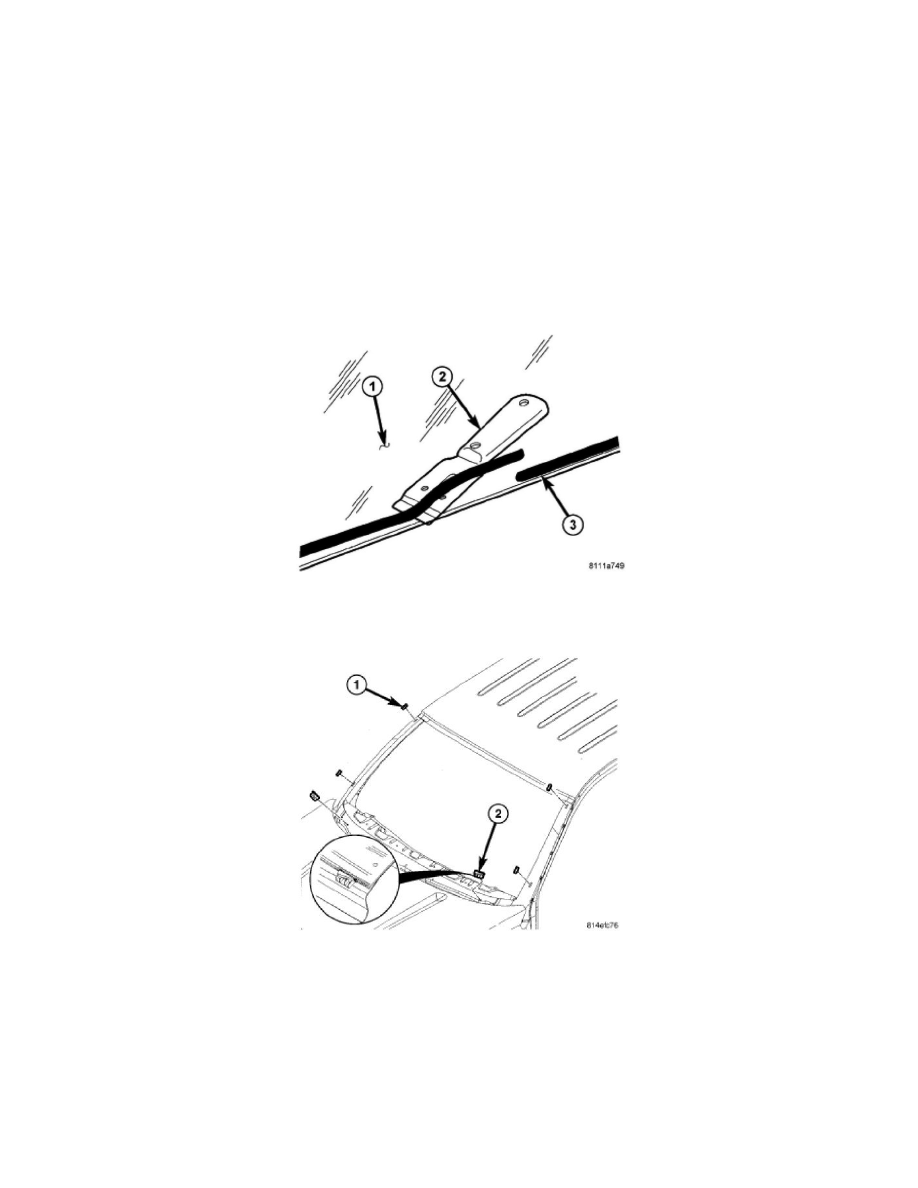
2. Level old bead of windshield adhesive (3) to a thickness of approximately 1 mm (0.04 in.) and remove loose adhesive.
3. Apply four new spacers (1) to the a-pillars and place them evenly apart at the top and bottom.
4. Install the lower spacer assemblies (2) into the slotted holes and verify proper installation by pulling to make sure they are locked on.
NOTE: Lower spacers must be facing with the flat side upwards when installing into the slotted holes.