
Dakota 4WD V8-5.2L VIN Y (1998)
Expansion Block/Orifice Tube: Service and Repair
WARNING: REVIEW THE WARNINGS AND CAUTIONS BEFORE PERFORMING THE FOLLOWING OPERATION.
REMOVAL
1. Disconnect and isolate the battery negative cable.
2. Recover the refrigerant from the refrigerant system. See Refrigerant Recovery in the Service Procedures.
3. Disconnect the liquid line refrigerant line coupler at the condenser outlet tube. See Refrigerant Line Coupler in the Replacement for the
procedures. Install plugs in, or tape over all of the opened refrigerant line fittings.
CAUTION: Always use two wrenches when loosening or tightening tube fittings. Use one wrench to hold one side of the connection stationary,
while loosening or tightening the other side of the connection with a second wrench.
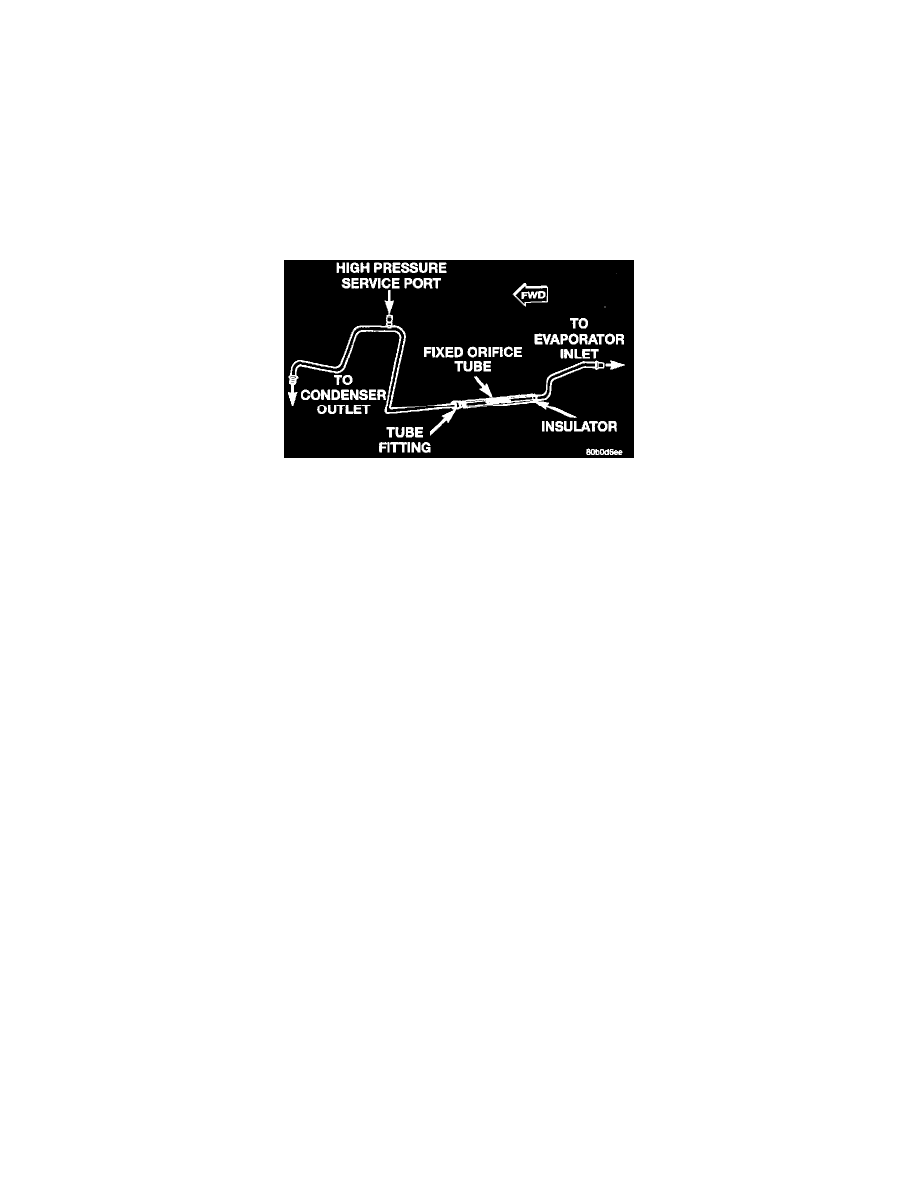
Fixed Orifice Tube Remove/Install
4. Remove the front half of the liquid line from the rear half by disconnecting it at the tube fitting. Install plugs in, or tape over all of the opened
refrigerant line tube fittings.
5. Remove the fixed orifice tube from the rear half of the liquid line using a pair of needle nose pliers. Note the orientation of the fixed orifice tube
for correct reinstallation.
INSTALLATION
1. Insert the fixed orifice tube into the rear half of the liquid line. Be certain that it is properly oriented.
2. Remove the tape or plugs from all of the refrigerant line tube fittings. Install a new 0-ring on the liquid line tube fitting. Connect and tighten the
tube fitting on the front half of the liquid line to the tube fitting on the rear half of the liquid line.
3. Remove the tape or plugs from all of the refrigerant line fittings. Install the refrigerant line coupler on the front half of the liquid line to the
condenser outlet tube. See Refrigerant Line Coupler in the Replacement for the procedures.
4. Connect the battery negative cable.
5. Evacuate the refrigerant system. See Refrigerant System Evacuate in the Service Procedures.
6. Charge the refrigerant system. See Refrigerant System Charge in the Service Procedures.