
Dakota 4WD V8-5.2L VIN Y (1998)
Control Arm: Service and Repair
Lower Control Arm
REMOVAL
1. Raise and support the vehicle.
2. Remove the wheel and tire assembly.
3. Remove front driveshaft.
4. Remove torsion bar.
5. Remove shock absorber lower bolt.
6. Remove stabilizer bar.
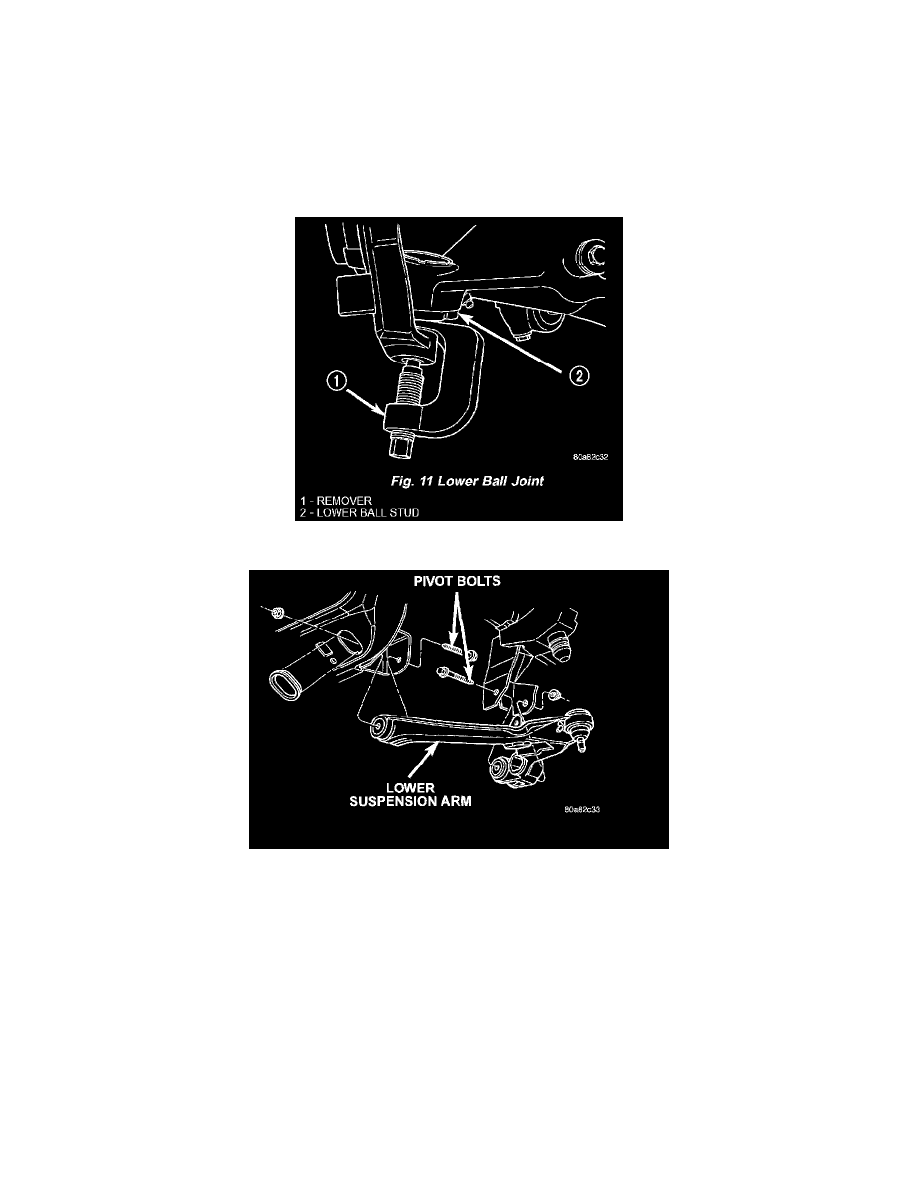
7. Remove the cotter pin and nut from lower ball joint. Separate ball joint from the steering knuckle with Remover C-4150A.
Lower Suspension Arm
8. Remove suspension arm pivot bolts and suspension arm from frame rail brackets.
9. Inspect lower ball joint seal and replace if damaged. Pry off old seal with screw driver if necessary.
INSTALLATION
1. Install new lower ball joint seal by tapping on around the seal flange lightly with a hammer.
2. Position the lower suspension arm at the frame rail brackets. Install the pivot bolts and nuts. Tighten the nuts finger-tight.
CAUTION: The ball joint stud taper must be CLEAN and DRY before installing the knuckle. Clean the stud taper with mineral spirits to remove
dirt and grease.
3. Insert the ball joint into steering knuckle. Install and tighten the retaining nut to 183 Nm (135 ft. lbs.) and install a new cotter pin.
4. Install the torsion bar.
5. Install shock absorber lower bolt and tighten to 108 Nm (80 ft. lbs.).
6. Install the front driveshaft.