
Dakota Quad Cab 2WD V8-4.7L VIN N (2001)
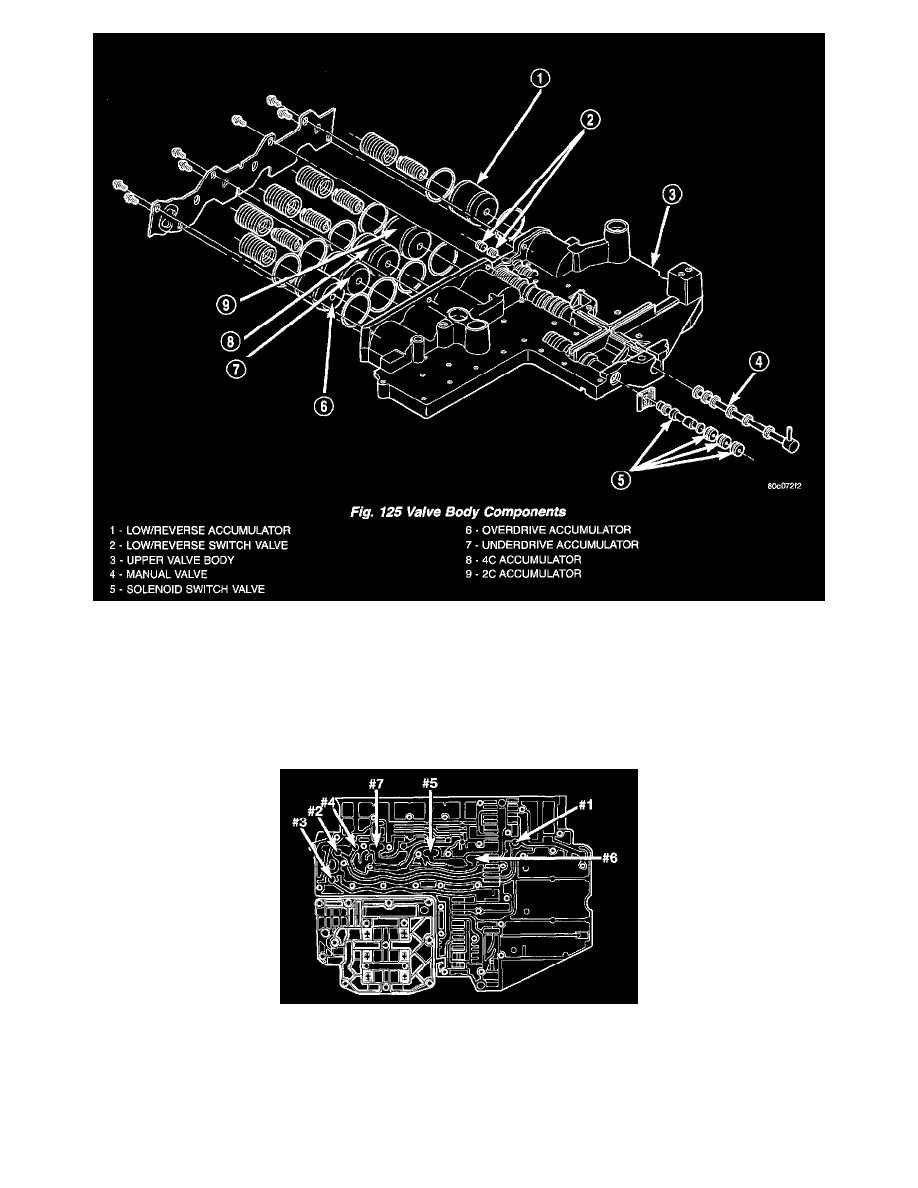
7. Remove the screws holding the accumulator cover onto the valve body (Fig. 125).
8. Remove the accumulator springs and pistons from the valve body. Note which accumulator piston and spring belong in each location.
9. Place the valve body on the bench with the transfer plate upward.
NOTE: The valve body contains seven check balls. The transfer plate must be placed upward to prevent losing the check balls when the transfer
plate is removed from the valve body.
10. Remove the screws holding the valve body to the valve body transfer plate.
11. Remove the transfer plate from the valve body. Note the location of all check balls (Fig. 126).
12. Remove the check balls from the valve body.