
Dakota Quad Cab 2WD V8-5.9L VIN Z LDC (2002)
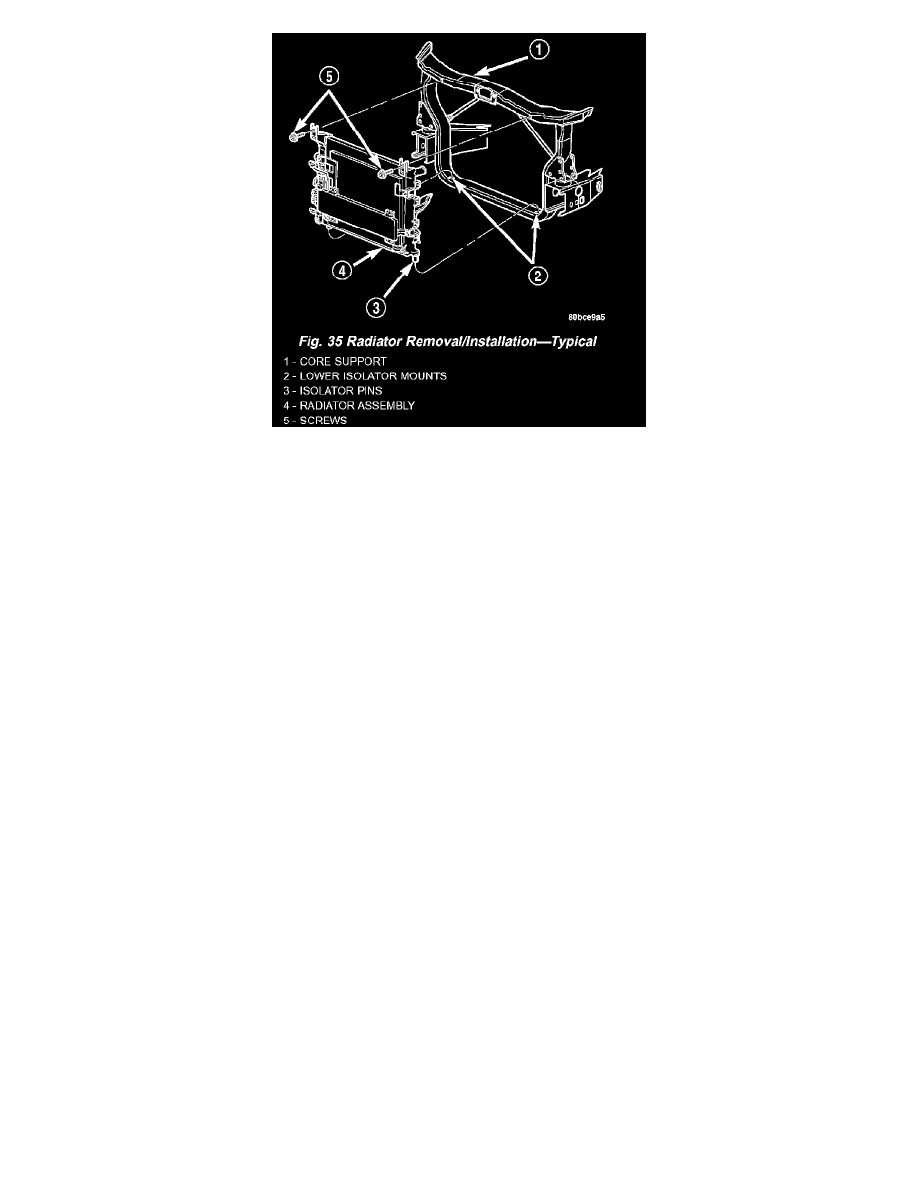
7. Remove radiator upper mounting screws. Lift radiator upward and away from vehicle. Do not allow cooling fins of radiator to contact any other
vehicle component. Radiator fin damage could result.
CLEANING
Clean radiator fins with the engine cold, apply cold water and compressed air to the back (engine side) of the radiator to flush the radiator and/or A/C
condenser of debris.
INSPECTION
The radiator cooling fins should be checked for damage or deterioration. Inspect cooling fins to make sure they are not bent or crushed, these areas
result in reduced heat exchange causing the cooling system to operate at higher temperatures. Inspect the plastic end tanks for cracks, damage or leaks.
Inspect the radiator neck for damage or distortion.
INSTALLATION
The radiator has two isolator pins on bottom of both tanks. These fit into alignment holes in radiator lower support.
1. Position isolator pins into alignment holes in radiator lower support.
2. Install and tighten radiator mounting bolts to 23 Nm (200 inch lbs.).
3. Install the transmission oil cooler lines, (if equipped).
4. Connect fan motor electrical connector to harness connector.
5. Position upper fan shroud onto lower fan shroud and radiator.
6. Install retaining screws into shroud.
7. Install radiator hoses. reconnect coolant reserve/overflow tank hose.
8. Connect battery negative cable.
9. Fill cooling system.
10. Start and warm the engine. Check for leaks.