
Dakota Quad Cab 2WD V8-5.9L VIN Z LDC (2002)
approximately 5 mm (0.2 inch) in diameter and 15 mm (0.6 inch) long.
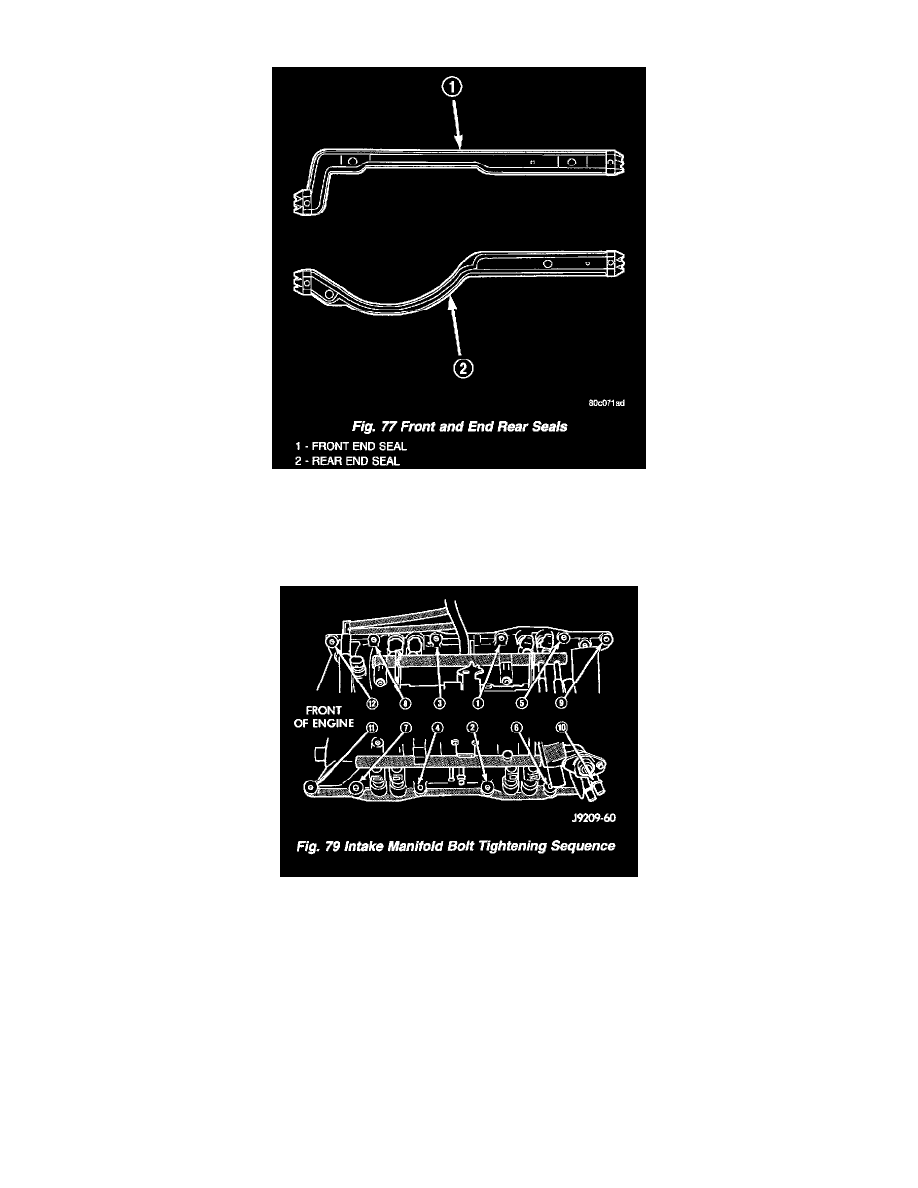
5. Install the front and rear end seals (Fig. 77). Make sure the molded dowel pins on the end seals fully enter the corresponding holes in the cylinder
block.
6. Carefully lower intake manifold into position on the cylinder block and cylinder heads. After intake manifold is in place, inspect to make sure seals
are in place.
7. Using a new gasket, install the throttle body onto the intake manifold. Tighten the bolts to 23 Nm (200 in. lbs.) torque.
8. Install the intake manifold bolts and tighten as follows (Fig. 79):
-
Step 1. Tighten bolts 1 through 4 to 8 Nm (72 in. lbs.) Tighten in alternating steps 1.4 Nm (12 in. lbs.) at a time
-
Step 2. Tighten bolts 5 through 12 to 8 Nm (72 in. lbs.)
-
Step 3. Check all bolts are torqued to 8 Nm (72 in. lbs.)
-
Step 4. Tighten all bolts in sequence to 16 Nm (12 ft. lbs.)
-
Step 5. Check all bolts are torqued to 16 Nm (12 ft. lbs.)
9. Install closed crankcase ventilation and evaporation control systems.
10. Connect the coil wires.
11. Connect the heat indicator sending unit wire.
12. Connect the heater hoses and bypass hose.
13. Install distributor cap and wires.
14. Hook up the return spring.
15. Connect the accelerator linkage and if so equipped, the speed control and transmission kickdown cables.
16. Install the fuel lines.
17. Install the accessory drive bracket and A/C compressor.