
Dakota Quad Cab 4WD V6-3.9L VIN X (2001)
20.
Lower the vehicle.
21.
Move the vehicle to an alignment rack and then jounce the front of the vehicle.
22.
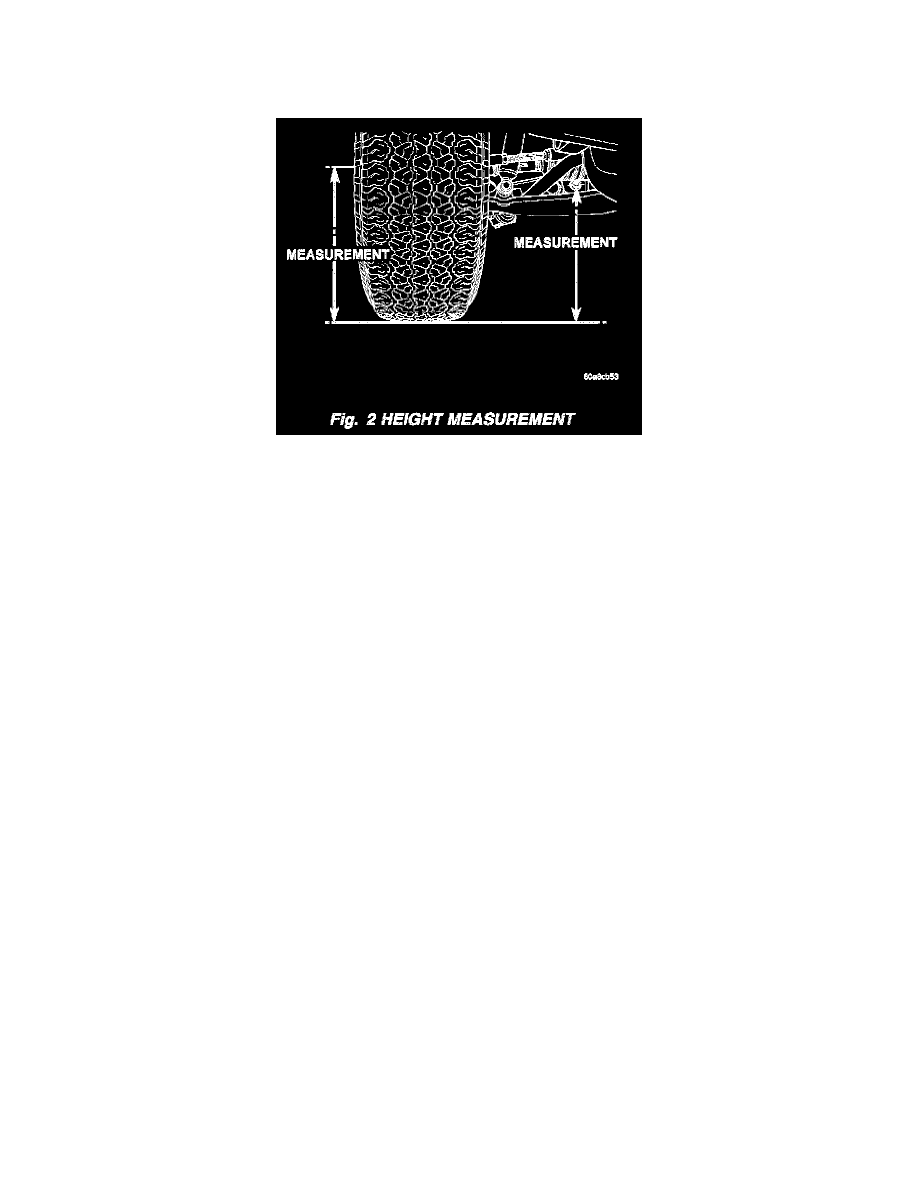
With the vehicle on a level alignment rack, measure and record the distance between the alignment rack and the center of the lower suspension arm
rear mounting bolt head (Fig. 2).
23.
Measure and record the distance between the alignment rack and the center of the front wheel (Fig. 2).
24.
Subtract the first measurement from the second measurement. The difference between the two measurements should be 47 mm (1.85 in.) +/- 3.25
mm (0.125 in.) for (AN) Dakota and 73 mm (2.9 in.) +/- 3 mm (0.120 in.) for (DN) Durango.
25.
If the vehicle needs to have the suspension height adjusted, turn the torsion bar adjustment bolt clockwise to raise the vehicle or counterclockwise
to lower the vehicle.
NOTE:
ALWAYS RAISE THE VEHICLE TO THE CORRECT SUSPENSION HEIGHT, NEVER LOWER THE VEHICLE TO OBTAIN THE
CORRECT SUSPENSION HEIGHT. IF THE VEHICLE SUSPENSION HEIGHT IS TOO HIGH, LOWER THE VEHICLE BELOW THE
HEIGHT SPECIFICATION. THEN, RAISE THE VEHICLE TO THE CORRECT SUSPENSION HEIGHT SPECIFICATION. THIS WILL
ENSURE THE VEHICLE MAINTAINS THE PROPER SUSPENSION HEIGHT. IN ADDITION, IF A HEIGHT ADJUSTMENT HAS BEEN
MADE, MEASURE THE SUSPENSION HEIGHT AGAIN ON BOTH SIDES OF THE VEHICLE.
26.
Perform a front wheel alignment check on the vehicle. Refer to the appropriate Service Manual or the MDS 2, Group 02 for information regarding
Wheel Alignment.
Repair Procedure After November 15, 1999
1.
Raise and support the vehicle with the front suspension allowed to hang.
2.
If so equipped, remove the front skid plate by removing the three bolts from the front of the skid plate and the two bolts from the rear of the skid
plate. Remove the rear skid plate by removing the two bolts from the rear of the skid plate.
NOTE:
THE REAR BOLTS OF THE FRONT SKID PLATE ALSO SECURES THE FRONT OF THE REAR SKID PLATE.
3.
Remove one of the eight transmission crossmember to frame attaching bolts. Apply several drops of Mopar Lock & Seal Adhesive, p/n 04318031,
to the threads of the transmission crossmember bolt. Then, install the crossmember bolt. Tighten the bolts to 75 Nm (55 ft. lbs.). Repeat until all
eight bolts have been removed and reinstalled.
4.
Turn the torsion bar adjustment bolt counterclockwise to release the spring load (Fig. 1).
NOTE:
COUNT AND RECORD THE NUMBER OF TURNS FOR INSTALLATION REFERENCE.
5.
Remove the adjustment bolt from the swivel.