
Dakota Quad Cab 4WD V6-3.9L VIN X (2001)
7.
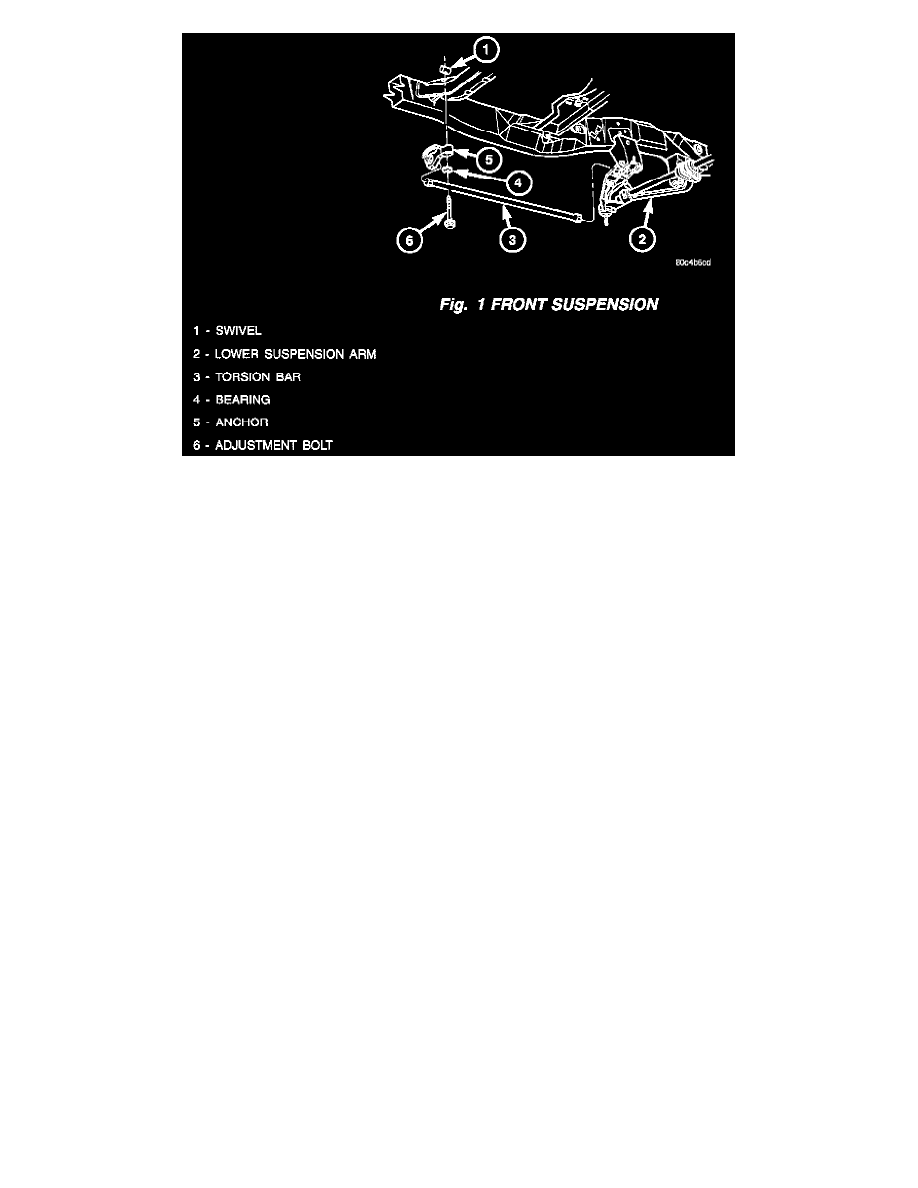
Turn the torsion bar adjustment bolt counterclockwise to release the spring load (Fig. 1).
NOTE:
COUNT AND RECORD THE NUMBER OF TURNS FOR INSTALLATION REFERENCE.
8.
Remove the adjustment bolt from the swivel.
CAUTION:
THE LEFT AND RIGHT TORSION BARS ARE NOT INTERCHANGEABLE. THE BARS ARE IDENTIFIED AND STAMPED R AND L, FOR
RIGHT AND LEFT. THE TORSION BARS DO NOT HAVE A FRONT OR REAR END AND CAN BE INSTALLED WITH EITHER END
FACING FORWARD.
9.
Remove the torsion bar and anchor. Then, remove the anchor from the torsion bar.
10.
Remove all foreign material from the torsion bar mounting in the lower suspension arm.
11.
Insert the torsion bar ends into the suspension arm and the new torsion bar anchor p/n 52038973.
12.
Position the torsion bar anchor and the bearing into the frame crossmember. Install the adjustment bolt through the bearing, the anchor, and into
the swivel.
13.
Turn the adjustment bolt clockwise the recorded amount of turns.
14.
Perform Steps 7 through 13 on the other side of the vehicle.
15.
Install transmission crossmember p/n 52020253AD onto the vehicle. Secure the cross-member to the frame with eight new bolts p/n 06506484AA.
Tighten the bolts to 75 Nm (55 ft. lbs.).
16.
Lower the transmission supporting jack so that the transmission mount rests on the transmission crossmember.
17.
Secure the rear transmission mount to the transmission crossmember with the attaching bolts.
18.
If so equipped, install the rear skid plate by attaching the rear of the skid plate with the two attaching bolts. Install the front skid plate by attaching
the rear of the skid plate with the two bolts and the front of the skid plate with the three bolts. Tighten all bolts to 23 Nm (17ft. lbs.).
NOTE:
THE REAR BOLTS OF THE FRONT SKID PLATE ALSO SECURES THE FRONT OF THE REAR SKID PLATE.
19.
Inspect all four tires for the correct size and air pressure.