
Dakota R/T 2WD V8-5.9L VIN Z LDC (1999)
Air Bag(s) Arming and Disarming: Service and Repair
DISARMING
Passenger Airbag Disarm Switch
A Passenger Airbag Disarm Switch (PADS) located on the instrument panel allows the passenger side airbag module to be disarmed when certain
facing child restraint devices are being used in the right front seating position. The PADS is equipped with a key cylinder so that the switch
position can only be changed using an ignition key. When the ignition switch is in the On position and the passenger side airbag is disarmed, a
Light-Emitting Diode (LED) illuminates an "Off" indicator lamp on the face plate of the switch.
To actuate the PADS switch, insert the ignition key in the switch key cylinder. The PADS key cylinder is then rotated with the ignition key to its
clockwise stop (the key cylinder slot will be aligned with the Off indicator lamp) to disarm the passenger side airbag. When the PADS key
cylinder is rotated with the ignition key to its counterclockwise stop (the key cylinder slot will be in a vertical position), the Off indicator lamp will
be extinguished and the passenger side airbag module will once again be armed.
WARNING: THE KEY MUST ALWAYS BE REMOVED FROM THE PASSENGER AIRBAG DISARM SWITCH KEY CYLINDER
AFTER THE SWITCH HAS BEEN USED. NEVER LEAVE A KEY IN THE PADS KEY CYLINDER.
The PADS cannot be adjusted or repaired and, if faulty or damaged, the PADS unit must be replaced.
Disarming Both Airbags
Disconnect and isolate the battery negative cable. If the airbag has not been deployed, wait two minutes for the system capacitor to discharge
before further service.
Arming Both Airbags
Prior to arming the system verify system operation as follows:
A DRB scan tool is required for diagnosis of the airbag system. Refer to the proper Diagnostic Procedures for more information.
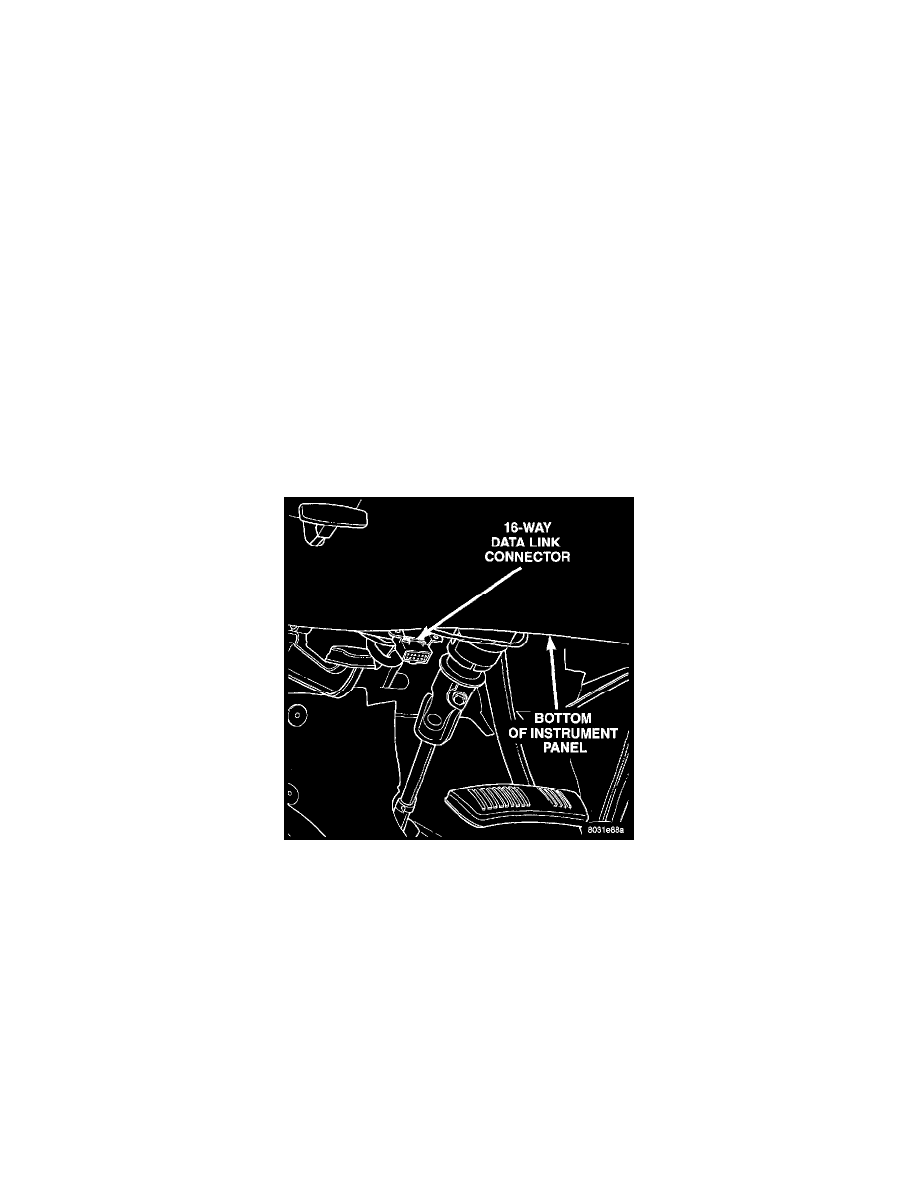
16-Way Data Link Connector - Typical
1. Connect the DRB scan tool to the 16-way data link wire harness connector. The connector is located on the driver side lower edge of the
instrument panel, outboard of the steering column.
2. Turn the ignition switch to the On position. Exit the vehicle with the DRE. Use the latest version of the proper DRB cartridge.
3.. Using the DRB, read and record the active Diagnostic Trouble Code (DTC) data.
4. Read and record any stored DTC data.
5. Refer to the proper Diagnostic Procedures if any DTC is found in Step 3 or Step 4.
6. Erase the stored DTC data. If any problems remain, the stored DTC data will not erase.
7. With the ignition switch still in the ON position, make sure nobody is in the vehicle.
8. From outside of the vehicle (away from the airbag modules in case of an accidental deployment) turn the ignition switch to the OFF position for
about ten seconds, and then back to the ON position. Observe the airbag indicator lamp in the instrument cluster. It should light for six to eight
seconds, and then go out. This indicates that the airbag system is functioning normally
NOTE: It the airbag indicator lamp fails to light, or lights and stays on, there is an airbag system malfunction. Refer to the proper Diagnostic Procedures
to diagnose the problem.