
Daytona L4-153 2.5L SOHC VIN B (1993)
Front Door Panel: Service and Repair
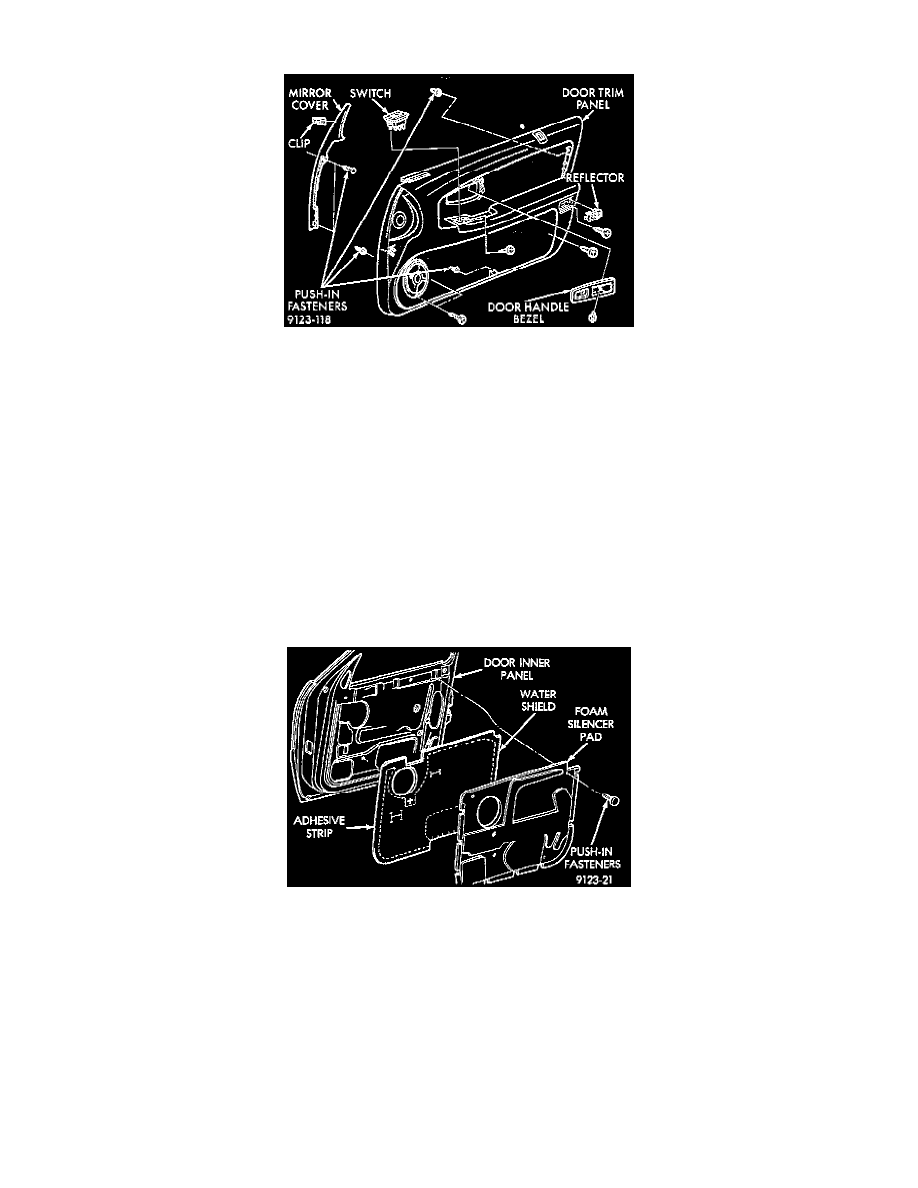
Door Trim Panel
DOOR TRIM PANEL REMOVAL
1. Lower door glass to down position. Disconnect battery negative cable, if equipped with power windows.
2. Remove window crank screw cover. Remove screw holding window crank to regulator and separate crank from door, if equipped with manual
windows.
3. Remove screw holding inside latch release handle bezel to door. Slide bezel forward and remove from door panel. Disconnect power door lock
switch wire connector, if equipped.
4. Pull power mirror switch outward to disengage clips holding switch to door panel. Disconnect mirror switch wire connector, if equipped.
5. Lift upward at rear edge of power window/seat switch bezel to disengage clips holding bezel to door panel. Disconnect wire connectors from
power window and power seat switches, if equipped.
6. Remove screw holding trim panel to door from inside power window switch bezel opening.
7. Pry outward on reflector lens to disengage clips. Remove screw holding trim panel to door from behind reflector.
8. Remove hidden screws holding trim panel to door from carpet area on trim panel.
9. Disengage push-in fasteners holding trim panel to door at ends and bottom center of trim panel.
10. Lift trim panel from door.
11. Reverse the preceding operation for installation.
Front Door Silencer And Water Shield
FRONT DOOR SILENCER AND WATER SHIELD REMOVAL
1. Remove front door trim panel.
2. Remove push-in fasteners holding silencer pad to door inner panel and separate silencer from door.
3. Pull water shield from adhesive around perimeter of door inner panel.
4. Reverse the preceding operation for installation.