
Daytona V6-181 2972cc 3.0L SOHC VIN 3 FI (1992)
Trunk / Liftgate Latch Release Cable: Service and Repair
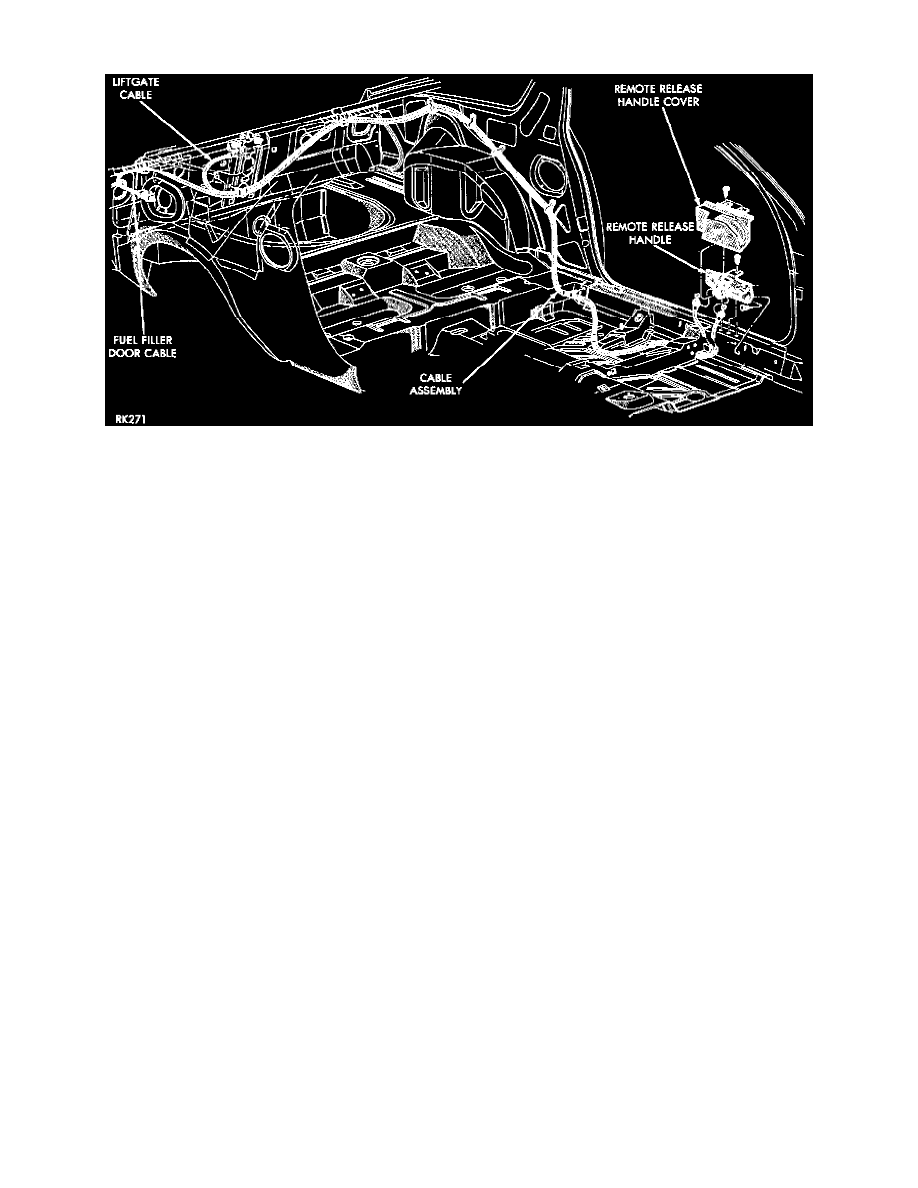
Cable Release Handle And Cable
REMOVAL
1. Move driver's seat forward to expose rear of seat adjuster.
2. Remove nuts used to fasten the adjuster to the floor pan.
3. Move driver's seat to the rear.
4. Remove the bolts used to fasten the adjuster to the floor pan.
5. Remove the driver's seat.
6. Open the liftgate.
7. Remove two screws, a "Christmas Tree" fastener, and the remote release handle cover.
8. Remove the remote handle retaining screws and lift the remote handle assembly upward.
9. Remove the rear seat.
10. Remove the rear seat latch cover.
11. Remove the lower quarter trim panel from each side.
12. Remove the upper quarter trim panel from each side.
13. Remove the lower liftgate trim panel.
14. Remove the liftgate latch.
15. Separate cable from latch.
16. Cut both ends from the liftgate latch release cable.
INSTALLATION
1. The original cables used to operate both fuel filler door and liftgate are clamped to each other and inseparable. For fear of damaging a cable still in
good working condition, do not attempt to separate and remove any cable. Place the replacement cable over the original.
2. Connect the cable to the remote handle assembly.
3. Install the remote handle assembly.
4. Install the other end of the cable into the liftgate latch.
5. Install and adjust the latch.
6. Close the liftgate and try the system for proper operation.
7. Starting at the rear of the vehicle, tape the new cable to the old one using duct tape.
8. Install the quarter trim panels and the lower liftgate trim panel.
9. Install the rear seat latch cover and the rear seat.
10. Install the remote release handle cover.
11. Install the driver's seat.
12. Try the system for proper operation.