
Daytona Shelby Z L4-135 2.2L SOHC Turbo VIN E FI (1988)
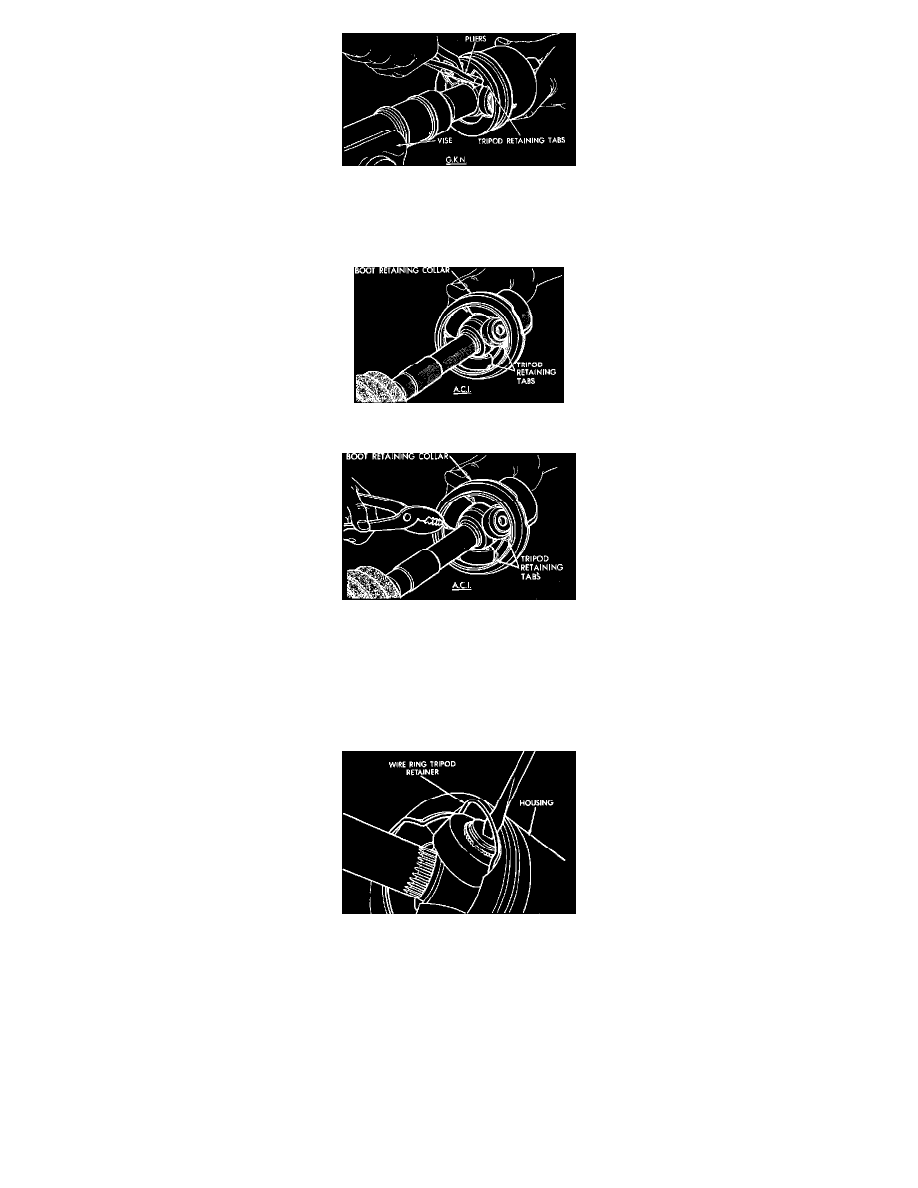
Fig. 20 Removing 3 ball tripod housing. Late 1982---87 G.K.N. inner C/V joint
3. On early 1982 G.K.N. non-spring loaded units, slide tripod from housing. On late 1982---87 G.K.N. spring loaded units, bend tabs on joint cover
using needle nose pliers, then remove tripod from housing.
Fig. 21 Removing 3 ball tripod housing. 1984 A.C.I. inner C/V joint
Fig. 22 Removing 3 ball tripod housing. 1985---87 A.C.I. inner C/V joint
4. On 1984 A.C.I. units, position housing so all 3 rollers are flush with retaining tabs. Pull housing out by hand at a slight angle to pop one roller at a
time out of retaining tabs. Do not hold joint at too severe an angle, as rollers may be damaged. The retaining tabs must not be bent during removal
or installation of housing.
5. On 1985---87 A.C.I. units, hold housing and lightly compress C/V joint retention spring while bending tabs back with a pair of pliers. Support
housing, then separate tripod from housing.
Fig. 23 Separating tripod from housing. 1986---87 S.S.G. inner C/V joint
6. On 1986---87 S.S.G. units, use flathead screwdriver to pry wire ring out of groove and slide tripod from housing. When removing housing from
tripod, hold rollers in place on the trunnion studs to prevent rollers and needle bearings from falling out. After tripod is out of housing, secure
rollers in place with tape.
7. Remove snap ring from end of shaft, then the tripod using a brass drift.
Inspection
Remove grease from assembly and inspect bearing race and tripod components for wear and damage and replace as necessary. On late 1982---87
spring loaded joints inspect spring, spring cup and spherical end of connecting shaft for wear and damage and replace as necessary. Components of
spring loaded and non-spring loaded inner C/V joints cannot be interchanged.