
Durango 2WD V6-3.7L (2009)
Heater Core: Service and Repair
Rear Heater Core - Installation
INSTALLATION
WARNING: The heater core tubes are not serviced separately from the rear heater core. The heater core tubes should not be repositioned,
loosened or removed from the rear heater core. Failure to follow this warning may result in a coolant leak and possible serious or
fatal injury.
NOTE: If a foam seal on the rear heater core is deformed or damaged, the seal must be replaced.
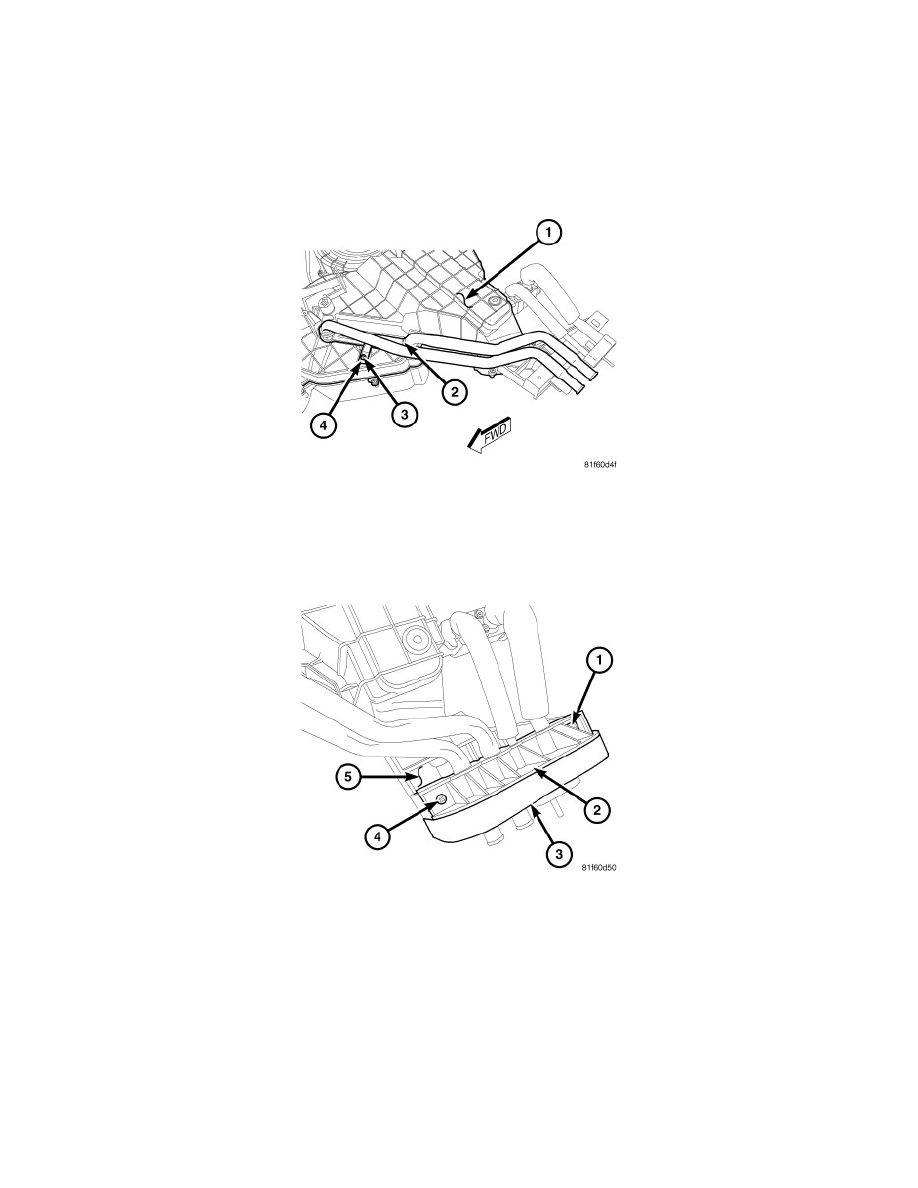
1. Install the rear heater core (2) into the inboard side of the rear heater-A/C housing (1). Make sure that the foam seals around the heater core are
properly installed.
2. Install the rear heater core retaining bracket (4).
3. Install the screw (3) that secures the rear heater core retaining bracket to the rear heater-A/C housing. Tighten the screw to 2 Nm (17 in. lbs.).
4. Position the rear heater core tube and evaporator line flange (2) to the outboard side of the rear heater-A/C housing (5) and engage the retaining
tab (1). Make sure the tab is fully engaged to the housing.
5. Install the screw (4) that secures the rear heater core tube and evaporator line flange to the inboard side of the rear heater-A/C housing. Tighten the
screw to 2 Nm (17 in. lbs.).
NOTE: If the foam seal for the flange is deformed or damaged, the seal be replaced.
6. Carefully install the foam seal (3) onto the rear heater core tube and evaporator line flange.
7. Install the rear heater-A/C housing See: Heating and Air Conditioning/Housing Assembly HVAC/Service and Repair/Removal and
Replacement/Front HVAC Housing Installation.
8. Reconnect the negative battery cable.
9. If the rear heater core is being replaced, flush the cooling system See: Service and Repair.