
Durango 2WD V6-3.7L (2009)
CAUTION: Care should be taken not to damage the camshaft target wheel. Do not hold the target wheel while loosening or tightening the
camshaft sprocket. Do not place the target wheel near a magnetic source of any kind. A damaged or magnetized target wheel could
cause a vehicle no start condition.
CAUTION: Do not forcefully rotate the camshafts or crankshaft independently of each other. Damaging intake valve to piston contact will
occur. Ensure the negative battery cable is disconnected and isolated to guard against accidental starter engagement.
14. Remove left and right camshaft sprocket bolts.
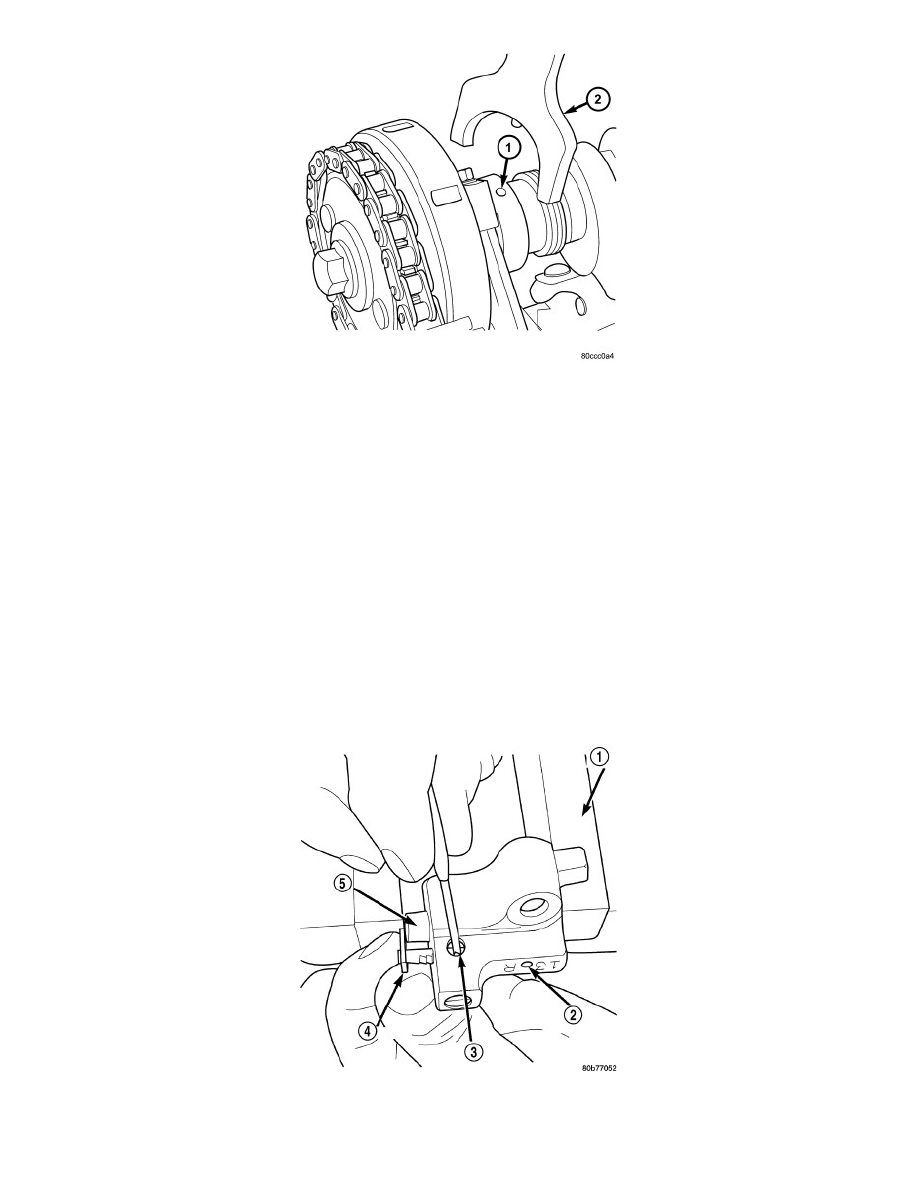
15. While holding the left camshaft steel tube Camshaft Holder 8428A (2), remove the left camshaft sprocket. Slowly rotate the camshaft
approximately 5 degrees clockwise to a neutral position.
16. While holding the right camshaft steel tube with Camshaft Holder 8428A (2), remove the right camshaft sprocket.
17. Remove idler sprocket assembly bolt.
18. Slide the idler sprocket assembly and crank sprocket forward simultaneously to remove the primary and secondary chains.
19. Remove both pivoting tensioner arms and chain guides.
20. Remove primary chain tensioner.
Timing Chain & Sprockets - Installation
INSTALLATION
1. Using a vise, lightly compress the secondary chain tensioner piston until the piston step (5) is flush with the tensioner body. Using a pin or suitable
tool, release ratchet pawl (4) by pulling pawl back against spring force through access hole on side of tensioner. While continuing to hold pawl
back, Push ratchet device to approximately 2 mm from the tensioner body. Install Tensioner Pins 8514 (2) into hole on front of tensioner. Slowly