
Durango 2WD V6-3.7L (2009)
1. Remove the center floor console See: Body and Frame/Interior Moulding / Trim/Console/Service and Repair/Floor Console - Removal.
2. Remove the front seats See: Body and Frame/Seats/Service and Repair/Seat, Front/Seat - Removal.
3. Roll back the front floor carpet from under the instrument panel toward the rear of the vehicle See: Body and Frame/Interior Moulding /
Trim/Carpet/Service and Repair/Carpet - Removal.
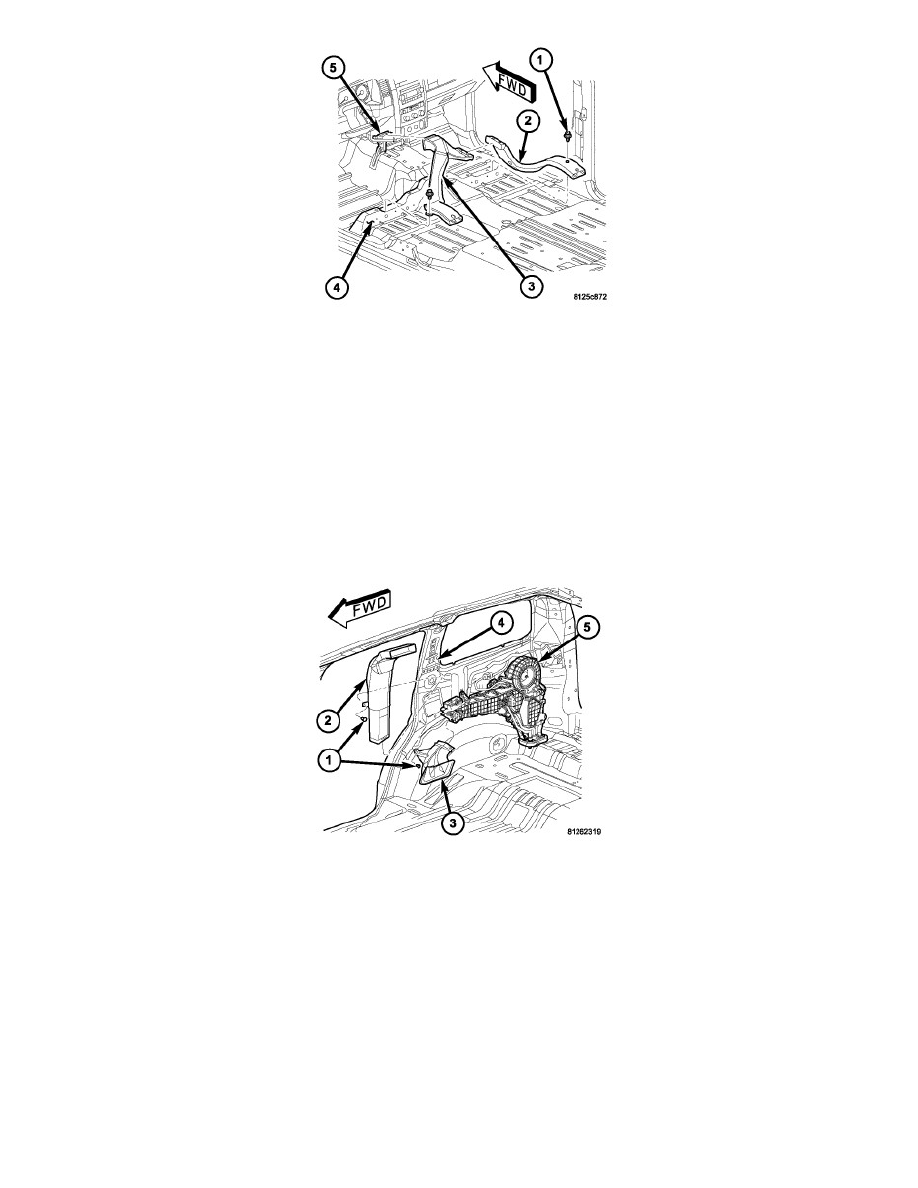
4. Remove the two push pin fasteners (1) that secure the right intermediate floor distribution duct (2) and the left intermediate floor distribution duct
(3) to the floor support (4).
5. Disconnect the left intermediate floor distribution duct from the front floor distribution duct (5).
6. If required, disconnect the right intermediate floor distribution duct from the left intermediate floor distribution duct.
Rear
REMOVAL
1. Remove the right interior quarter panel trim See: Body and Frame/Interior Moulding / Trim/Trim Panel/Service and Repair/Luggage Compartment
Trim/Quarter Trim Panel - Removal.
2. Remove the push-pin fasteners (1) that secure the rear ceiling distribution duct (2) and the rear floor distribution duct (3) to the right interior
quarter panel (4).
3. Disconnect the rear ceiling distribution duct from the rear heater-A/C housing (5) by sliding the lower half of the ceiling distribution duct into the
upper half of the ceiling distribution duct.
4. Disconnect the rear ceiling distribution duct from the headliner duct and remove the ceiling distribution duct from the vehicle.
5. Disconnect the rear floor distribution duct from the rear heater-A/C housing and remove the floor distribution duct from the vehicle.
Front
INSTALLATION
FRONT FLOOR DISTRIBUTION DUCT