Durango 2WD V6-3.7L (2009)

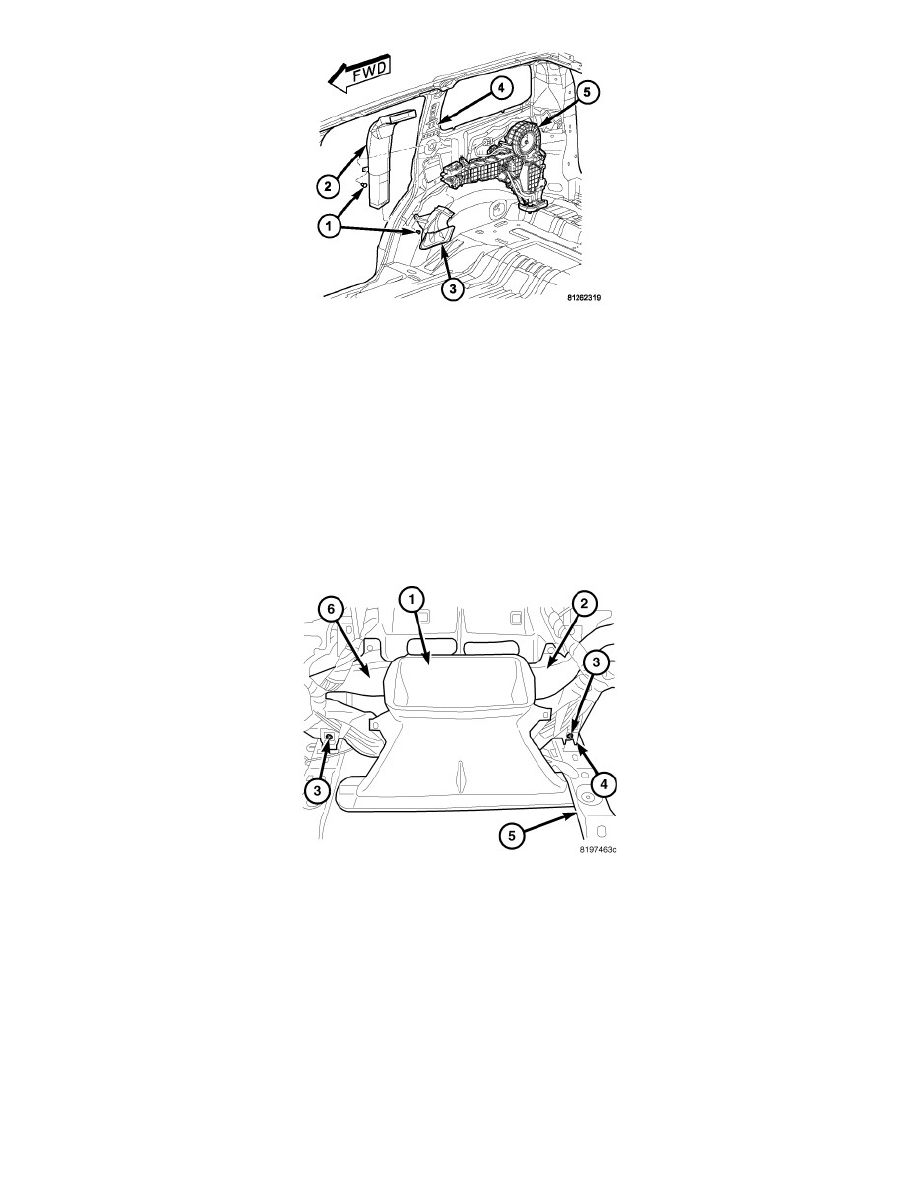
1. Connect the rear floor distribution duct (3) to the rear heater-A/C housing (5).
2. Connect the rear ceiling distribution duct (2) to the headliner duct and the rear heater-A/C housing. Make sure that the rear ceiling distribution duct
is fully installed to ensure a good seal.
3. Install the push-pin fasteners (1) that secure the rear ceiling distribution duct and the rear floor distribution duct to the right interior quarter panel
(4).
4. Install the right interior quarter panel trim See: Body and Frame/Interior Moulding / Trim/Trim Panel/Service and Repair/Luggage Compartment
Trim/Quarter Trim Panel - Installation.
Instrument Panel Duct - Removal
REMOVAL
NOTE: Take the proper precautions to protect the front face of the instrument panel from cosmetic damage.
1. Remove the instrument panel and place it on a workbench See: Body and Frame/Interior Moulding / Trim/Dashboard / Instrument Panel/Service
and Repair/Instrument Panel - Removal.
2. Remove the instrument panel top cover.
3. Remove the defroster duct (1) See: Defroster Duct - Removal.
4. Remove the two screws (3) that secure the instrument panel wire harness (4) to the instrument panel support (5).
5. Remove the demister ducts (2 and 6) See: Instrument Panel Demister Duct - Removal.
